Welcome to Pictorus!
Pictorus is a cloud-native software development platform for control systems, which generates and deploys Rust-language code to connected devices directly from your browser.
Our solution is simple:
- Pair your dev hardware to the cloud
- Draw your application logic visually in a browser
- Deploy compiled code and observe it running in real-time, within seconds.
Getting Started
Head on over to our Interface Tour to learn more about the app builder interface.
You can also read about projects we've built so far, as well as some technical deep dives into the product by visiting our blog.
Supported Hardware
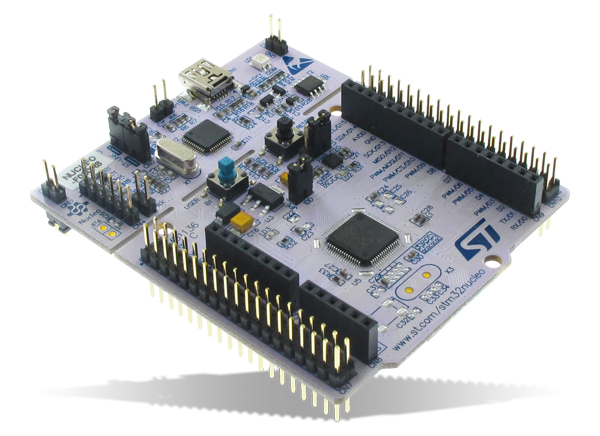
STM32 Embedded Processors
We support a range of STM32 embedded boards and are expecting to expand our list of supported boards in the next year. If you don't see a specific STM32 board that you'd like to use, please feel free to reach out.
Single Board Computers
For now, we fully support the Raspberry Pi single board computer line, and expect users to have success with the Jetson and Beaglebone series as well. Other SBCs running Linux operating systems, such as Odroids, etc may also work, but have not been well tested and are not officially supported.
| Pi Zero | BeagleBone | Pi3/4B | Jetson Nano |
|---|---|---|---|
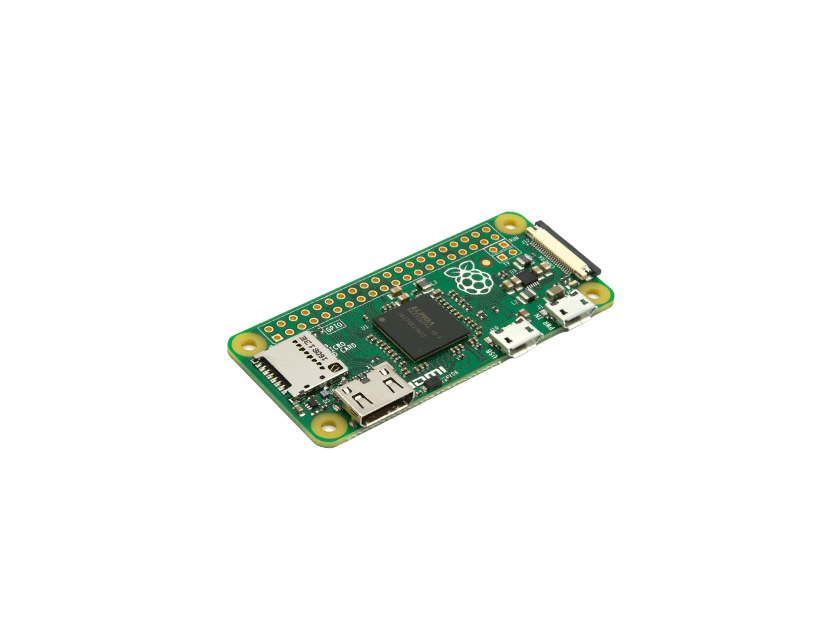 | 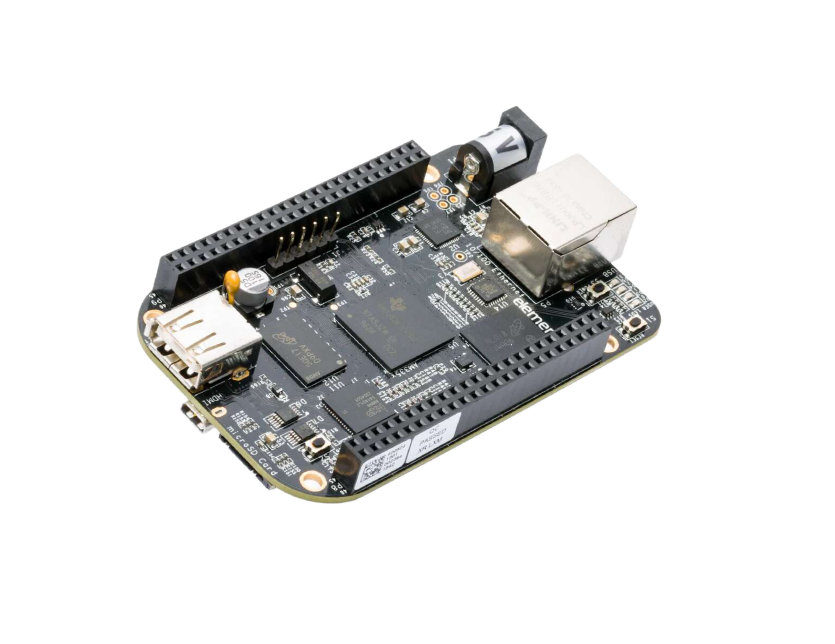 | 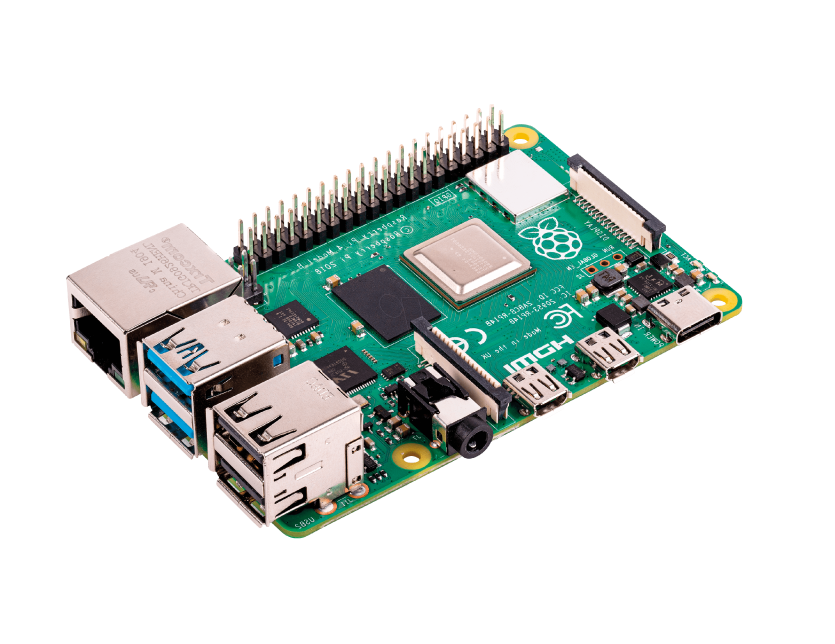 | 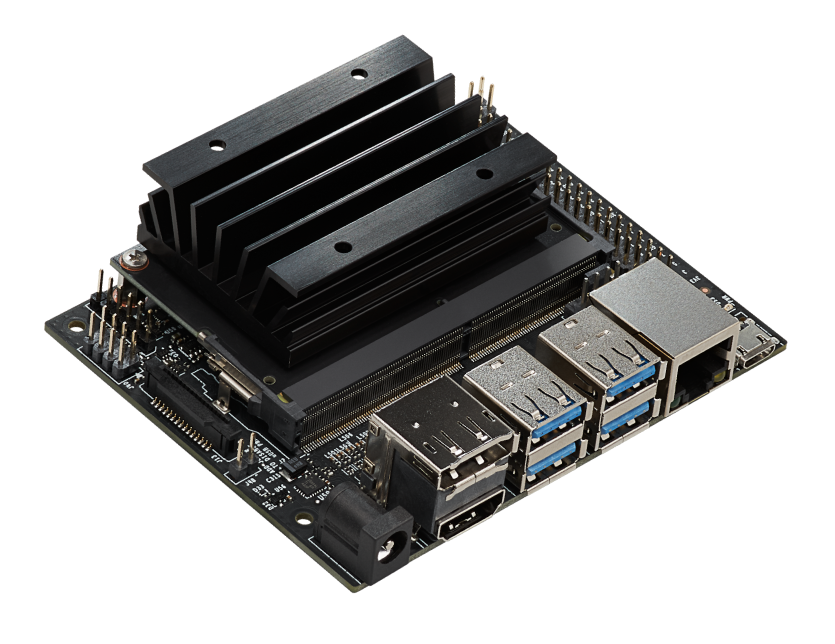 |
Public API
Pictorus provides the ability to work with your apps and devices outside of the web interface. This is a powerful tool to run simulations, automate builds, and integrate with CI/CD pipelines. Head over to Working with the API to learn more or take a look at our Google Colab notebook that demonstrates how to use the API and provides a minimal Python workflow to get you started.
Getting Started with Pictorus
We recommend running through the in-app tour (captured below) when you first log in to your account, in order to get acquainted with common Pictorus app-building workflows. For more interface feature details, see the Interface Tour in the next section.
We've also included a set of demo apps that might serve as helpful examples when you first login to your account.
Additional Tutorials
You can check out the Pictorus Blog for more in-depth tutorials, ranging from very simple "Hello World" LEDs, to real-time aircraft stabilization:
- Controlling LEDs with Pictorus
- Configuring a Pictorus app to always run on your device
- Estimating range with an ultrasonic sensor
- Building a DIY Thermostat
- Building a robotic software API
- Building a room-searching robot
- Plantbot - building a plant-sustaining robot
- Interfacing a Python script to a Pictorus app over UDP
- Remote control of a robot using serial data
- Attitude stabilization of an RC-controlled aircraft
Interface Tour
In this section we'll do a quick run through of the interface features you'll encounter when you first open Pictorus in the browser.
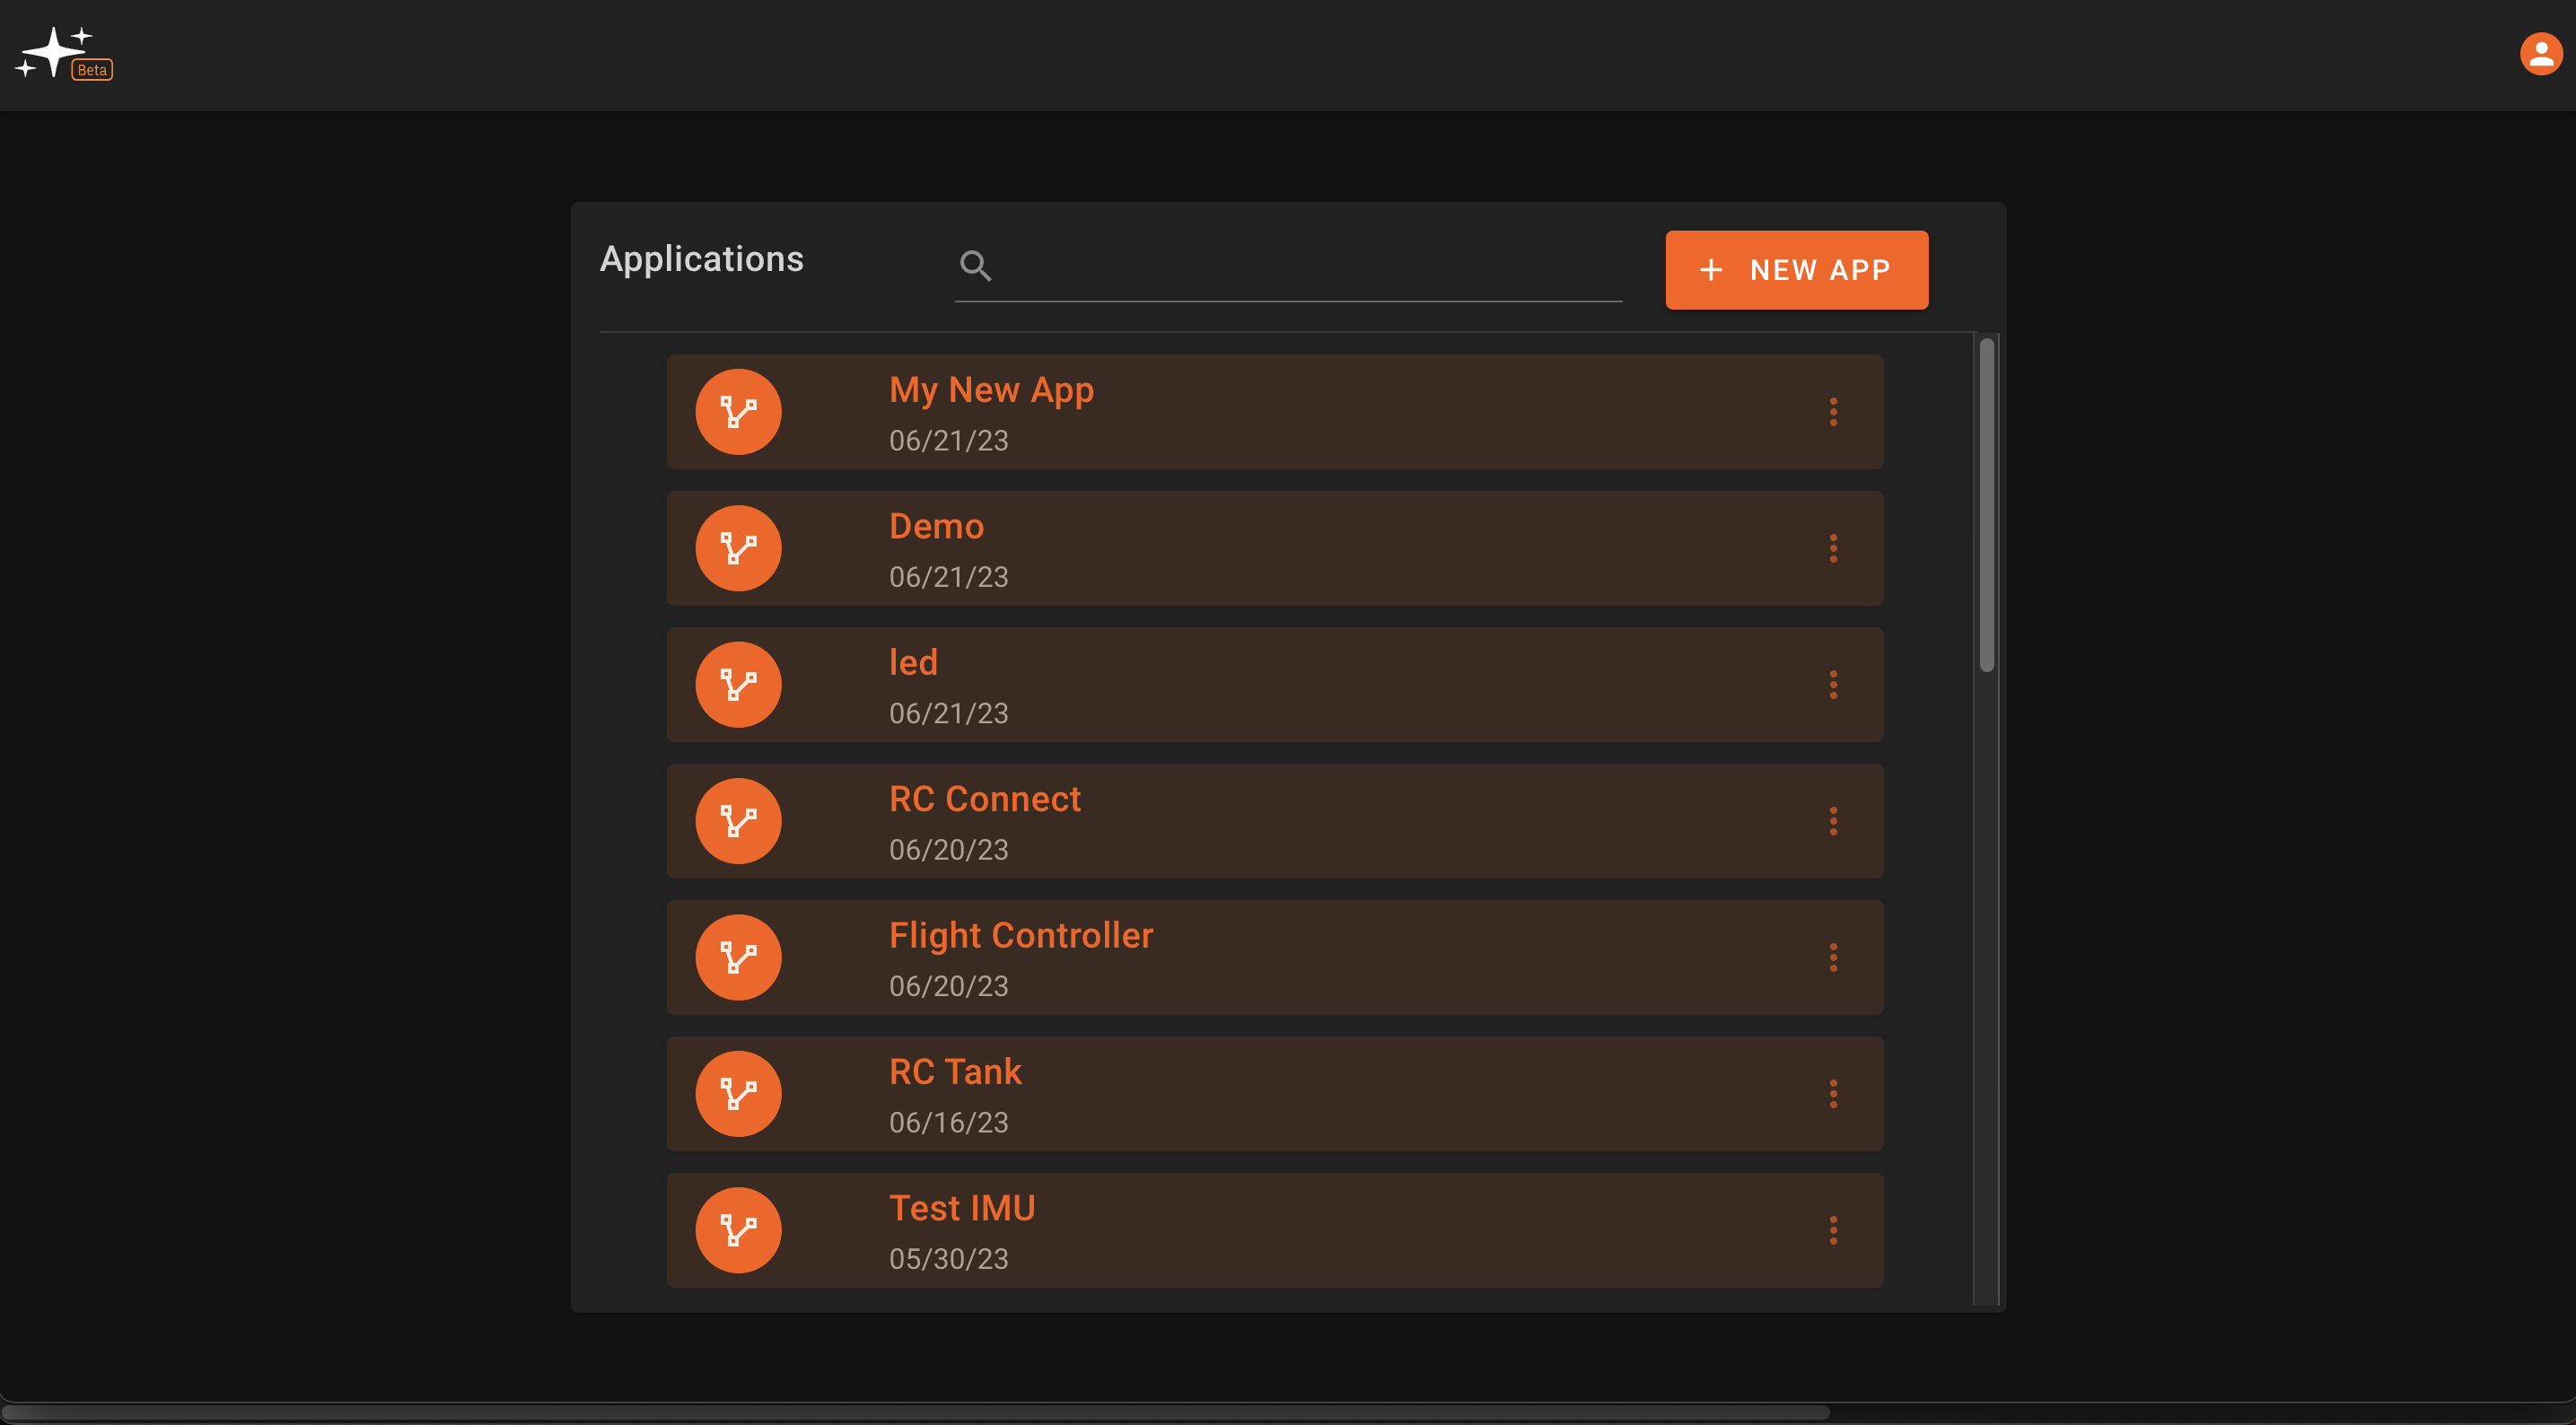
Account Page
When you first log in to Pictorus, you'll arrive at your account page, which contains a list of all of the apps associated with your account. Apps can be accesssed, deleted, renamed, and copied from this page, by clicking on the three dots on the rightside of the app row. For now, you'll see a few demo apps that are automatically added to your new account. You'll have the option to start a tour when you first open the app as well.
App Editor
After clicking into an app or creating a new app, you will be directed to its Main state. For more information on app States in Pictorus, navigate to the Concepts > State Machines section of the docs.
The interface is divided into a few sections:

-
App Navigation: Navigate across levels of hierarchy in your app. If you only have one state and no nested components in your app, you'll see
AppName / Mainhere. The current app page is greyed out while others can be navigated to by clicking on the page's name. -
Connection Manager: Click the dropdown arrow to select a device to connect to. Devices online will show a green dot and others will be greyed out. An app can also be run in simulation mode by selecting "Simulator". You will be connected to "Simulator" by default on app startup.
-
App Controls: Build, deploy, start, and stop apps with these two buttons. The up arrow builds an app when in simulation mode or deploys to a device if one is connected. The play/pause button starts/stops an app.
-
App Actions Panel: This is where you'll find app editing actions. The panel is divided into five submenus -
Block Palette,Version History,Export App,Scripts,Custom Blocks,App Settings, andStatic Assets.
Block Palette: Contains standard and a user's library blocks which can be dragged onto the canvas.Version History: Save a current app version and/or restore a previously saved versionExport App: Export the code generated for a specific appScripts: Declare variables and perform pre-run calculations with Python scriptsCustom Blocks: Create and edit custom blocks in RustApp Settings: Change the app name, update rate, and build output settingsStatic Assets: Upload an asset to be used in your app (currently supports CAN database files).
-
Canvas: This is the editing workspace where you can drag and connect blocks and inspect outputs
-
Debug Console: Here you can view detailed information about your app's build, compile, and runtime actions. Toggle the debug console with the terminal icon at the bottom of the left panel.
-
Build Info: The green checkmark indicates that a build is up-to-date and there are no issues. Alternatively, you may see a warning sign or red 'x' indicating that there may be an issue. The encircled '!' can be clicked to show issues with the current build:
-
View Controls: The leftmost option here allows for plot toggling on/off. The next two options allow for panning and centering a diagram. The grid icon toggles the grid on/off, and the rightmost controls allow for zooming in and out of the canvas. #TODO: fix this
Getting Started with Devices
Pictorus currently supports code deployment to Linux single-board computers and a selection of embedded STM32 boards. We can directly deploy software to a single board computer, and manage software deployments to embedded boards connected to your laptop/desktop or a single board computer. In this section we'll go through the setup for these two use cases.
Overview
There are 4 basic steps that must be completed to deploy software to a connected device from Pictorus:
- Connect a device (laptop, desktop, single-board computer) to the internet
- Install the Pictorus manager on your device
- Register your device with Pictorus
- Configure your device to deploy software to an appropriate target (either Linux process or embedded board)
Connecting Your Device to Wifi
In order to interact with your device in the Pictorus UI, you'll need to ensure it's connected to the internet. These instructions vary from device to device, so you should follow the setup instructions associated with your hardware. Here are some links to network setup instructions for some common single-board computers.
- Raspberry Pi: https://www.raspberrypi.com/documentation/computers/configuration.html#configuring-networking
- Beaglebone: https://www.fis.gatech.edu/how-to-configure-bbw-wifi/
- Jetson Nano: https://learn.sparkfun.com/tutorials/adding-wifi-to-the-nvidia-jetson/all
Registering your device with Pictorus
(You can also read our Blog post on setting up devices for more details.)
In order to deploy software to your device, we need to install our device manager, and register the device with Pictorus cloud.
Install Pictorus on device
macOS
pipx install pictoruspipx ensurepath- Register the device using
pictorus-cli
This will create a us.pictor.dm.plist file in ~/Library/LaunchAgents and register the service to start at boot as a user level service. The device logs can be found in /tmp/pictorus.err in case anything goes wrong.
Working with launchctl service
If you need to unregister or stop the service using launchctl, use the following command
launchctl bootout gui/($id -u) ~/Library/LaunchAgents/us.pictor.dm.plist. This may be useful if you wish to run pictorus-device-manager manually instead of automatically at boot.
The service can be re-enabled and started using:
launchctl bootstrap gui/$(id -u) ~/Library/LaunchAgents/us.pictor.dm.plistlaunchctl kickstart -k gui/$(id -u)/us.pictor.dm.plist
Linux
Option 1
This option is recommended if you are using a Single Board Computer (SBC) like a Raspberry Pi and want to get up and running quickly:
sudo pip install pictorus --break-system-packages- The--break-system-packagesflag let Pictorus Python dependencies be installed alongside or on top of existing Python dependencies, which may cause issues for other packages and programs.- Register the device using
pictorus-cliwithsudoaccess.
This option will create a sudo level pictorus.service in /etc/systemd/system that starts the pictorus-device-manager at boot with sudo access to embedded USB peripherals. The service can be managed using systemctl if needed.
Option 2
This option is recommended for systems with restricted or controlled access using pipx to manage Python dependencies and avoid possible problems with other Python dependencies as well as to
respect Linux account permissions:
pipx install pictoruspipx ensurepath- Register the device using
pictorus-cli
This creates a user level pictorus.service in ~/.config/systemd/user and manages the service using systemctl --user.
Working with systemd services
Some useful commands for managing either sudo systemctl or systemctl --user:
<systemctl> status pictorus.service- Check the status of the service and inspect the logs<systemctl> start pictorus.service- Start the service<systemctl> stop pictorus.service- Stop the service<systemctl> restart pictorus.service- Restart the service<systemctl> enable pictorus.service- Enable the service to start at boot<systemctl> disable pictorus.service- Disable the service from starting at boot
Additional Configuration steps for Option 2 (requires sudo access)
Running on Embedded Targets
Linux requires modified permissions for non-sudo users to access certain hardware resources. The recommended way to do this is to modify the udev rules to allow users to access certain peripherals, for example the STLink:
Running Device Manager at boot
The pictorus.service that is installed using Option 2 is only activated when a user logs in, i.e. via a terminal session or the desktop. This service can be configured to launch at boot using:
sudo loginctl enable-linger $USER
Register device with Pictorus
Next, run the CLI to register the device.
Once this is done, you should be able to select your device from the deployment drop down menu in the upper-right hand corner of the app builder.

For single board computers, you can deploy software immediately after following the above steps, using Pictorus's default configuration settings. You have the ability to push software to your device as long as it remained online, using the Deploy button just to the right of the device selection drop-down. Apps deployed to devices do not automatically start running (for safety), so you must hit the Play button to the right to start the app. At any time, you can hit Stop to stop the app. A note of caution: Your device must retain a stable internet connection to Start/Stop reliably!
For embedded boards or to manage multiple apps on one device, see the below section.
Embedded Boards
Currently, Pictorus can deploy software to an embedded board connected to a laptop, desktop or single board computer with an installed device manager. An additional configuration step is necessary to deploy software to an embedded target. After completing the above steps for registering a device, click on the three dots to the right of the device name in the deployment drop down menu. This will take you to the device configuration menu, where you can manage device deployment targets.
You will see a process target titled 'Main', which is the default configuration for single board, Linux-based computers. Click on the 'Add Embedded Target' button to create a new embedded target, add a name, and select the appropriate platform and target type. The newly created target will now appear in the deployment dropdown, nested under a device name. Select the target to deploy your app to it. Multiple embedded boards can be added to a single device, and will appear as a list in this section. A green circle will appear next to connected hardware.

Note: You may also need to make sure you select the correct platform and target type in the app settings menu.
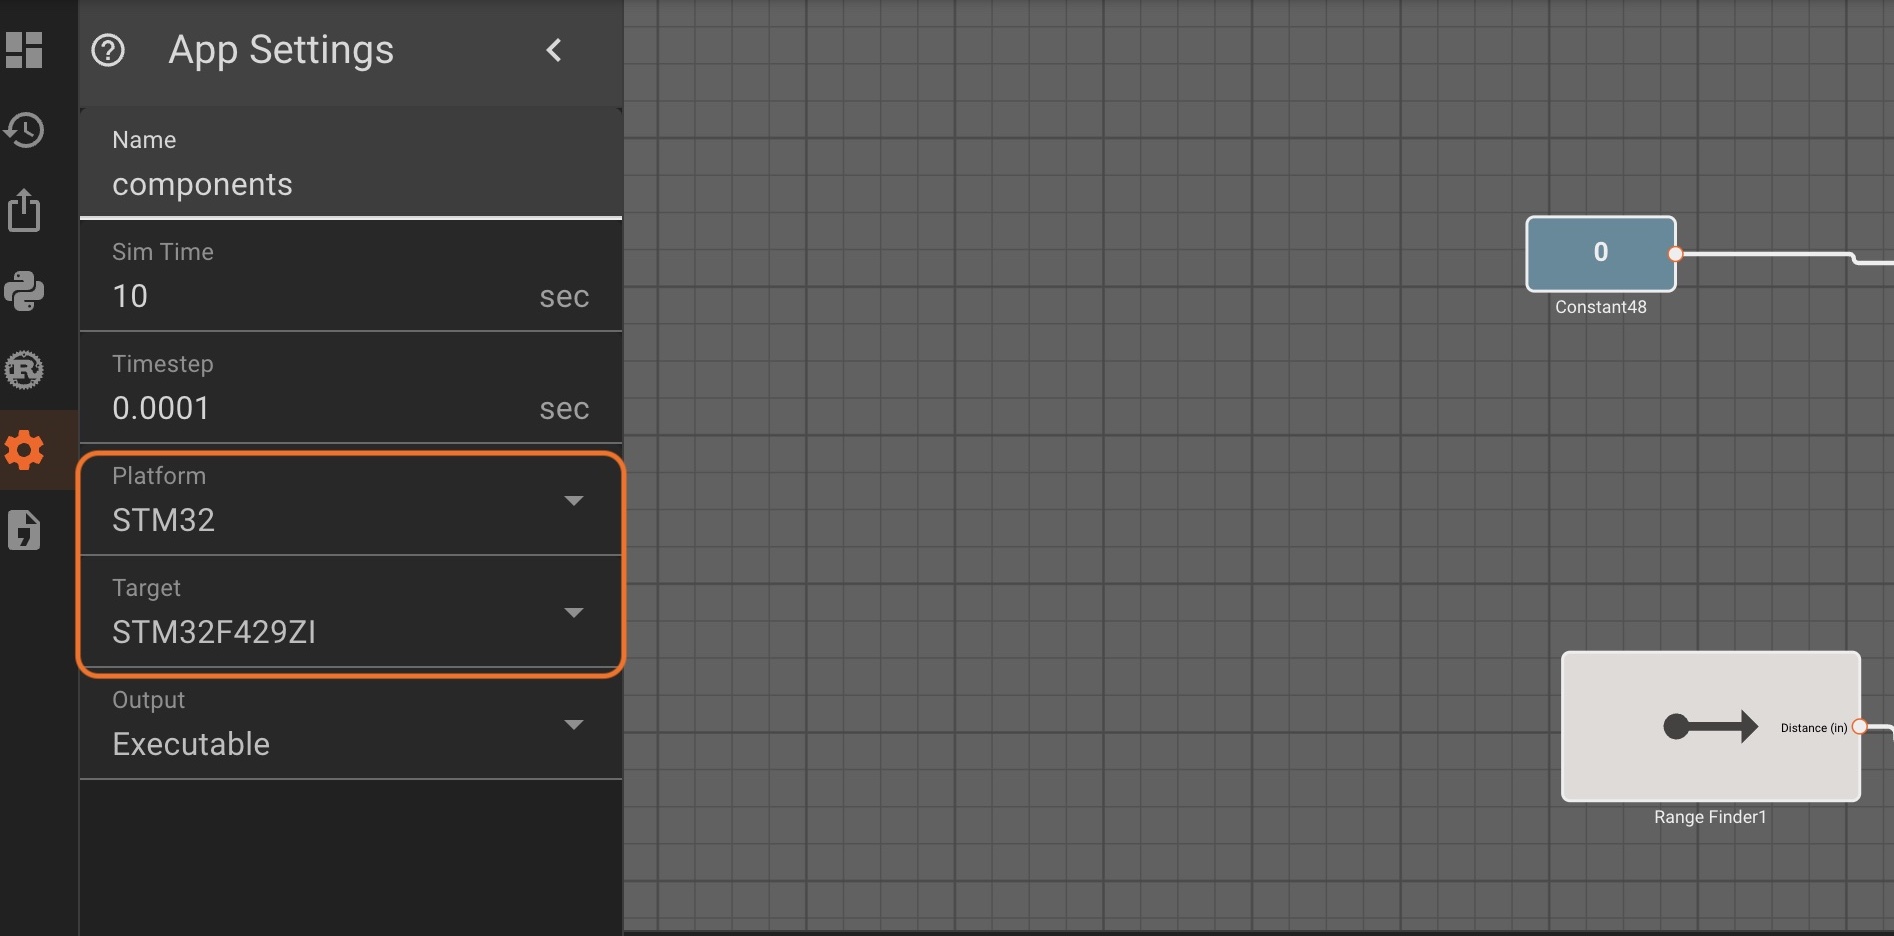
This can also be setup on app creation in the 'Advanced' settings dropdown menu.
Running Multiple Process Targets
In the device configuration menu, you can also add multiple process targets. This allows you to run multiple Pictorus apps on a single-board computer. Simply choose 'Add Process Target' and name the target as you wish. Remember to select the correct target name when deploying.
Concepts
A good diagram can help us understand and communicate a complex process. In traditional development, process diagrams are only connected to the code that implements them by manual translation; this translaction work must be repeated every time there's a change. In Pictorus, code is automatically generated from a diagram, saving work, reducing translation errors, and reducing the complexity of coding, while retaining the benefits of a language well-suited to safe efficient embedded development.
Additionally, in Pictorus there are no "intermediate representations" common in legacy simulation tools. Meaning, everything in a diagram directly generates embedded code, so even in simulation mode we can observe the exact algorithmic behavior we expect when deploying to hardware.
The essential idea is that blocks represent processing. Lines between blocks represent information flowing between blocks. The behavior of a block can be understood directly from the block by examining it. There is documentation for every kind of block. Each block has settings or variables associated with it. Component blocks are implemented as nested diagrams or Rust code.
Light Controller Example
Here is a simple application to control a light. The light can be bright, dim, or off. Diming is accomplished by rapidly turning the light on and off.
The inputs x0 and x1 enter from the left. These would come from a physical switch and the User Setting (Sum) block combines them to produce a value of zero, one, or two. A signal determining whether the light is off or on exits on the lower left. The signal on the upper left is for inspecting the input and can be ignored for now.
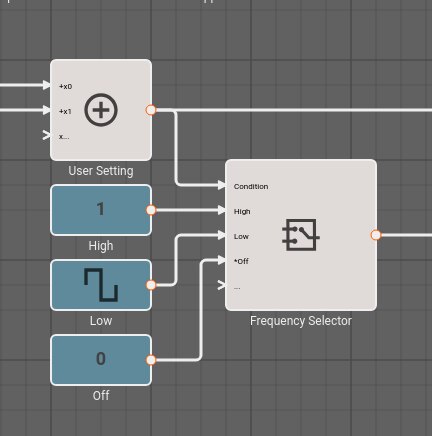
The User Setting is encoded thus,
| Setting | Value |
|---|---|
| Bright | 2 |
| Dim | 1 |
| Off | 0 |
The User Setting block supplies the Condition input to the Frequency Selector (Switch) block, which selects one of the remaining inputs to pass to its output. The output would control a solid-state relay to set the brightness of the lamp. The completed Light Controller example includes simulated input and output.
For those coming from a traditional programming background, this may seem unfamiliar, however the priciples of good design and good communication are universal, so it's simply a matter of learning how those principles apply in this visual world.
Navigation
Program text has a conventional linear ordering. For small programs, it is possible to print all the source files, and read every page in order. For a collection of hierarchial diagrams, the process of reviewing all the blocks and settings isn't as straightforward, because one must keep track of which blocks have been reviewed and which blocks are yet to be reviewed. Moreover, one must remember to open the settings for each block. This problem is more similar to reviewing a large program. Although one could print a large program, it is impractical. Instead, development tools enable us to quickly find definitions and references to program entities while focusing on the aspect of the program under review.
Organization
A picture is worth ten thousand words, but only sometimes. A cluttered diagram with many blocks and crossing signal lines with high-level and low-level details all jumbled together may be worse than a carefully organized program in a textual programming language. Organization is key, both visually and conceptually.
Related blocks can be grouped into higher-level reusable components. This helps us focus on smaller collections of related things.
Blocks can be arranged so that the most important signals flow in a simple line, and less important signals are below or off to the side.
Block labels can reflect the role of the blocks in the process. Comment blocks allow the author's intentions to be expressed close to the relevant blocks.
Extending Pictorus
When blocks do not yet exist for needed processing tasks and building them up from other blocks would be cumbersome, it is possible to define new blocks using Rust code. This is especially handy for reuse. We'd love to hear your ideas to make the block library more complete or more efficient.
Blocks and Components
Blocks
Blocks are the smallest unit of computation in Pictorus. Blocks appear in the Block Palette to the left of the canvas. Blocks are pre-compiled functions, which are chained together to form algorithms.
You modify a block's behavior by adjusting its Parameters. You can double-click on a block to open its Settings and edit its Parameters. You can also right-click on a block to get to the Settings.
Blocks almost always emit a single output (except, of course, Output blocks). They can have zero, one, or more inputs.
Components
Components allow us to aggregate blocks into re-usable functions. They're a powerful way to modularize your App, create new behaviors and functionality, not to mention a convenient way to clean up sprawling diagrams. The Yahboom G1 Tank API is a Component, composed of several sub-components that communicate to the robot's hardware.
To create a new Component, right-click anywhere on the canvas and select New Component. Double-clicking on a Component will navigate into it, and reveal another layer to your diagram. You can navigate in and out of these nested layers using the path links at the top of the canvas:
Components rely on special ComponentInput and ComponentOutput blocks to pass data in and out. These are easy to identify in a diagram given their unique shape. Adding these blocks within the Component makes them appear as inputs/outputs from the level above:
Ports can also be reordered after being created, which may be helpful for cleaning up diagram connections upstream of the component. This can be done by double-clicking on any port of a given type or right clicking and selecting Settings.
Reusable Component Library
Components can be made reusable across different apps, allowing users to build out a library of commonly used functions. To make a component reusable, right click on it and select Make Reusable. After following the prompts and saving, the component will appear in the My Library subsection of the Block Pallette within any of a user's apps. We have also pre-built a set of components that interface with common sensors and acutators, availables in the From Market subsection of the Block Pallette.
For more ways to make Components powerful, check out:
Inputs and Outputs
...or, "If an App runs in the woods, but creates no side effects, did it really exist?"
Inputs and Outputs are a particularly crucial concept in Pictorus. The simplest explanation of our Code Generator is that it attempts to trace every single "Output" block in a diagram back to the "Input" blocks necessary to compute them.
An App, by our definition, cannot exist if it has no Output blocks. Something needs to be generated by an App in order to be useful.
Similarly, an Output block cannot be compiled unless we can trace back ALL of its Inputs. If an output block depends on 50 blocks upstream, and even just one of them is broken (missing inputs, bad parameters, etc), then we cannot compile the sequence generating that Output.
So, Pictorus will constantly re-evaluate your diagram to determine which Output sequences it can compile, and which incomplete sequences it will ignore. It will incrementally build chains of logic for your app when it is positive all the Inputs and Outputs in a sequence are properly connected.
Since this distinction is so crucial, we draw attention to the different block types with colors:
- Input-type blocks are shades of Indigo.
- Output-type blocks are shades of Orange.
- All other blocks (called "processes" or "transformations") are shades of Gray.
A very simple app, with a single input, transformation, and output block looks like this:
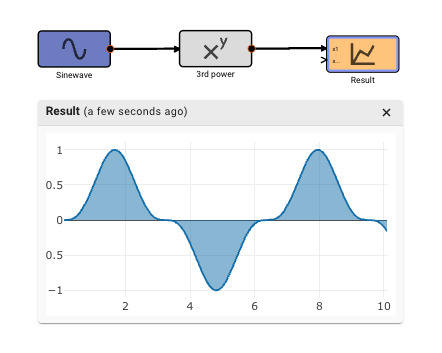
"True" inputs vs "Generators"
You may have noticed there are two palette tabs sporting Indigo-colored blocks, labeled Inputs and Generators. The distinction is that "True" inputs refer to signals we expect from the outside world (i.e. from hardware, or APIs, etc), whereas Generators are signals generated internally by the App.
Why does this distinction matter? When simulating Apps in the cloud, we cannot talk to real hardware, so external inputs cannot be interacted with. They’re actually removed from the code entirely in simulation mode. But Generators are fine. What’s more, we can use Generators to simulate Inputs, which can be very helpful when prototyping an App.
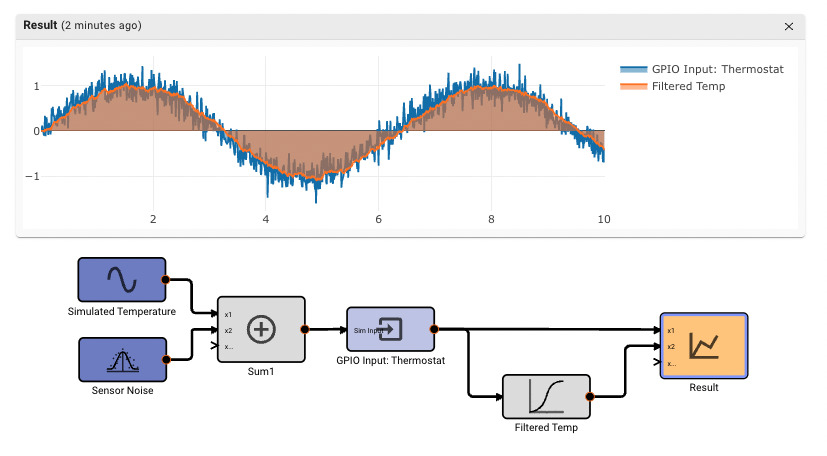
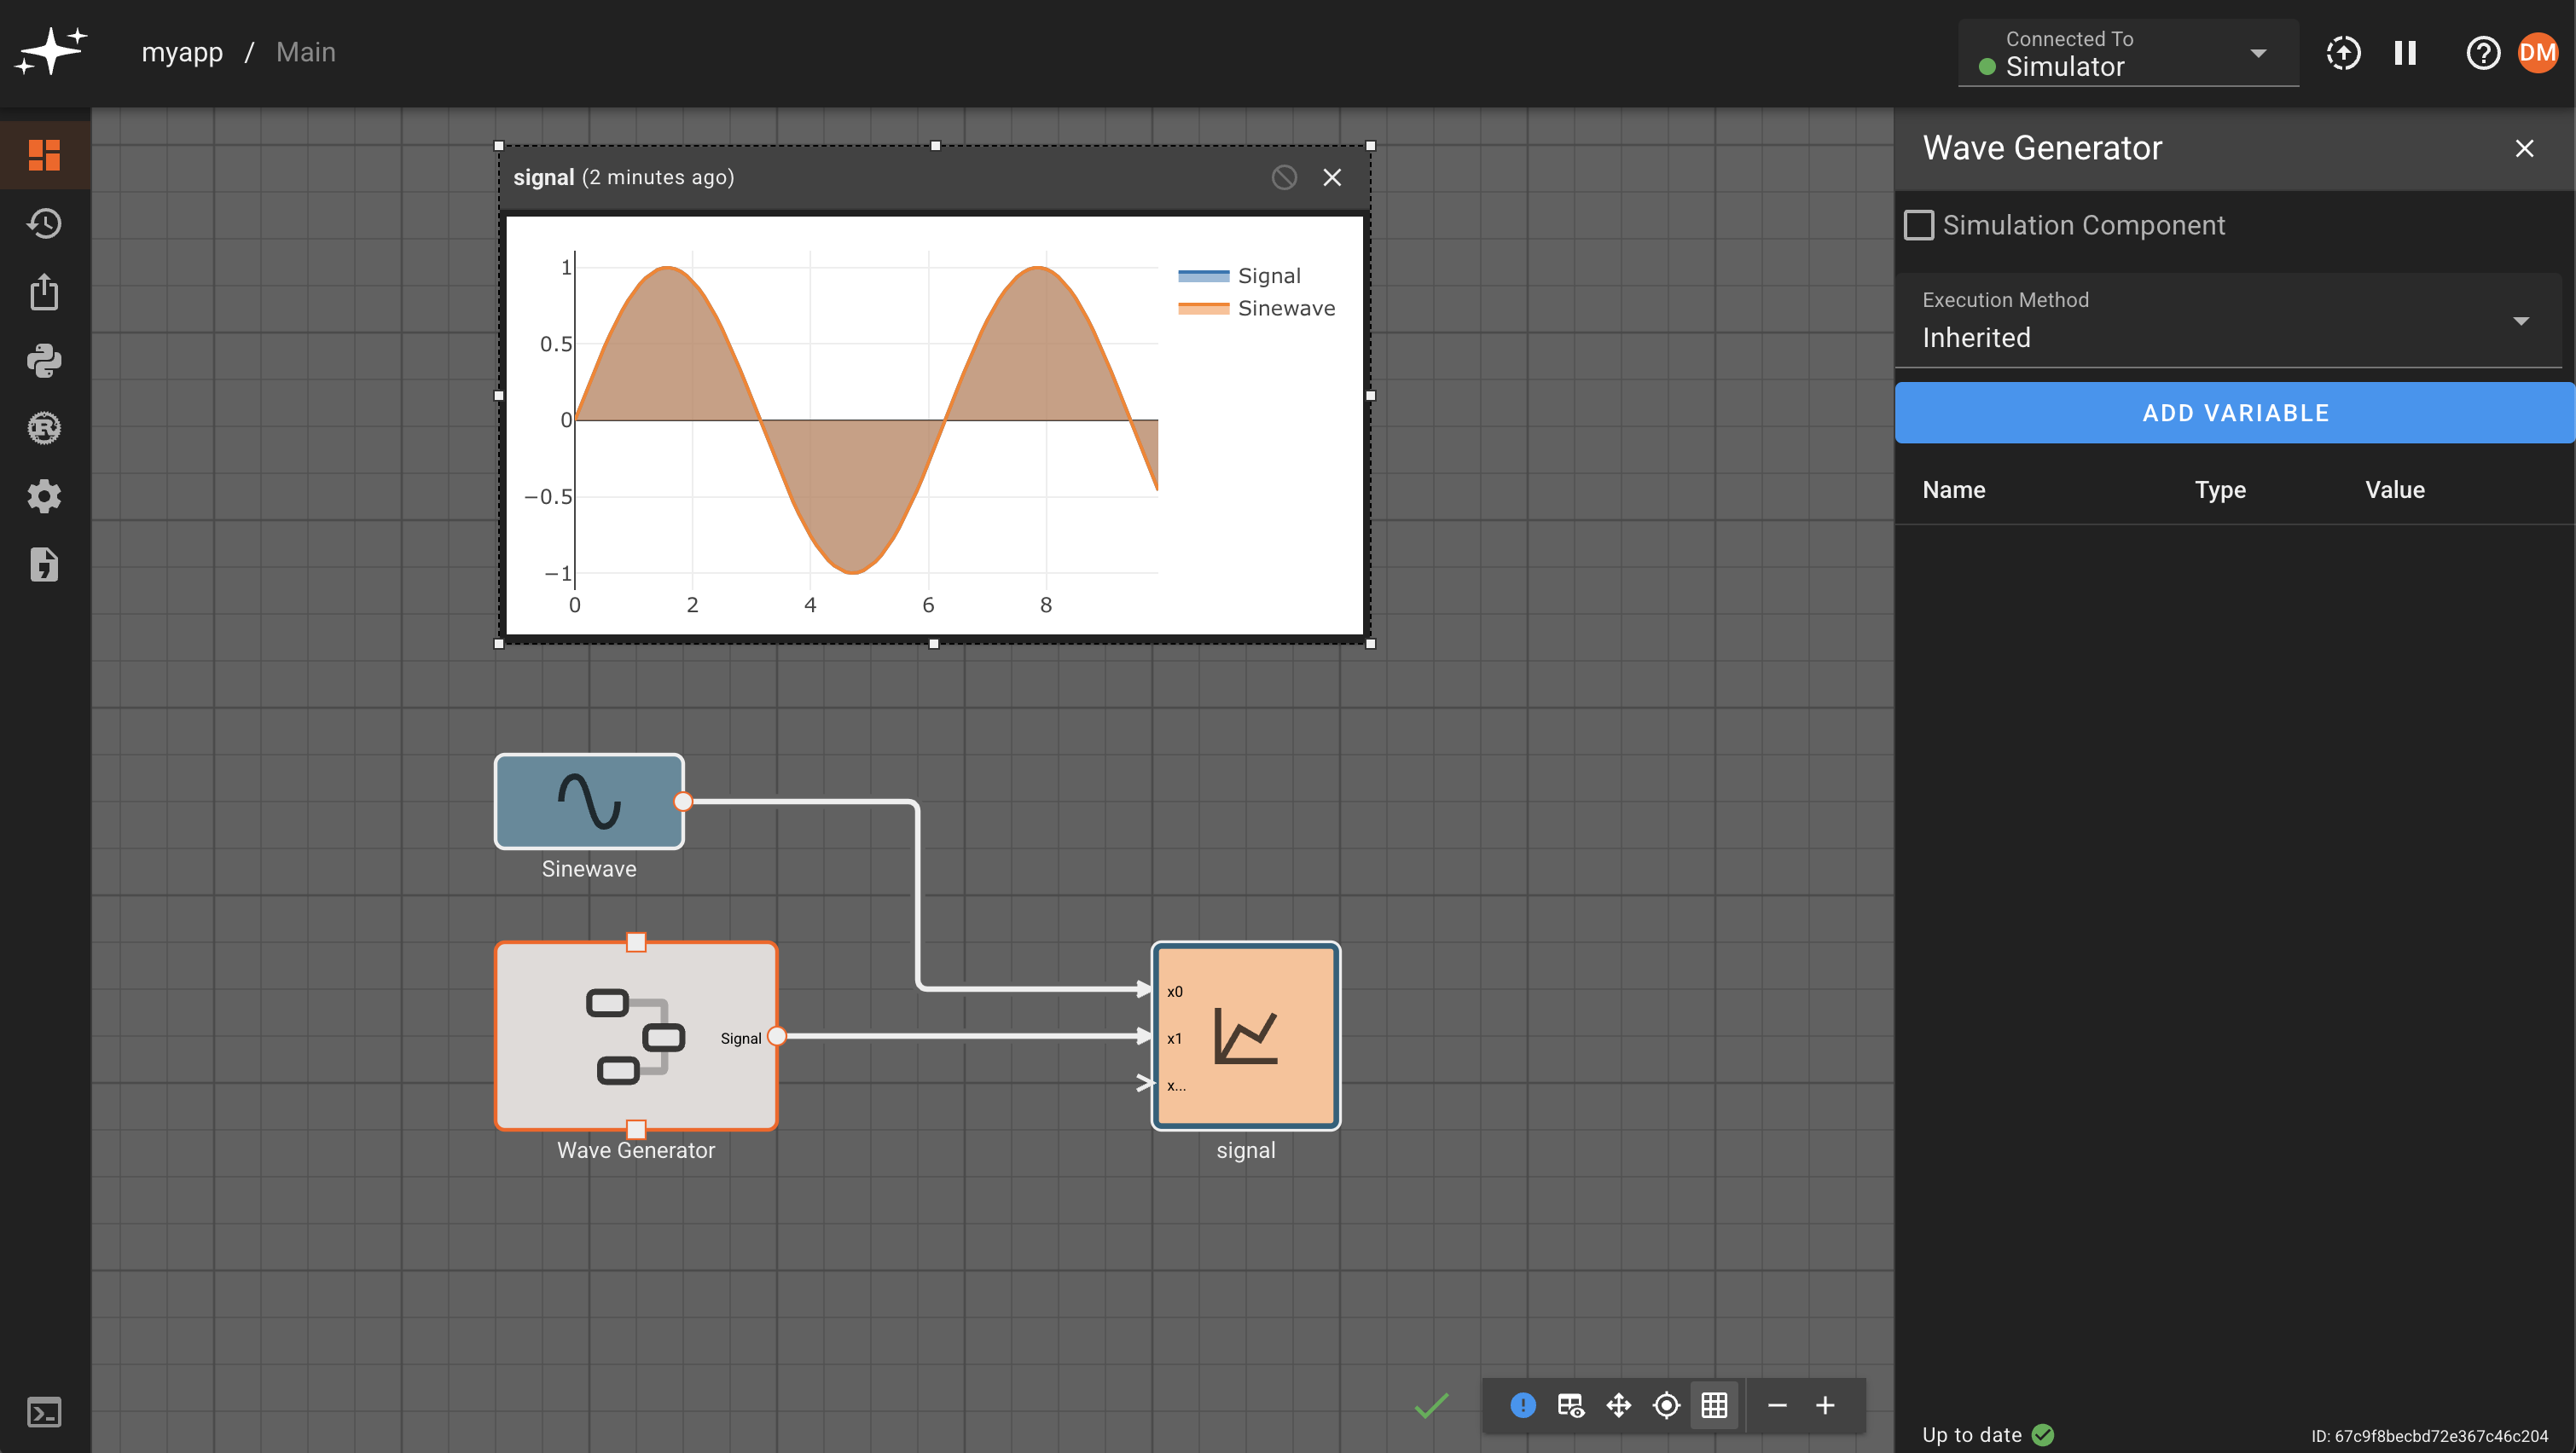
In the app above, we’re simulating a thermostat sensor we expect to receive data over GPIO with a sinewave and Random Number block. When this app is run in Simulation mode, we see the generated signal come through, and we can tune our low-pass filter block accordingly. However, once we deploy this App to a real device, the blocks upstream of the "True" GPIO Input will be pruned from the final App, and we’ll receive temperature data from the sensor itself.
Computation in Pictorus
Currently, data that flows between blocks are uniformly represented as 64-bit floating point values. In the generated Rust code, this translates to the f64 type. This is a fast and convenient choice for simulation, but there are some possibly surprising implications.
As always with computer floating point arithmetic, only a finite set of numbers can be represented, so expressions that should be equal mathematically, may not be exactly equal numerically.
For example, in Rust,
if 0.1 + 0.2 == 0.3 {
    println!("A");
} else {
    println!("B");
}
Will this print A or B? If you said, B, you're correct. The reason is interesting, but what's most important is that we need to understand when calculations are exact and when they may not be.
In addition to the usual challenges of numerical analysis, integer arithmetic and logical operations require care.
Exact Arithmetic
The range of integers that can be represented exactly in 64-bit floating point is \(-2^{53} \) to \(+2^{53} \) or a little over 15 decimal digits. Addition, subtraction, and multiplication of integers in this range remain exact provided the result does not exceed the range. Division is exact if the result has a remainder of zero. Understanding exact computations is key to understanding when it is safe to compare values with strict equality.
As described in True and False in a Floating Point World, False is represented as exactly 0.
Sources of Error
There are several sources of numerical error relevant to numerical control systems. A full treatment of Numerical Analysis is beyond the scope of this documentation, however, some hints and references are provided.
- Sampling error
- Data uncertainty
- Roundoff error
- Underflow/overflow
- Division by zero and other exceptional conditions
Sampling Error
To test a threshold crossing, due to the possibility of sampling error, it is unreliable to use an exact comparison. It is necessary to test for a value in a range or react to the first value that exceeds a given point. True and False in a Floating Point World provides an example.
When analyzing sample signals from a continuous process, the sampling rate must be high enough to avoid aliasing. The FFT block and the Frequency Filter block may be useful.
Data Uncertainty
Actual sensor data typically includes noise. It may be helpful to
- Smooth the data by taking a moving average or median using the Aggregate
- Low-pass filter the data using the Infinite Impulse Response
- Rate limit the data using the Rate Limit
- Clamp the value within a reasonable range.
Roundoff Error
Pictorus uses the highest available precision to minimize the effects of roundoff error, however, it is still necessary to avoid unstable numerical algorithms and ill-conditioned problems for which relatively small input changes lead to large output changes.
Underflow/overflow
Consider an approximation algorithm that terminates when an error expression is less than an absolute threshold. Although a threshold may be representable, if the threshold is too small, the algorithm may not terminate. Subtracting a very small floating point value from a very large floating point value may result in a difference exactly equal to the very large value. From this point on, no progress is made. It is often most productive to test the error relative to the magnitude of the numbers being compared.
IEEE 754 floating point values have the maximum precision between one and negative one.
With 64-bit floating point values, overflows are uncommon for practical examples, but it is good to consider how large numbers might enter and corrupt a computation. For example, a sensor may emit invalid data when an error condition occurs. If there is no error condition signal, or the error condition signal is not used, the input data may contain unreasonably large values. A Deadband block can be used to detect a signal out of range by treating its output as a not-valid signal.
Division by Zero and Other Exceptional Conditions
Currently, Pictorus prioritizes avoiding crashes over generating mathematically correct results. Division by zero and other undefined calculations are arbitrarily defined to be zero. Blocks that potentially mask calculation errors:
- Derivative Block - Since the derivative block requires Max Samples to compute the derivative, it will output zero for the initial timesteps.
- Equation Block - If the computation is undefined at for certain inputs, the corresponding output is zero. For example,
1/x0will be zero whenx0is zero. - Exponent Block - We define \(0^{0} = 0 \). See Zero to the power zero.
- FFT Block - With a Buffer Size of zero, an empty vector is produced.
- Frequency Filter Block - With a Cutoff Frequency of zero, the filter passes the input almost unchanged. Changes are on the order of \(10^{-15} \).
- Logical Block - See "True" and "False" in a floating point world and Logical Block.
- Product Block - When the Method is ComponentWise and a Port Method is Divide, division by zero results in zero.
- Rust Block - Aside from the guarantees provided by the Rust compiler, there are no additional guards provided for user-supplied Rust code.
Simulation vs Production Code
By necessity there are a few differences between working with simulation in Pictorus and working with a physical device (Production).
Simulation Components
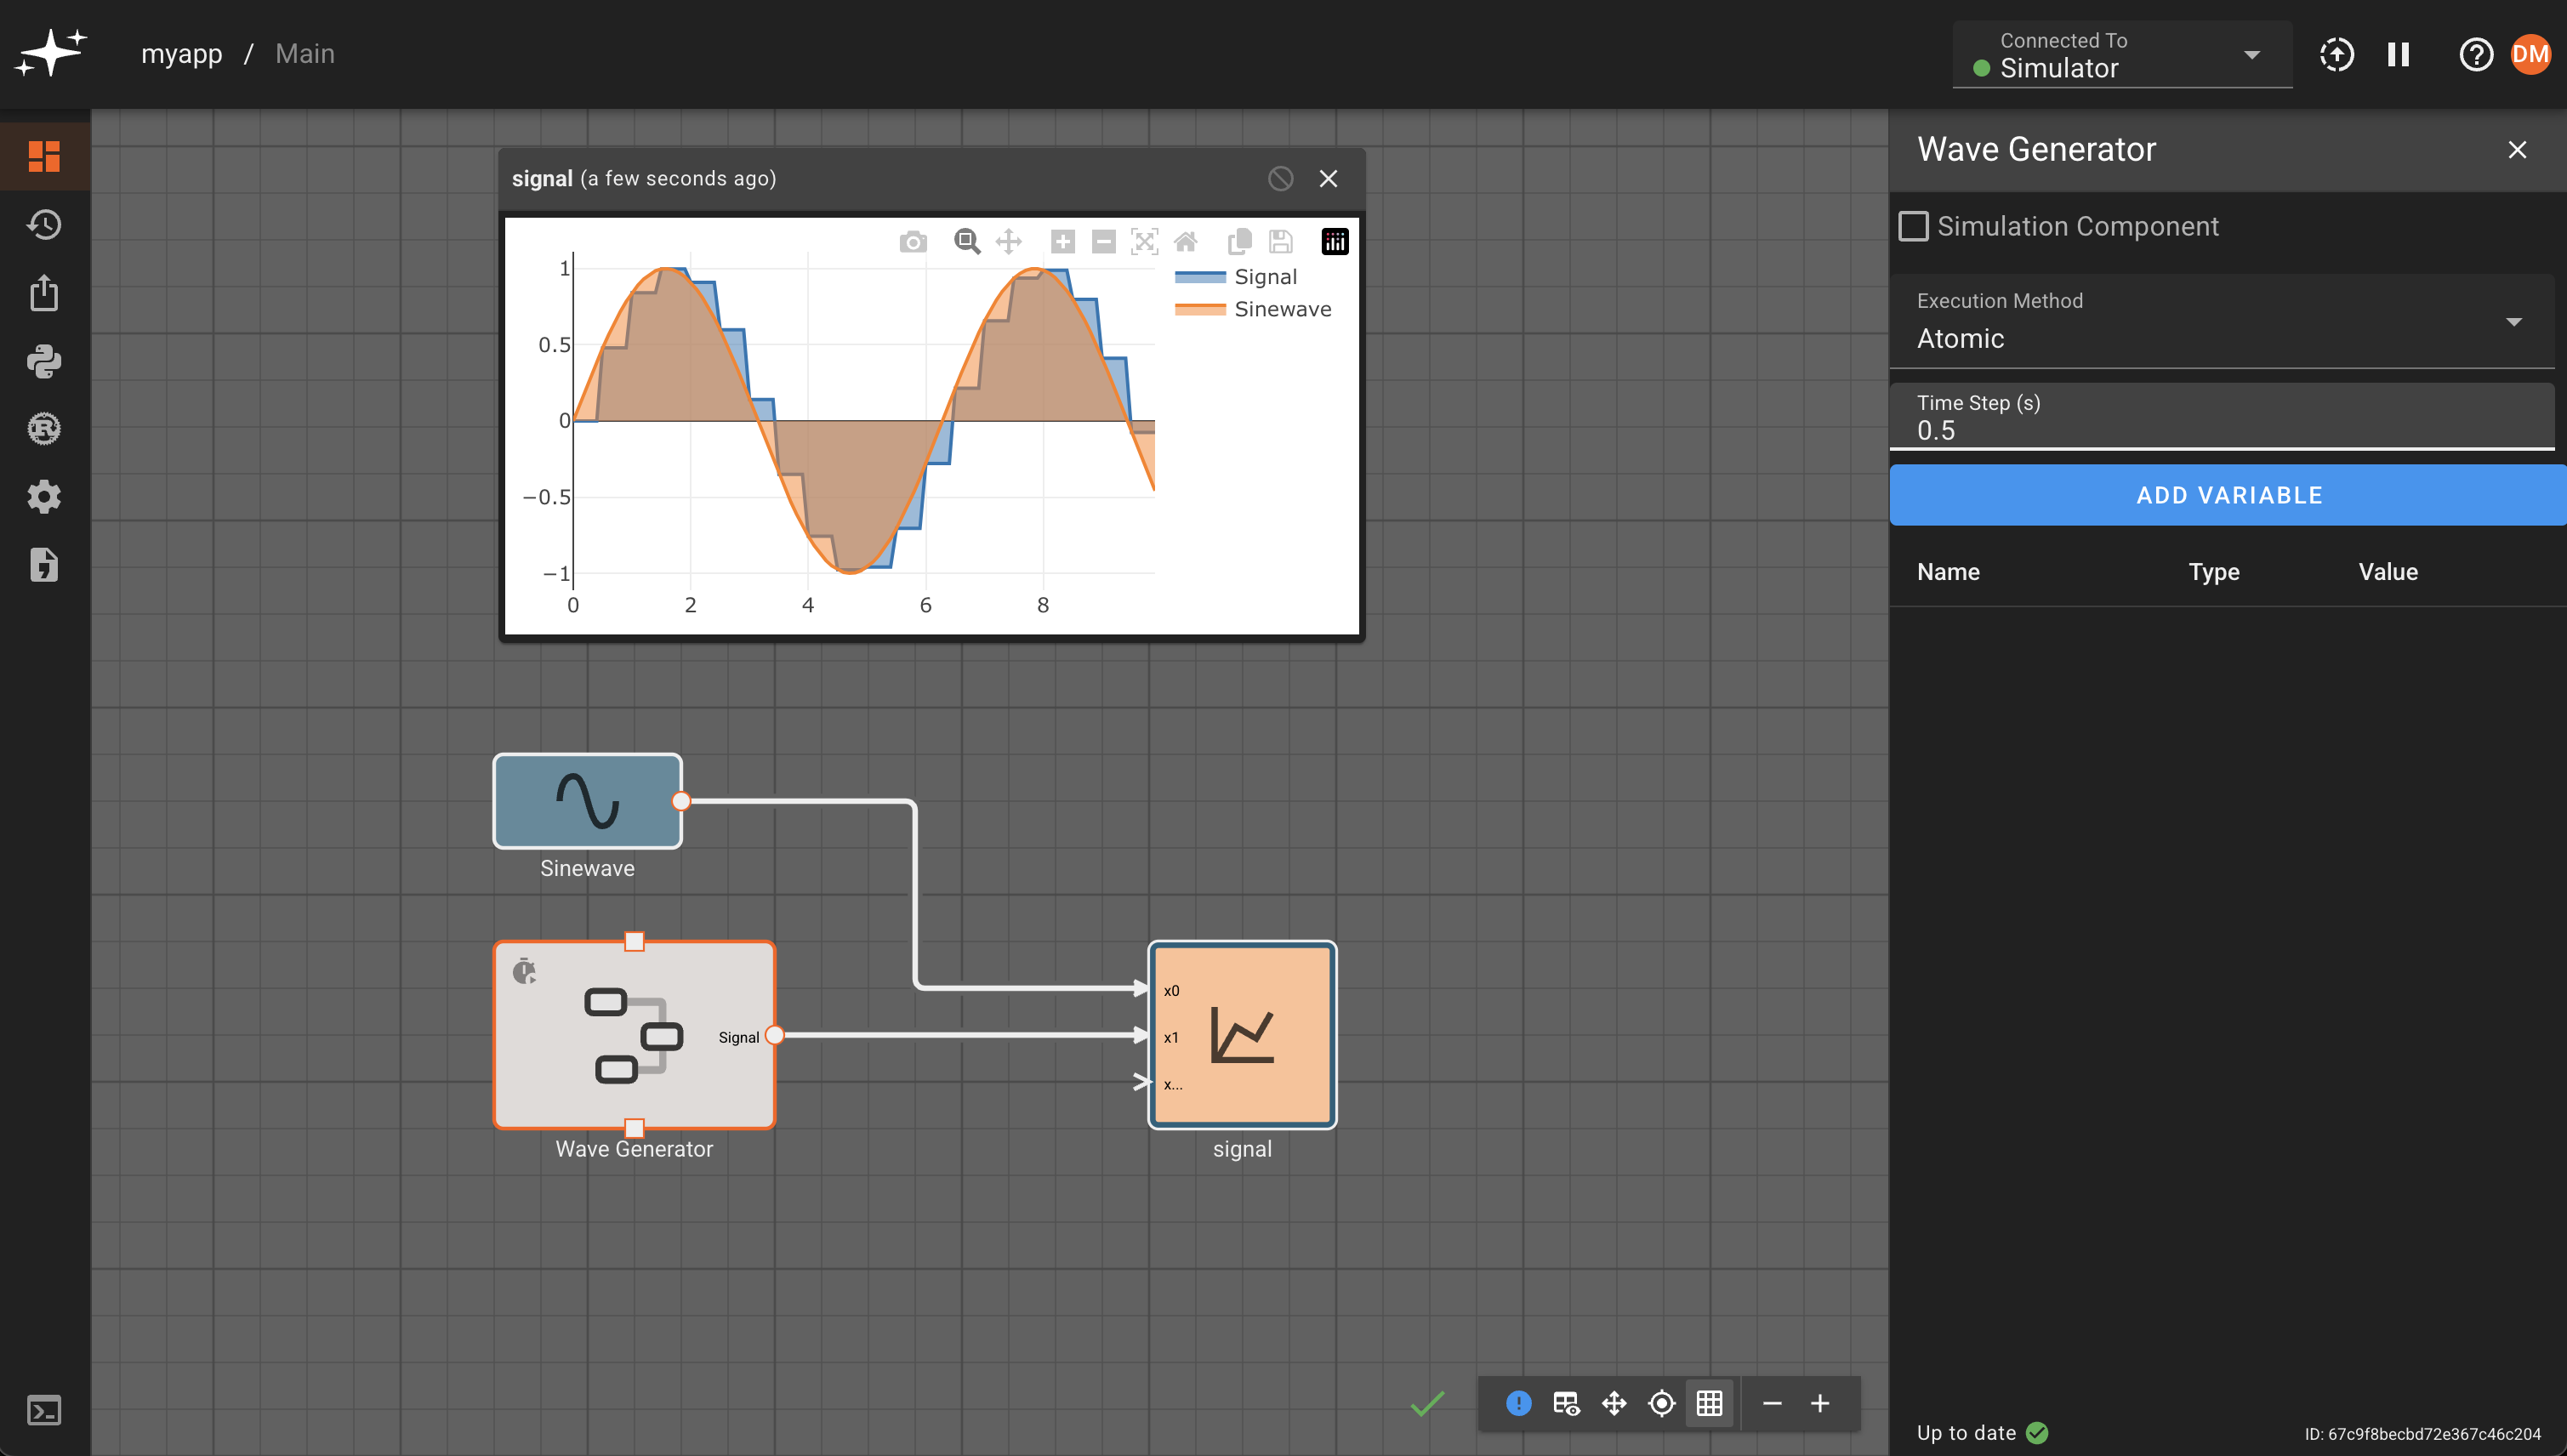
Pictorus makes a clear distinction between Simulation code and Production code, so users can easily understand which sections of their diagram will be compiled and run on production hardware and which sections are purely for simulating inputs to the production algorithm.
Any Component can be marked as a Simulation Component from its settings panel. By doing so, we've indicated to the code generator to trim this section from code generation when the user selects a true hardware target. However, in Simulation mode (the platform default), the Component does get included, and users can experiment with synthetic inputs:
You'll notice that attempting to connect any other Block or Component to an Input Block is forbidden:
Simulation Computation Limits
The Pictorus beta imposes some limits on the computation that can be done in simulation mode. The total number of iterations (i.e TimeStep*Sim Time) that the simulation will compute is 1e8 or 100 million. Additionally the maximum Sim Time is 1e5 or 100,000. These limits are in place to prevent the simulation from running indefinitely, and to ensure that the user can't accidentally create a simulation that will take an unreasonable amount of time to run. If these limits are blocking your work feel free to reach out to us.
True and False in a Floating Point World
As described in Computation in Pictorus, data that flows between blocks are represented as 64-bit floating point values. Blocks that operate on Boolean logic values convert floating point to truth values thus
- False is exactly zero
- True is any non-zero value
Boolean outputs are
- Exactly 0 for False
- Exactly 1 for True
Converting from calculated floating point values to Boolean logic values can be tricky because expressions that are equal for real numbers may only be approximately equal for fixed-precision floating point values. Moreover, due to sampling error, it is possible to "miss" a point on a continuous function. The examples below illustrate some of the challenges and solutions.
Simple Control Example
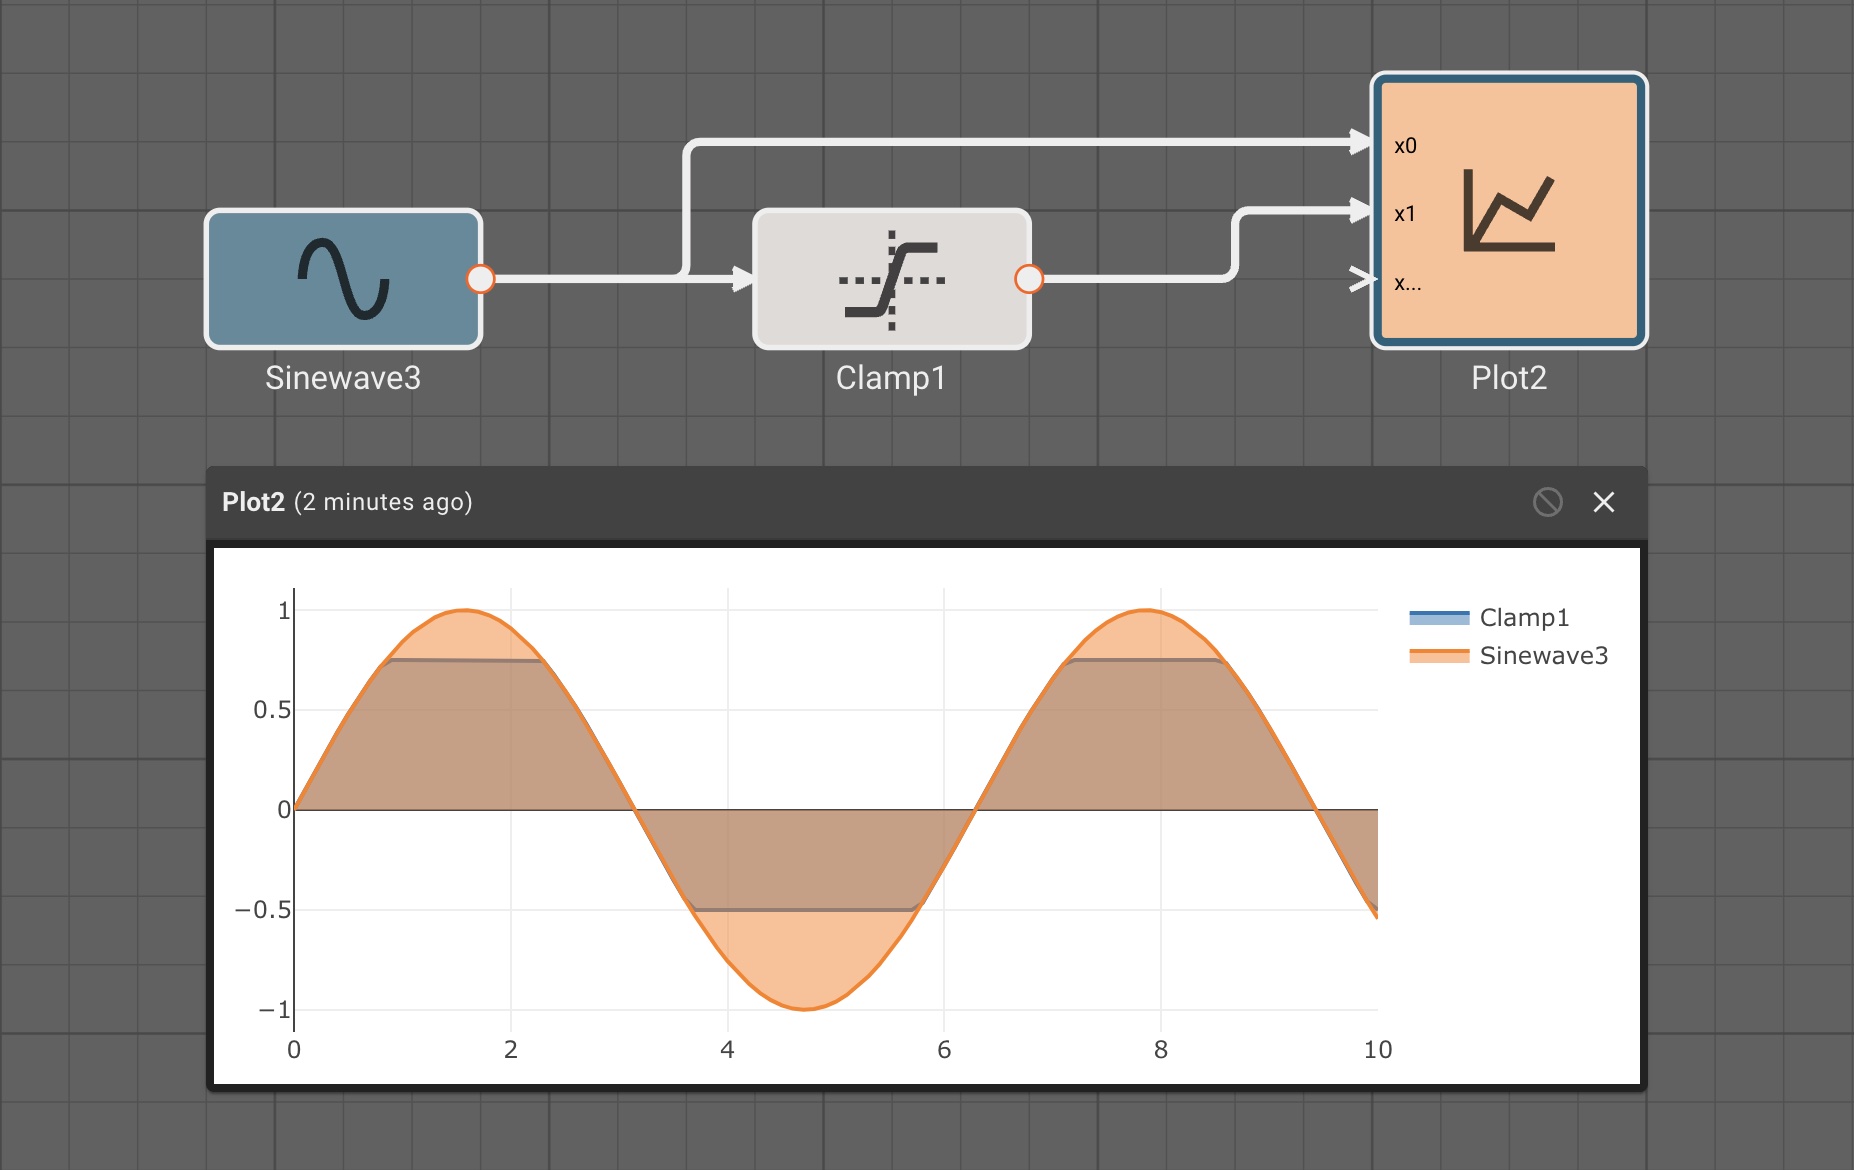
Consider a simple air conditioner control application. The air conditioner should turn on only when the temperature is greater than a set point of 70°. We can use a Compare To Value block. We model the temperature with a Sinewave. As a visualization aid, we multiply the comparitor output by 100 with a Gain block (AC On in the figure below).
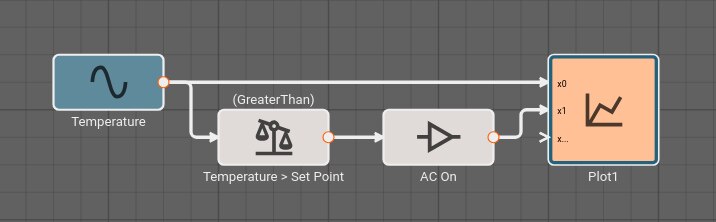
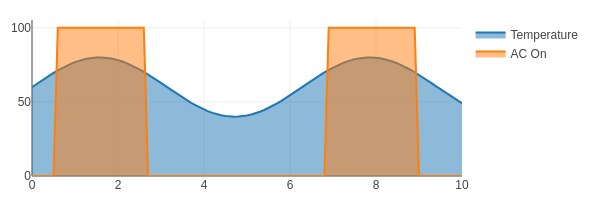
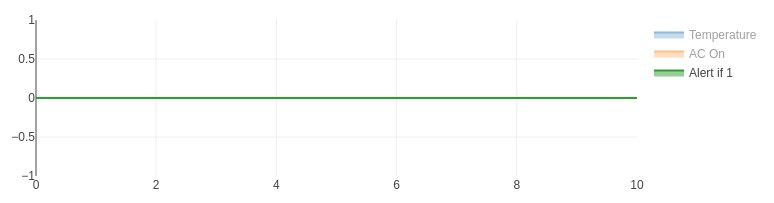
The Plot below shows temperature in blue and the air conditioner on state in orange.
Alert Example
Suppose an alert tone is required when the air conditioner turns on. Ideally, we could use another Compare To Value block to test whether or not the temperature is equal to the set point.
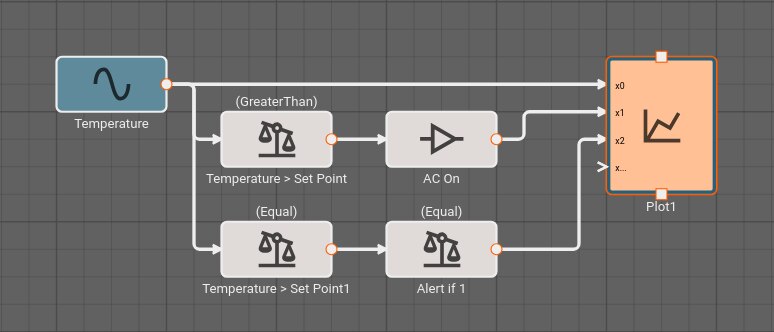
If we try this, we discover it doesn't work! The temperature is exactly 70° in between time steps; none of the samples is exactly equal to the set point, so the alert signal is always False and no alert is ever generated.
If we had been unlucky with our choice of model parameters, the application might have appeared to work. There's another defect. If we could successfully test that the temperature exactly equals the set point, the alert would play both when air conditioner turned on and when it turned off.
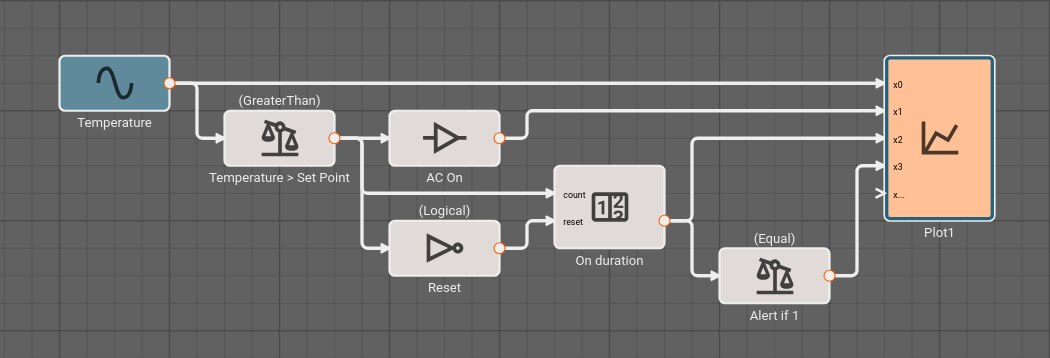
To repair both defects, we cannot simply change the condition to GreaterThanOrEqual, because the alert would play over and over. We can, however, use a Counter block. As long as the temperature is greater than or equal to the set point, increment the counter once per time step. Only when the counter is exactly one, play an alert. When the temperature is less than the set point, reset the counter.
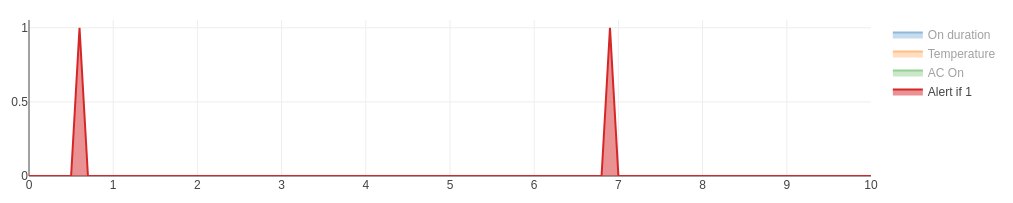
The alert signal is not visible when all the signals are plotted because it is relatively small, with a magnitude of one corresponding to True.
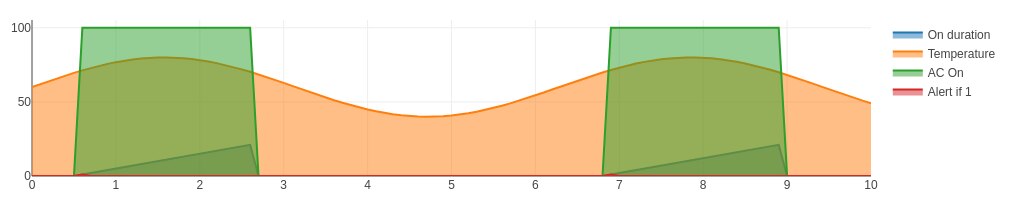
If we hide the other signals, the alert signal is visible as a pair of spikes that occur when the temperature is rising above 70°.
Safely testing Boolean conditions on continuous signals
As the example above illustrates, we cannot assume that a signal that crosses a threshold will be sampled exactly at the point it crosses the threshold.
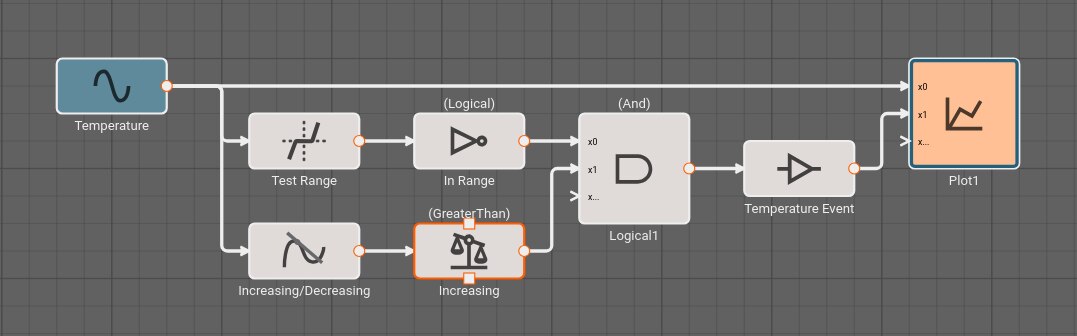
It's often better to test inclusion in a range than strict equality. The Deadband block provides a range test. This is another way to reliably obtain a Boolean value from an arbitary signal. In the example above, we could trigger our alert when the temperature is within a range including the set point, and the input signal is increasing. The Derivative is positive when the signal is increasing. Because the deadband is False when the signal is in the range, a Not is needed.

Differences from the previous example.
If the signal begins above the threshold, no initial event will be detected.
The alert signal remains 1 as long as the temperature remains in the range; in the previous example the alert signal is only 1 for a single time step after the signal exceeds the set point.
Vector math
Pictorus implements Vectors similarly to Numpy and Matlab. Vectors can be transformed by other vectors, and they can also be transformed by scalars.
This is because under the hood, all signals in Pictorus are stored as 2d vectors. So, when we speak of "scalars", we simply mean a signal stored like [[3.14159]]. Similarly, a "vector" is stored as [[1, 2, 3]]. We also support "2d vectors" (sometimes called matrices) like [[1, 2], [3, 4], [5, 6]]. We don't currently support 3d or higher dimension vectors (but plan to).
The benefit of storing everything as a 2d vector is it makes it relatively easy to perform operations on any two signals, whether they are scalars, vectors, or matrices.
Creating vectors
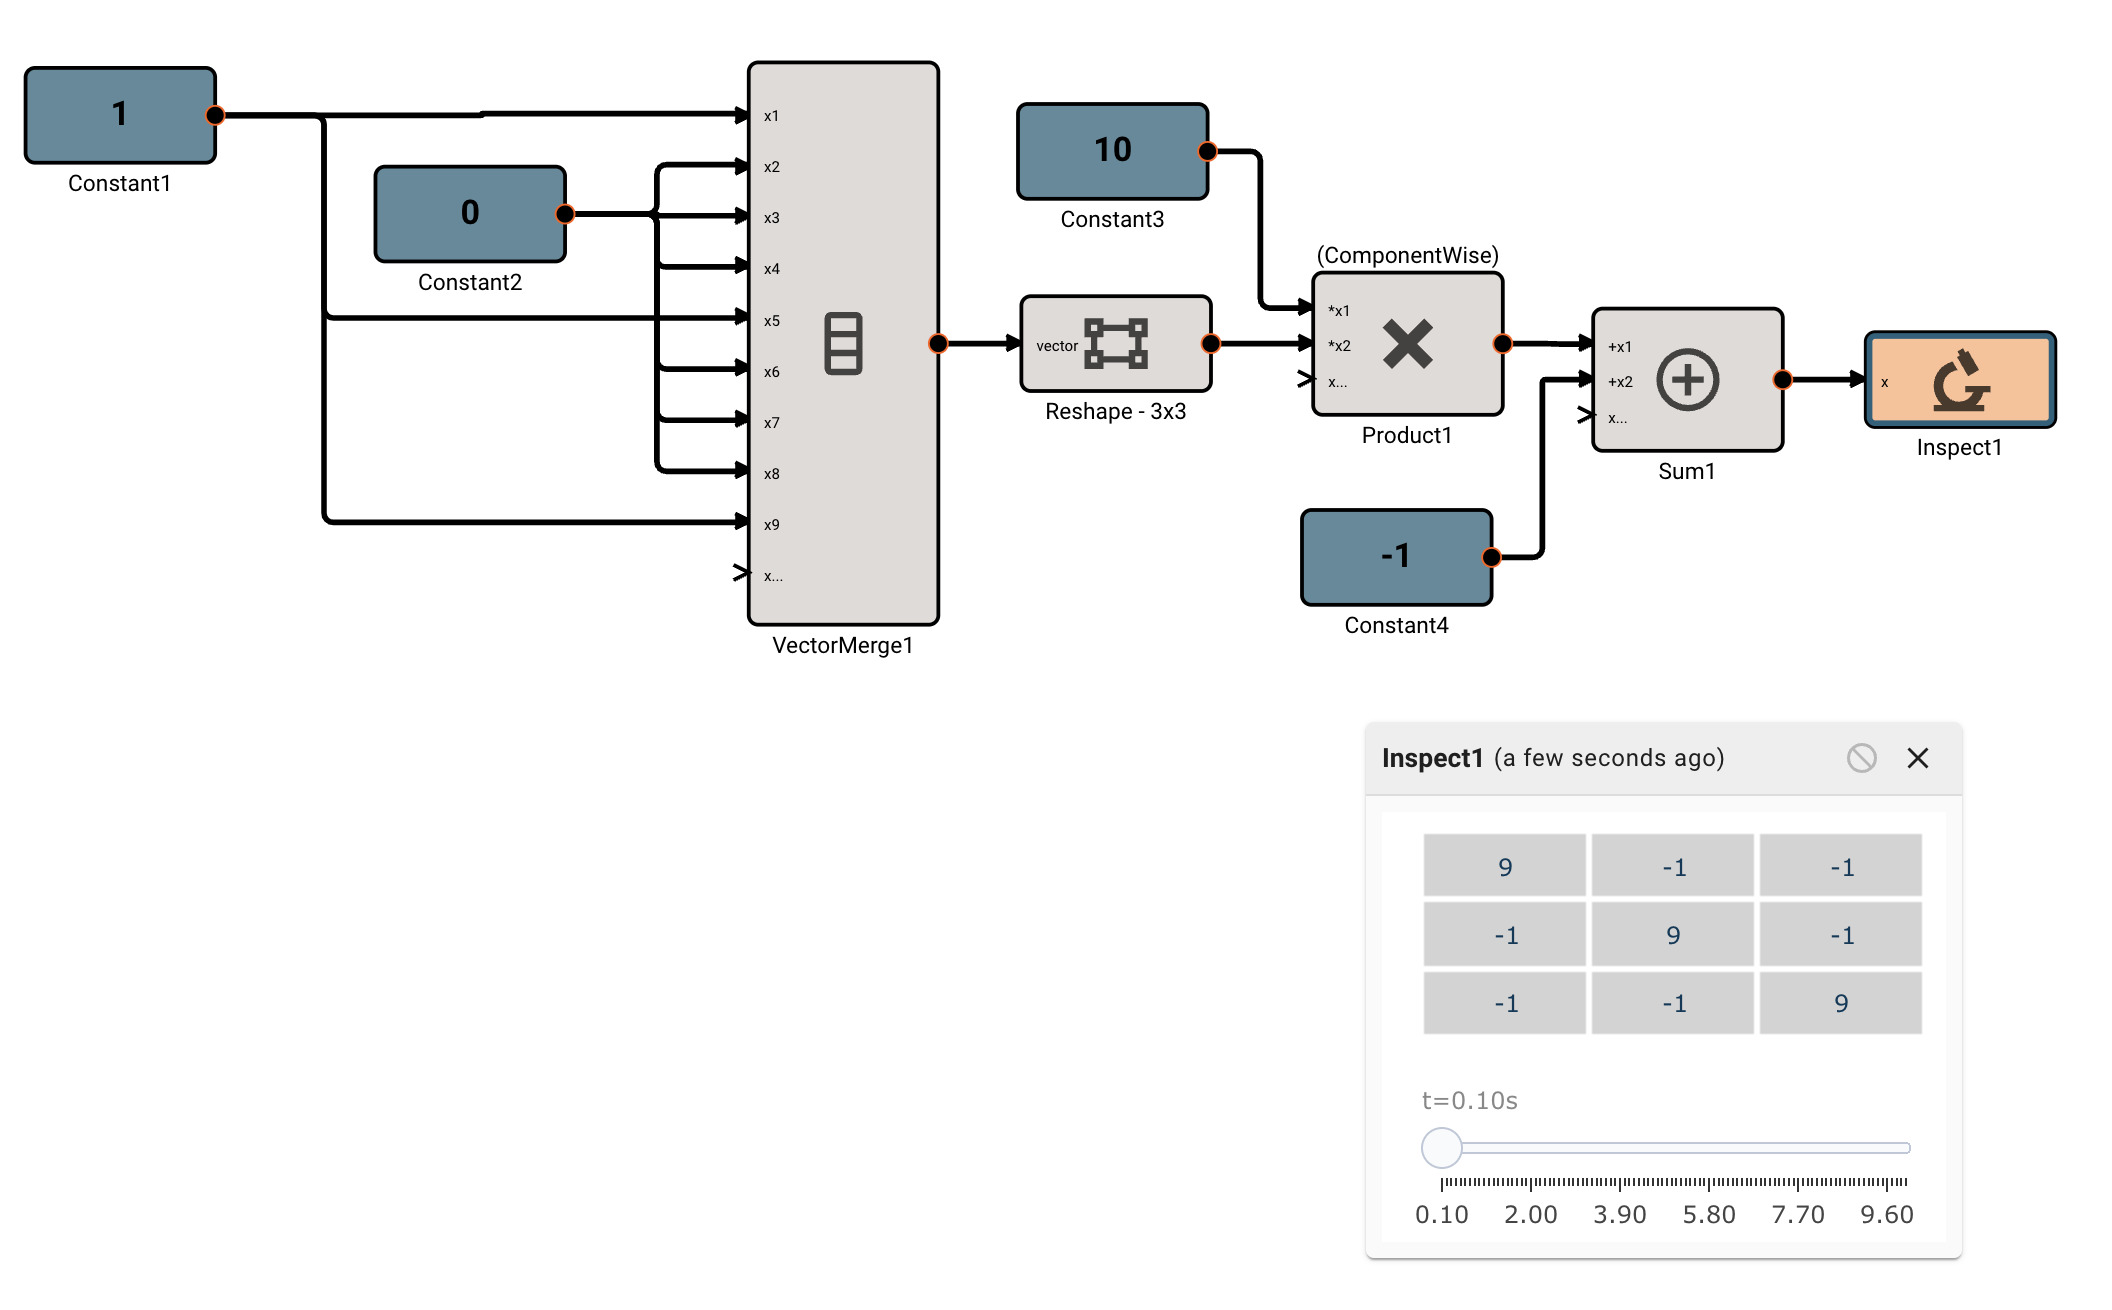
There is currently only one, fairly annoying way to create a new vector, using the Vector Merge block, which creates a flat vector from inputs. This is often in conjunction with a Vector Reshape block. For example, a simple 3x3 identity matrix can be constructed with:

As mentioned, we can operate on scalars and vectors pretty easily - as long as we don't violate any dimensional rules of the operation involved. For example, we can scale the Identity matrix by a scalar factor of 10, and then subtract a scalar like so, and it applies to the entire vector:
Vector sizing rules
Certain vector operations have firm vector size requirements. A few common ones to be aware of:
- When using the
Matrix Multiplicationmethod of the Product Block, the inner dimensions of the input vectors must match. For example, a 2x3 vector can matrix multiply with a 3x4 matrix, since the inner dimensions are both 3. The order of the product inputs clearly matters here. - The Cross Product block only works for 1x3 or 3x1 sized vectors.
- When using the
Inversemethod of the Matrix Inverse block, the input block must be square (rows == cols). - The Determinant block also requires square matrices.
What about the overhead involved with this paradigm?
Storing everything as double precision 2d vectors is certainly not cheap, computationally. For the most part, the fact that Pictorus diagrams compile to highly performant Rust apps leveraging the nalgebra crate means our apps are still generally very efficient. But eventually, we intend to add a precompile step to the code generator that will strip down vectors to scalars where appropriate, and reduce floating point precision if specified by the users. If you are encountering a significant performance issue, please reach out and we'd love to dive into it!
Custom Variables
Custom Variables allow users to specify variables on a Component, State, or globally within an app, thereby granting all blocks within that scope the ability to reference the variable. Custom variables are helpful for defining something you need to reference in multiple blocks once at a high level, so any adjustments to that variable immediately trickle to all blocks referencing it.
Adding variables
To add a component or state-specific variable, right click on a Component or State go to Settings, and then Add Variable. For global variables, right click on the canvas in the State View. Then, name your variable and assign its value. Here we're showing how to add a custom variable to a component:

Now, you can go to any block within that scope - in this case,within the Component - and assign a parameter to reference that variable. You do this by clicking the (x) option next to a parameter, and selecting from the variables shown in the drop down:
Any time you adjust the custom variables you set up, the blocks within the Component immediately reflect the change!
State Machines
For more info, check out the Our Blog post on State Machines.
Pictorus allows for basic State Machine representations within your App. Currently, State Machines are a top-level App feature only - we don't allow nested State Machines.
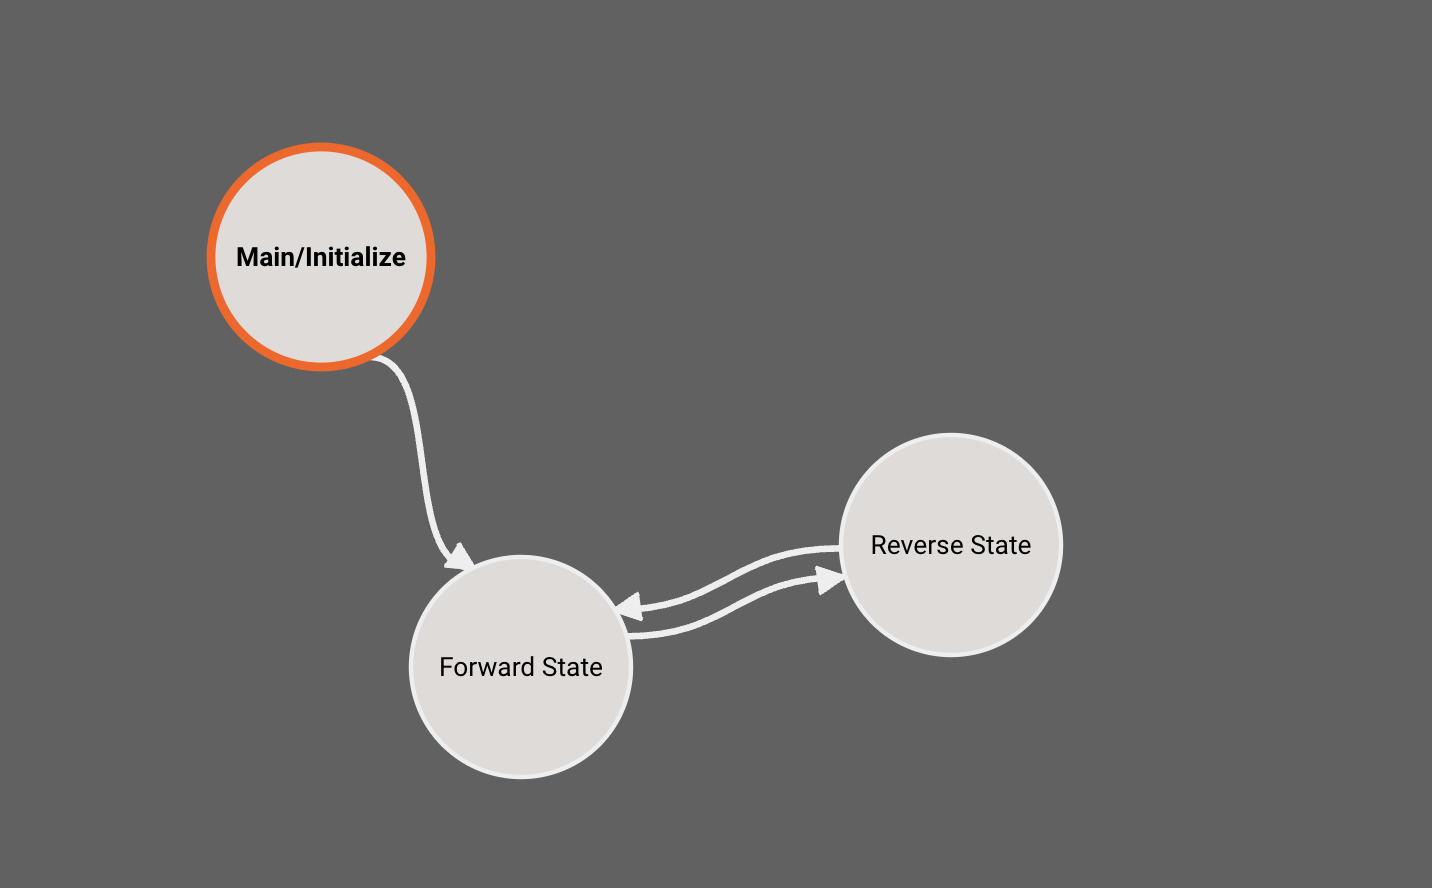
By default, every App is created with a single State (Main), which users immediately drop into when opening the App in browser. To see the State Machine representation for you App, navigate one level higher using the breadcrumbs above the canvas. From there you can right-click to create additional States, and connect different States to one another:
You may have noticed the newly-created States above quickly grayed out. This is because empty States do not generate any code, and when we create a new State, it starts out empty. Only the Main State (indicated by blue outline) is always compiled.
To make these States valid, we have to do two things. First, we need to make sure there is a valid State Transition to get to this State. So we'll need to go into the Main State, and connect the newly-added State Transition Block (which is automatically created when we connect States together from the top level) to a valid block sequence. You can also rename state transitions, and these will appear as a labels in the state view.
Once we do that, Pictorus will know how to get to our new State. But the State still doesn't do anything yet, so we also need to navigate in and create a valid Block sequence there as well. Finally, the State should render solid, indicating it is now included in our compiled App:
We'll now make sure all the States are connected, and look at some plots. You'll notice that plots are grayed out occasionally. This indicates time regions when the App was not in the current State, and therefore, the value does not update:
Conditional Execution
There's currently two basic ways to do If/Else style "Conditional Execution" in Pictorus.
The first is using the Switch Block, which allow you to pass different signals through the block based on a Condition (the first input to the block).
You can add many conditions to a Switch Block, and you can chain them together to form complex logic. Here's an example where we command a heater ON (100%) or OFF (0%) based on whether the simulated room temperature is below 60 degrees:
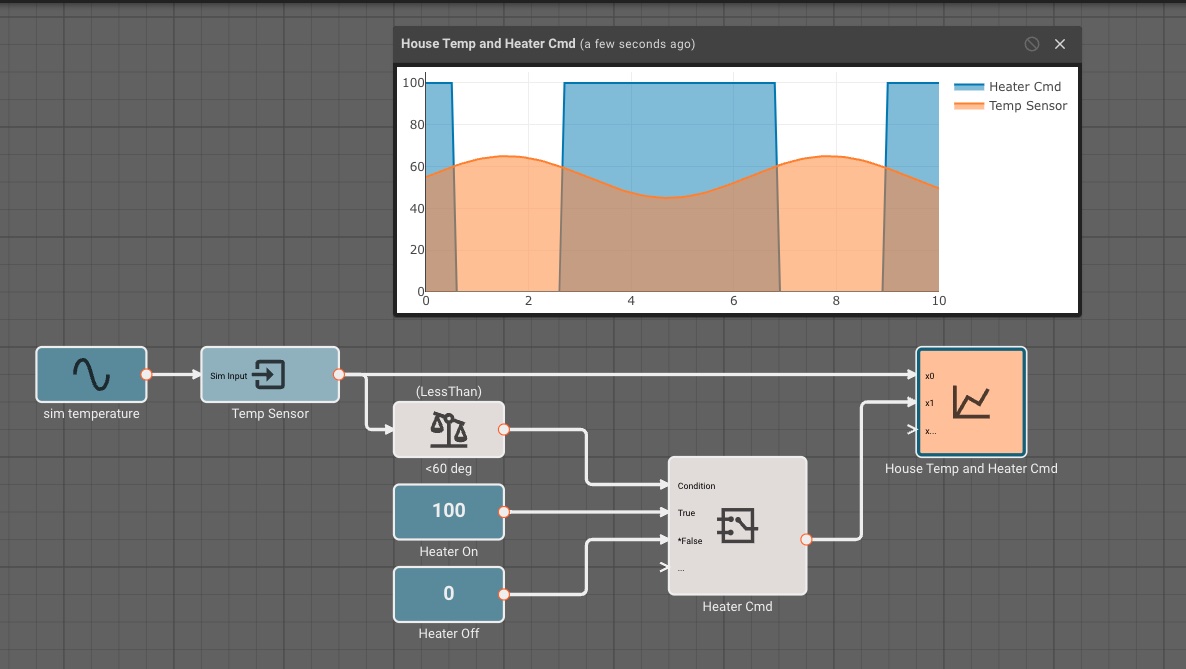
One drawback to the Switch Block approach is that is doesn't prevent the execution of any sequence of blocks. All possible outputs get computed, but only one gets passed through.
If you only want to execute a sequence of code if some condition is True, you need to use Conditionally Executed Components. To do this, simply create a Component, go to its settings, and set its Execution Method to Conditional. You can learn more about conditional execution and other execution methods in the Component Execution Methods doc.
Component Execution Methods
By default, a component in Pictorus will run whenever its parent component or state runs. However, the platform also supports the ability to run a component (and in turn its children) based on a desired update rate or conditionally based on a signal. These different execution methods allow components to run at varying rates across the entire model, or only run conditionally based on the state of the system. On timesteps that a component doesn't run it will not respond to changes to its inputs, and its outputs will be set to whatever value they had the last time it was run.
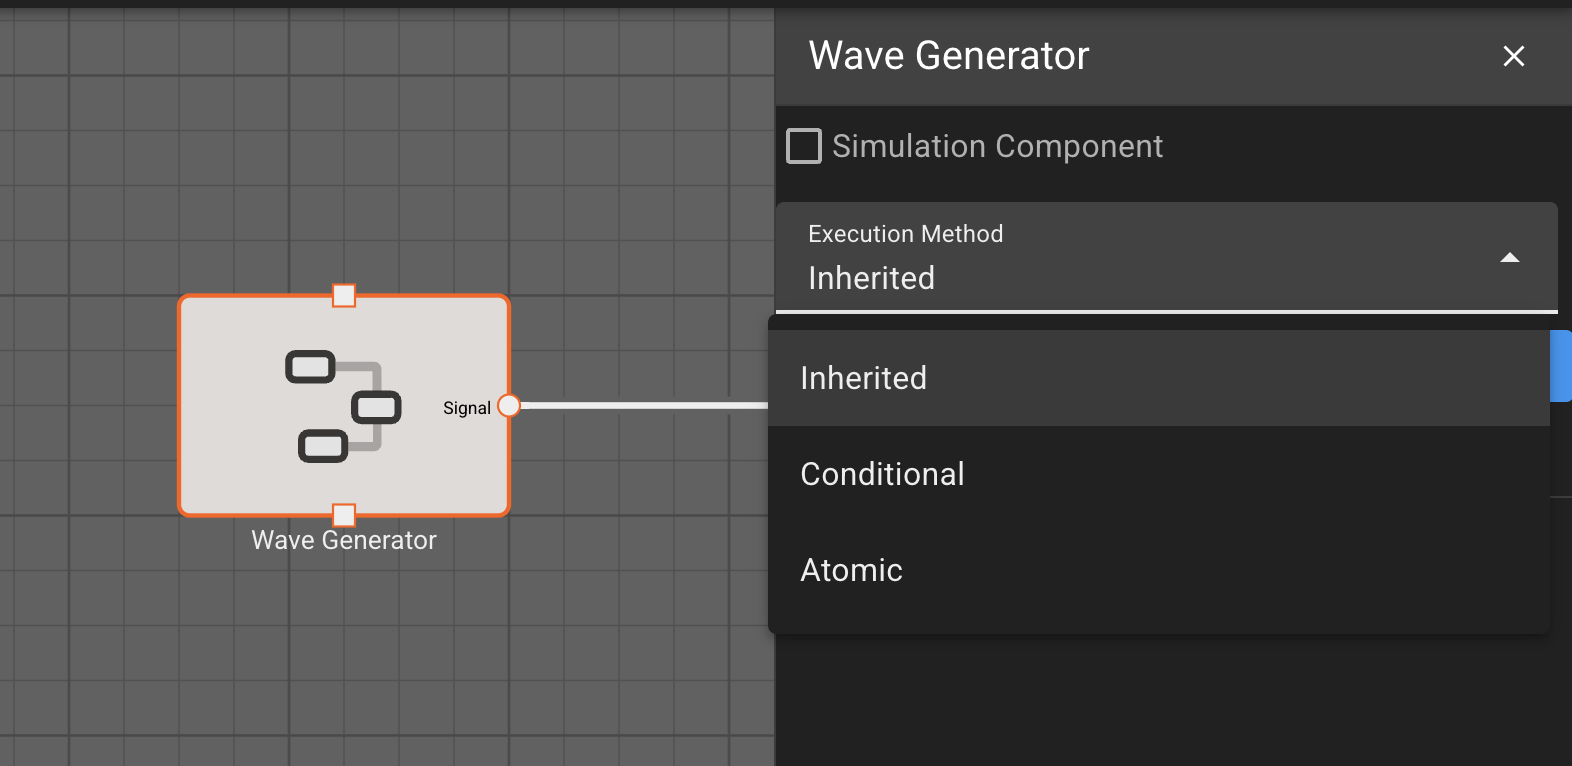
A component's execution method can be set in the component settings pane. You can get to this view by right-clicking on a component and selecting "Settings". Within this pane there is an "Execution Method" dropdown with three choices; Inherited, Atomic, and Conditional.
Inherited
This is the default execution method for a component when it is created. With this setting the component will run whenever its parent runs. That parent may be another component or it could be a state.
Atomic
When execution method it set to atomic a visual indicator in the form of a small stop watch icon will appear on the top left of the component. Additionally, a second input box will appear in the settings for the desired timestep of the component. The timestep set here will be the effective timestep that the component is run at. This timestep has a few limitations, it must be greater than the timestep that its parent is running at, and it must be an integer multiple of its parent's timestep.
For example, if you had a model set to run with a 0.1 second timestep you could place a component at the top level of the model and set it to run at a timestep of 0.5 seconds. This would have the result of executing that component once every 5 timesteps of the model as a whole. In this example one could not set a timestep of less than 0.1 since the component cannot run faster than its parent. Additionally, it could not be set with a timestep of 0.25 seconds since that does not divide evenly into the parent's timestep.
Atomic execution can be used to, for example, run a different parts of a controller at different rates. A specific example would be updating a Kalman Filter at a slower rate than a PID controller that is actuating control surfaces on a UAV.
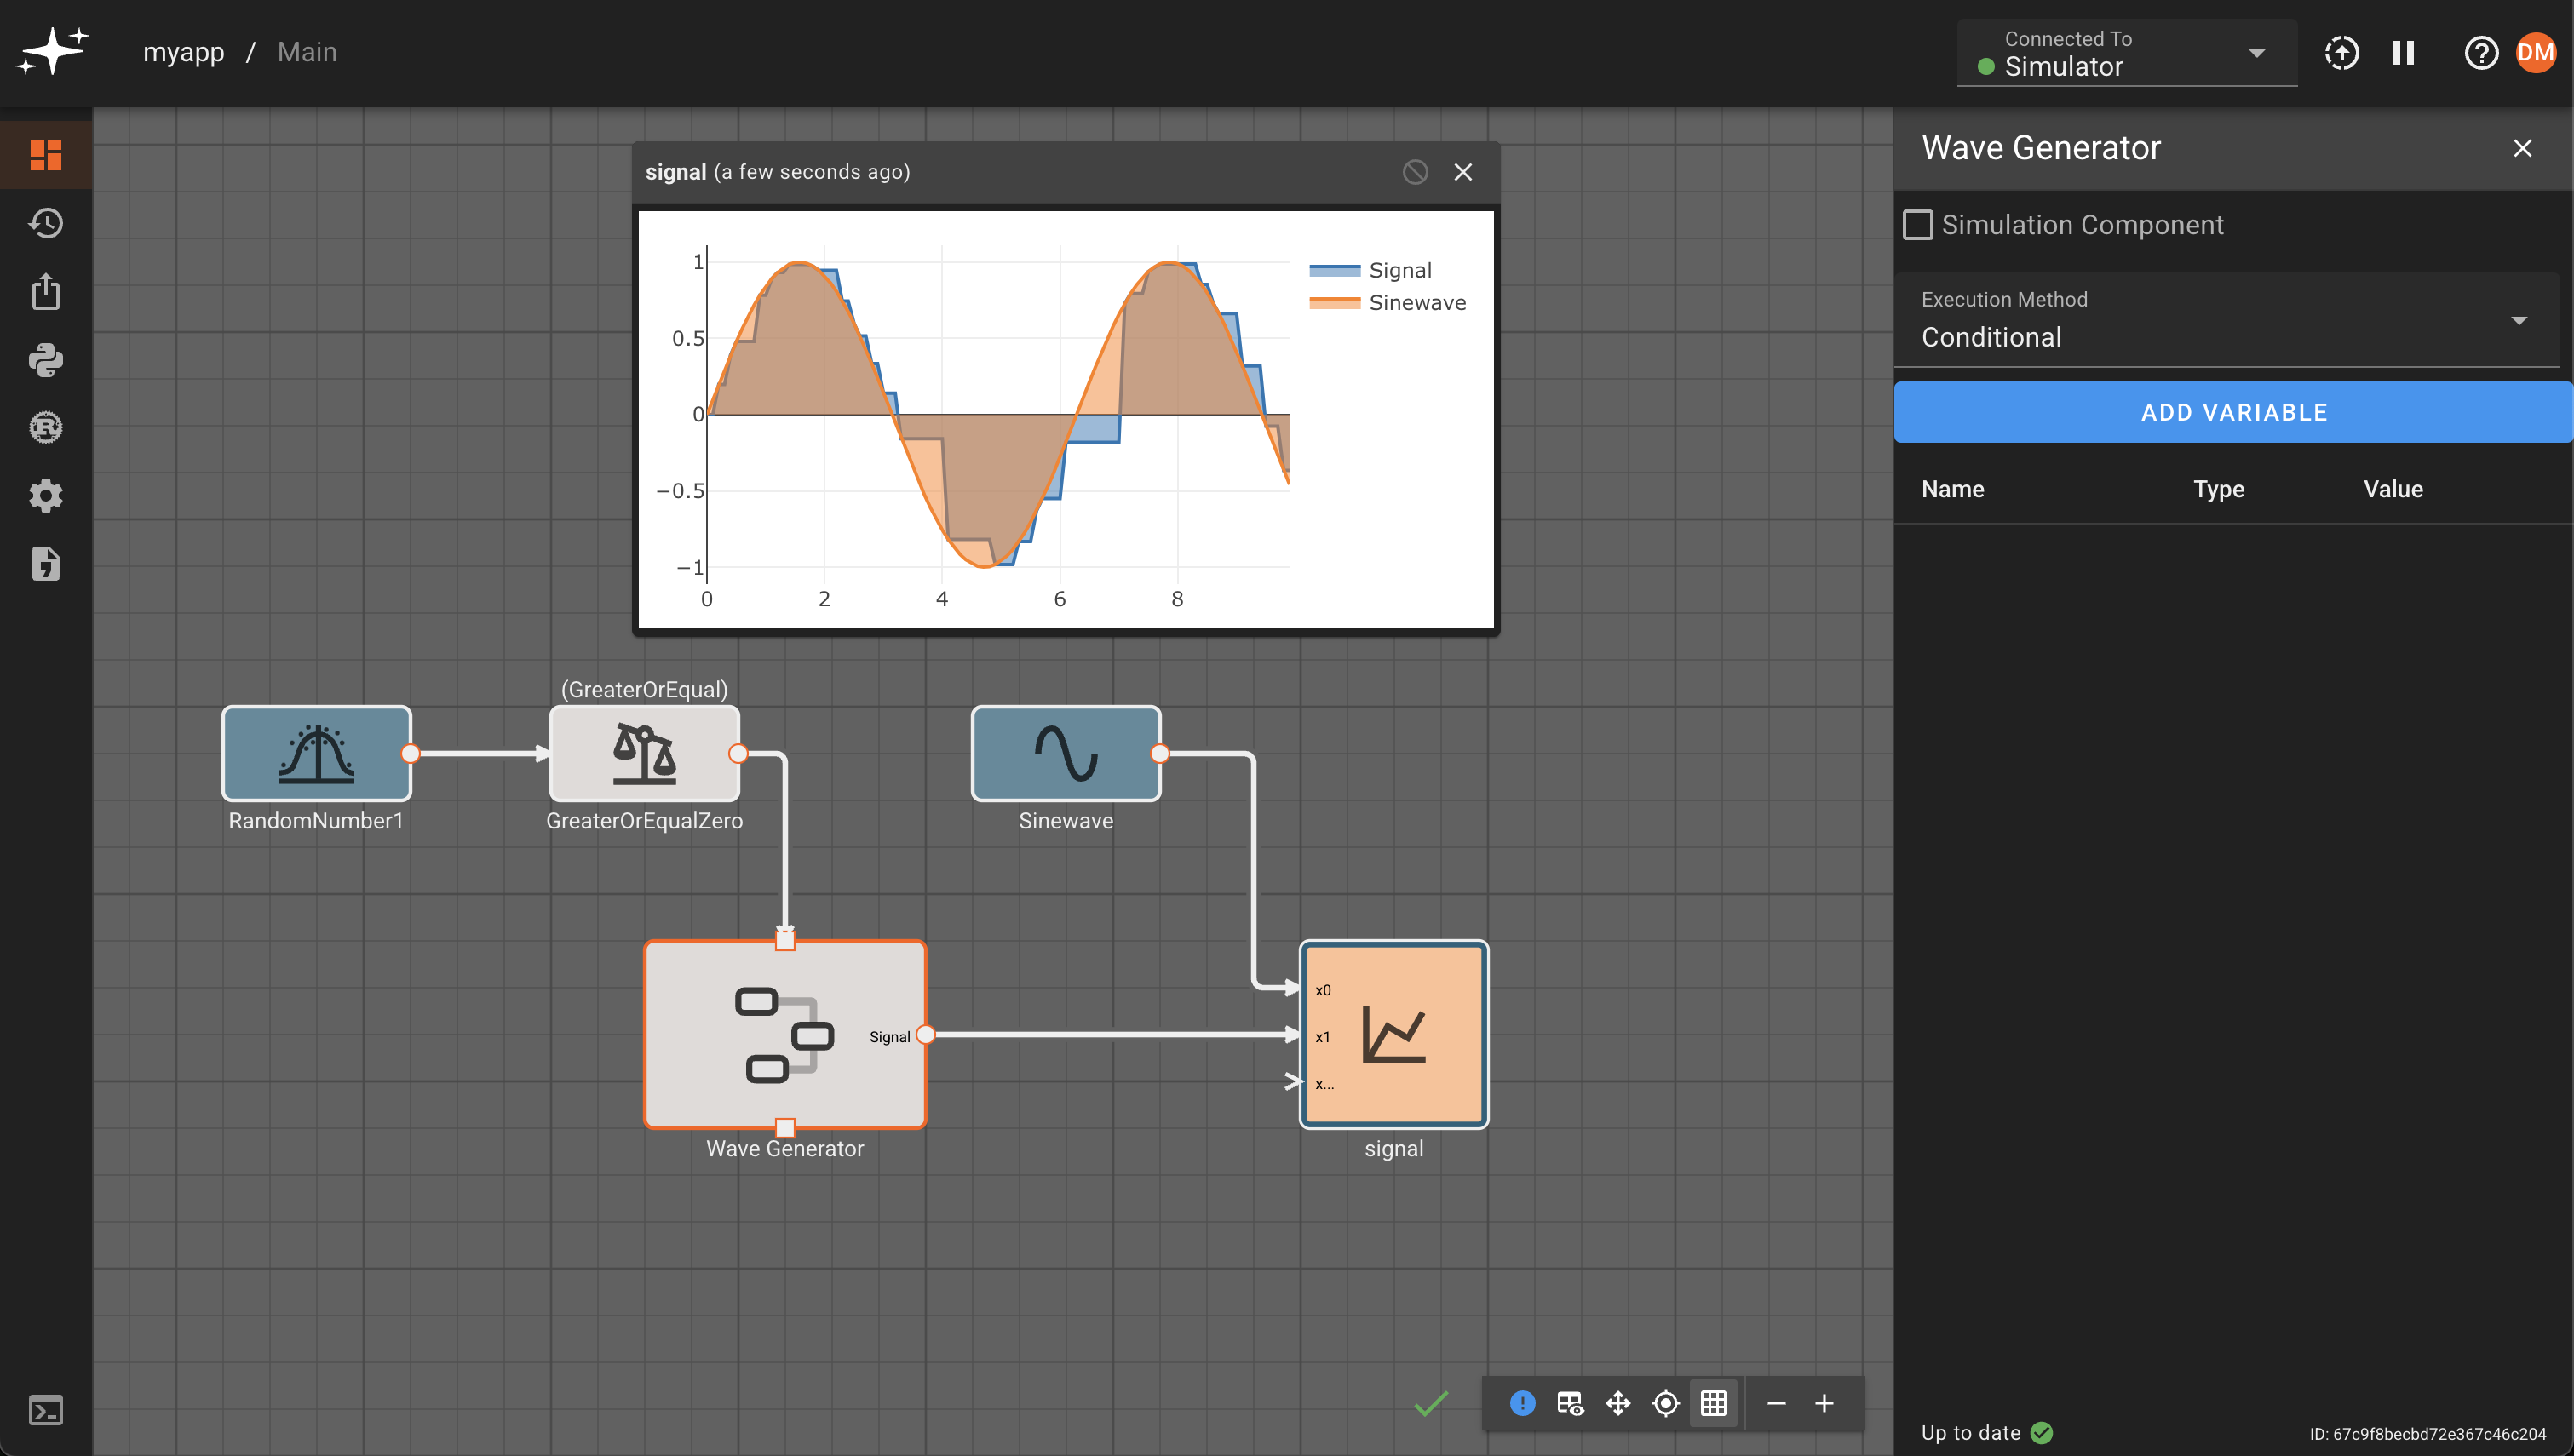
Conditional
Conditional execution allows the execution of a component and its children to be controlled by the output of other blocks in the model. When this option is set a new input will appear on top of the component. When a signal is connected to that input that block will only run in a given timestep if that signal evaluates as True. If the signal is False the component will not run.
Conditional execution can be very useful, both as a regulating mechanism (i.e. enforcing different update rates for different parts of the app), as well as for preventing execution of dangerous code (divide by zero, etc).
Working with Bytes and Strings
Generally the data we're working with in Pictorus apps is numeric, either as scalars or vectors. However, in some cases it's necessary to represent data as bytes. This is especially useful for receiving data from an external source, and for publishing data outside of an app. In these cases we first need to convert the data to a common format that can be understood by both the publisher and the receiver. For instance, we might run an app that calculates a desired position state, formats it as a bytes representation of a JSON object, and then publishes that data over UDP for a separate process to consume and act upon.
Strings vs. Bytes
In the above example, people often think of the formatted data as a String. In Pictorus, we don't distinguish between strings and bytes, as is common in many programming languages. All data that is received by an Input Block or published by an Output Block is represented as bytes, which is just an vector of 8-bit values. A String, on the otherhand, is a specific interpretation of bytes that conforms to a standard such as UTF-8. These can be represented as bytes in an app, but take on no special meaning.
For example, the string "Hello World" is just the UTF-8 interpretation of the following byte vector:
[72, 101, 108, 108, 111, 32, 87, 111, 114, 108, 100]
It's also common to see byte arrays expressed in hex notation:
[0x48, 0x65, 0x6c, 0x6c, 0x6f, 0x20, 0x57, 0x6f, 0x72, 0x6c, 0x64]
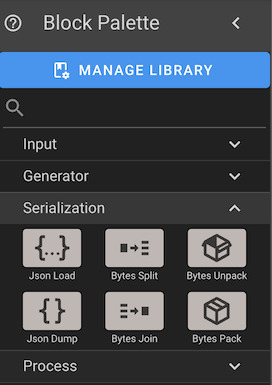
Serializing and Deserializing
The process of converting data into bytes that can be used outside of a program is commonly referred to as serialization. Converesely, interpreting bytes into a known format is often called deserialization. Blocks used for these operations can be found under the "Serialization" tab in the block palette.
Receiving data as bytes
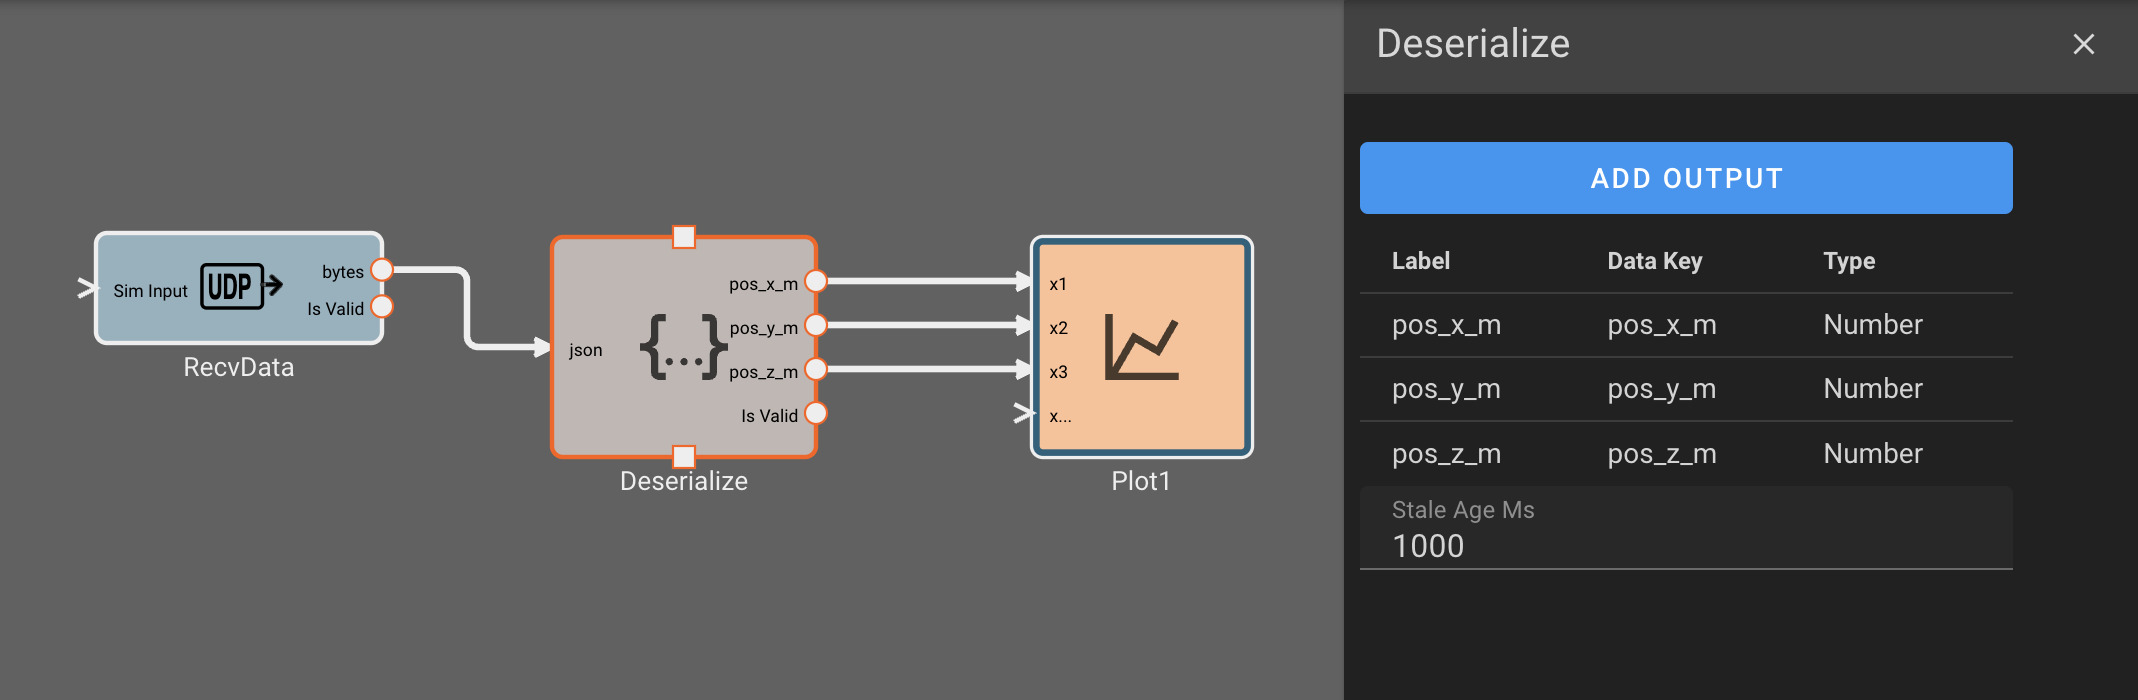
You can receive data from an external source in your apps using any of the supported Input Blocks. This data could be in any number of formats, so you need to tell the app how to interpret it and parse it into useful numeric data that can be handled by other blocks and components. Going back to our JSON example, we might have an app that expects to receive an x/y/z position in meters from an external source, and then command a robot to try and move to that position. One way we could represent this data is with the following JSON object:
{
  pos_x_m: 1.0,
  pos_y_m: 2.0,
  pos_z_m: 3.0,
}
To receive this data in our app, we could do the following:
- Create a UDP Receive Block that binds to a port that another app can publish to.
- Connect a JSON Load block to the output of our UDP Receive block.
- Configure the JSON Load block to extract
pos_x_m,pos_y_m, andpos_z_minto 3 different numeric outputs. - We can now use our position data for further calculations!
Publishing data as bytes
Publishing data from an app is essentially the opposite process as receiving it. Given some numeric fields we want to send out, we first need to convert our data into a format that an external consumer can understand. If we wanted to implement the publisher app in our UDP example we would do the following:
- Create a signal for each of our desired values (x, y, and z position).
- Create a JSON Dump block and connect our 3 position signals as inputs.
- Update the JSON Dump block settings to have the correct object key names for each corresponding signal.
- Create a UDP Transmit block that publishes to the receiver address, and, finally, connect the JSON Dump output as an input to this block.

Tips for working with byte data
Working with byte data in Pictorus is very similar to working with numeric data. However, there are a few helpful tips that can simplify things.
Debugging bytes
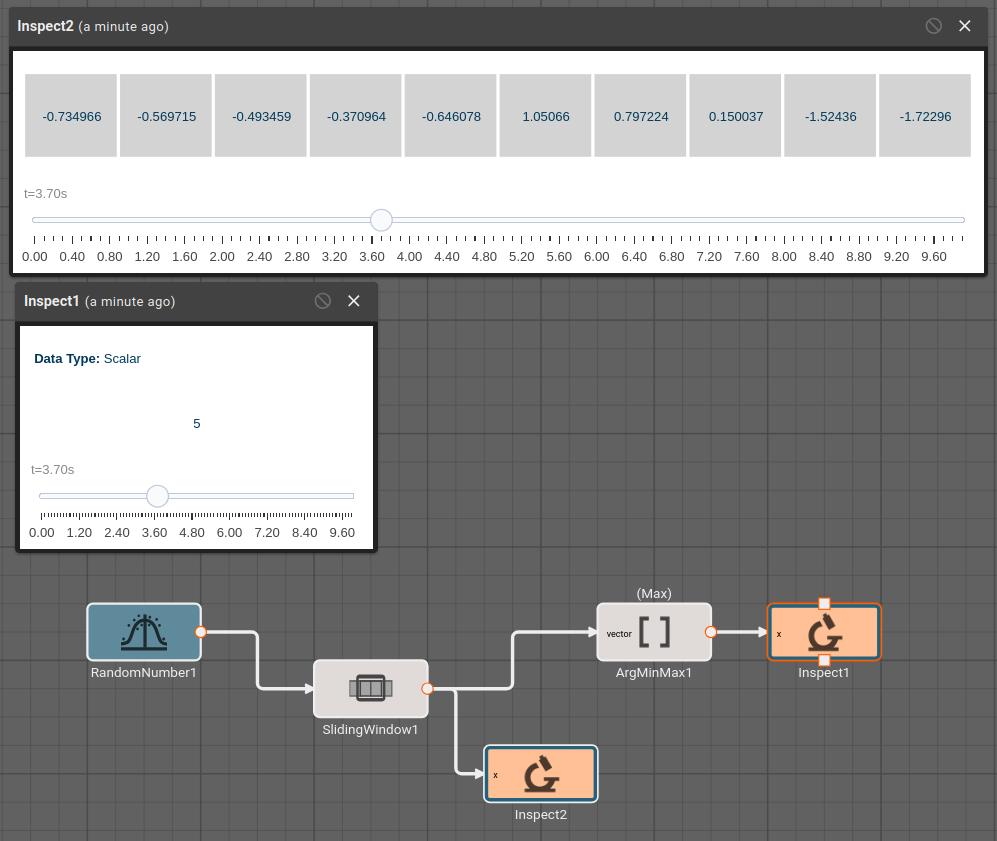
Plot blocks are commonly used for debugging numeric data in apps. However, they aren't particularly useful for displaying byte data. Instead, you can use the Inspect Block, which allows you to visualize a byte array at different points in time. Inspect Blocks will attempt to render data as a string, an array of bytes, and an array of hex values, so you can quickly understand what your data looks like in a few common formats.

Simulating bytes
It's often helpful to be able to simulate input data, so you can quickly validate your deserialization steps and downstream calculations. Luckily this is easy to do in Pictorus!
- Simulate your desired data by connecting blocks as usual.
- Use the desired "Serialization" blocks to convert your sim data into the correct bytes representation.
- Connect your serialized bytes signal to the "Sim Input" port of your input block
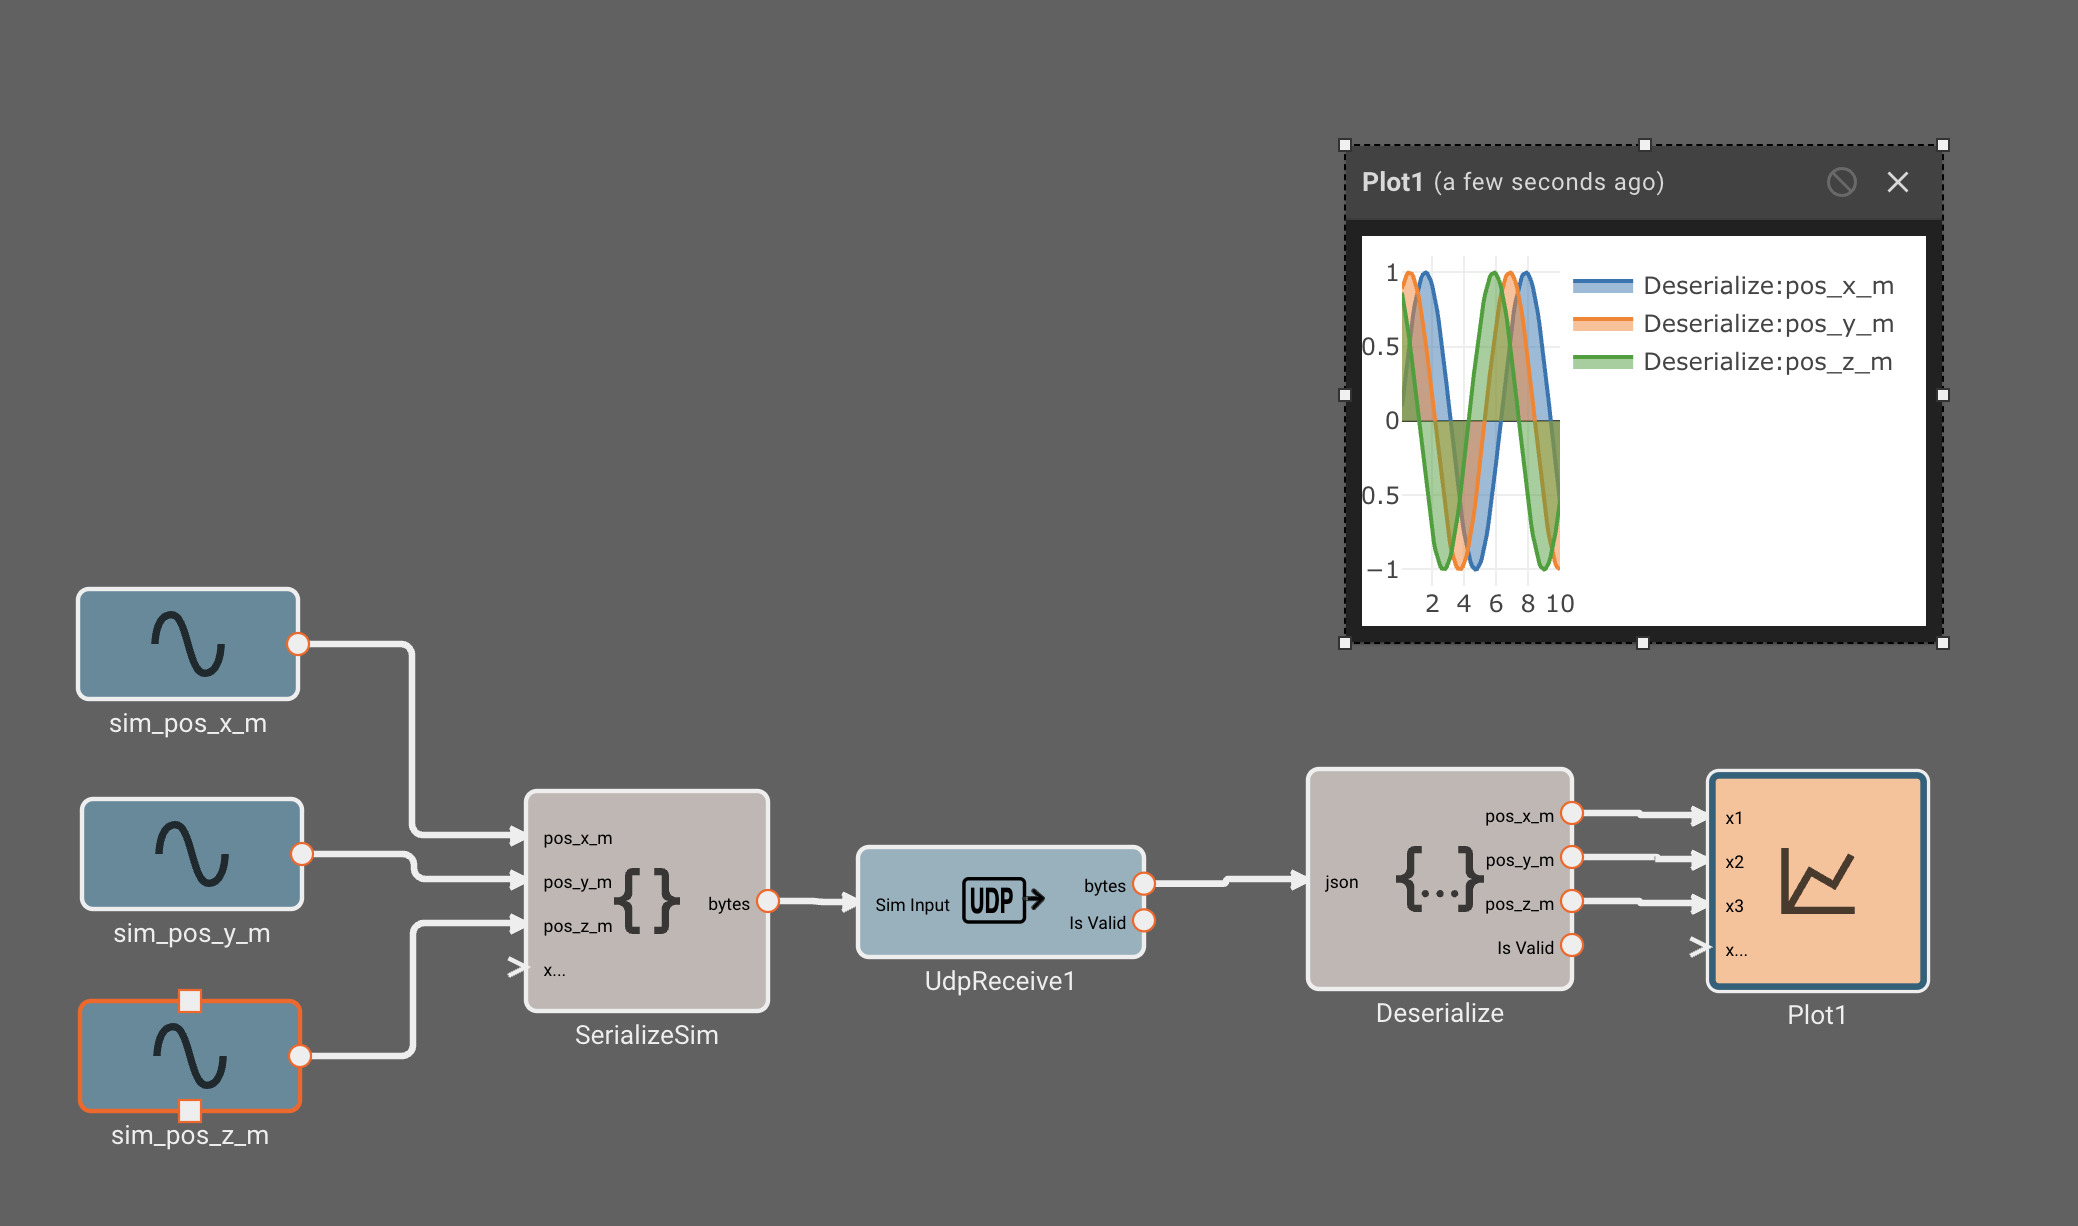
Any blocks that are used for simulation will be removed when compiling for a hardware target, so they won't affect your real builds.
It's common to create multiple apps in Pictorus that communicate with each other by serializing/deserializing data sent across a network/file protocol. If your serialization strategy is complex, you can make things easier by converting the relevant blocks into a reusable component. This component can then be used by your publisher app, and also pulled into your receiver app for serializing sim data. This ensures your apps can communicate with each other successfully using whatever format you choose for your data!
Working with complex protocols
Having to explicitly convert all byte data into numeric data and vice-versa can seem a bit complicated, but this approach allows us to handle a wide variety of serialization strategies. For instance, you might have a JSON object that contains a field of comma-delimited numbers. Because most serialization blocks allow you to output data as bytes, they can be easily chained together to handle nested encodings like this. In this example we would do the following:
- Connect the raw bytes signal to a JSON Load block
- Configure the JSON Load block to extract the desired key and output it as bytes
- Feed this signal into a Bytes Split Block, and configure it to grab data from the desired indices.
Commenting out Code
If you want to temporarily comment out sections of your canvas, you can do this either with hotkeys (⌘/ and ⌘.) or by right-clicking after a selection and selecting Comment Out or Uncomment.
Commented out sections will not be included in generated code, and may orphan unstream or downstream sections of code connected to them.
Block Execution Order, Feedback Loops, and Statefulness
Converting a control flow diagram into a sequence of discretely executed functions in code is challenging. Though the execution order may seem obvious visually, establishing the correct semantics programmatically—especially in large, complex models—is far from trivial.
 Block execution order of a nested feedback loop. Numbers in orange above each block indicate their execution order in generated code.
The primary principle governing block execution order is data dependency. A block cannot compute its output until all the blocks providing its input signals have already executed in the current simulation step. For simple feed-forward paths, where signals flow in a single direction, this naturally leads to an execution order progressing from input sources toward output sinks.
The Challenge of Feedback Loops
Complexity increases dramatically with feedback loops, also known as graph cycles. A feedback loop exists when tracing a block's input dependencies eventually leads back to that same block’s output. This creates a circular dependency where Block A requires Block B’s output, but Block B simultaneously requires Block A’s output within the same simulation step.
Resolving these circular dependencies requires “grounding” the loop with a block whose output can be determined independently of its inputs in the current time step. These are referred to as stateful blocks.
Stateful Blocks as Loop Resolvers
Stateful blocks are characterized by maintaining an internal state that persists between simulation steps. This state allows them to provide a valid output at the beginning of a simulation step before their inputs for that step have been fully computed.
Consider a simple integrator: We often want to set the Initial Condition of the integrator, so that it starts with a pre-determined output value before any computation has occurred. This makes an integrator an excellent candidate for feedback loop resolution. Its initial condition can be used by the blocks which depend on it, and then their outputs can be used to update the integrator.
For the first simulation step (t = 0), the output of a stateful block is determined by its configured Initial Condition. For all subsequent steps (t > 0), its output at the start of the step is the value its state held at the end of the previous time step (t - 1). Because this output value is available upfront, the computation within the loop can begin, effectively “breaking” the circular dependency for the current step.
Stateful vs. Stateless Blocks
All blocks can be categorized as either stateful or stateless:
- A stateless block is one whose output is determined entirely by its current inputs and carries no internal state that influences the computation across time steps. A trigonometric function like
cosine(x)is a prime example; its output depends only on the current inputx. - A stateful block, conversely, stores state between execution steps (e.g., the current value of an integration or the previous input value), and its output depends on both current inputs and its internal state.
Stateful blocks are crucial for enabling the execution of feedback loops. If Pictorus detects a cyclical feedback loop in your model that does not contain at least one stateful block to provide a starting point, an error will be raised identifying the blocks involved and indicating the need to insert a stateful element to resolve the dependency.
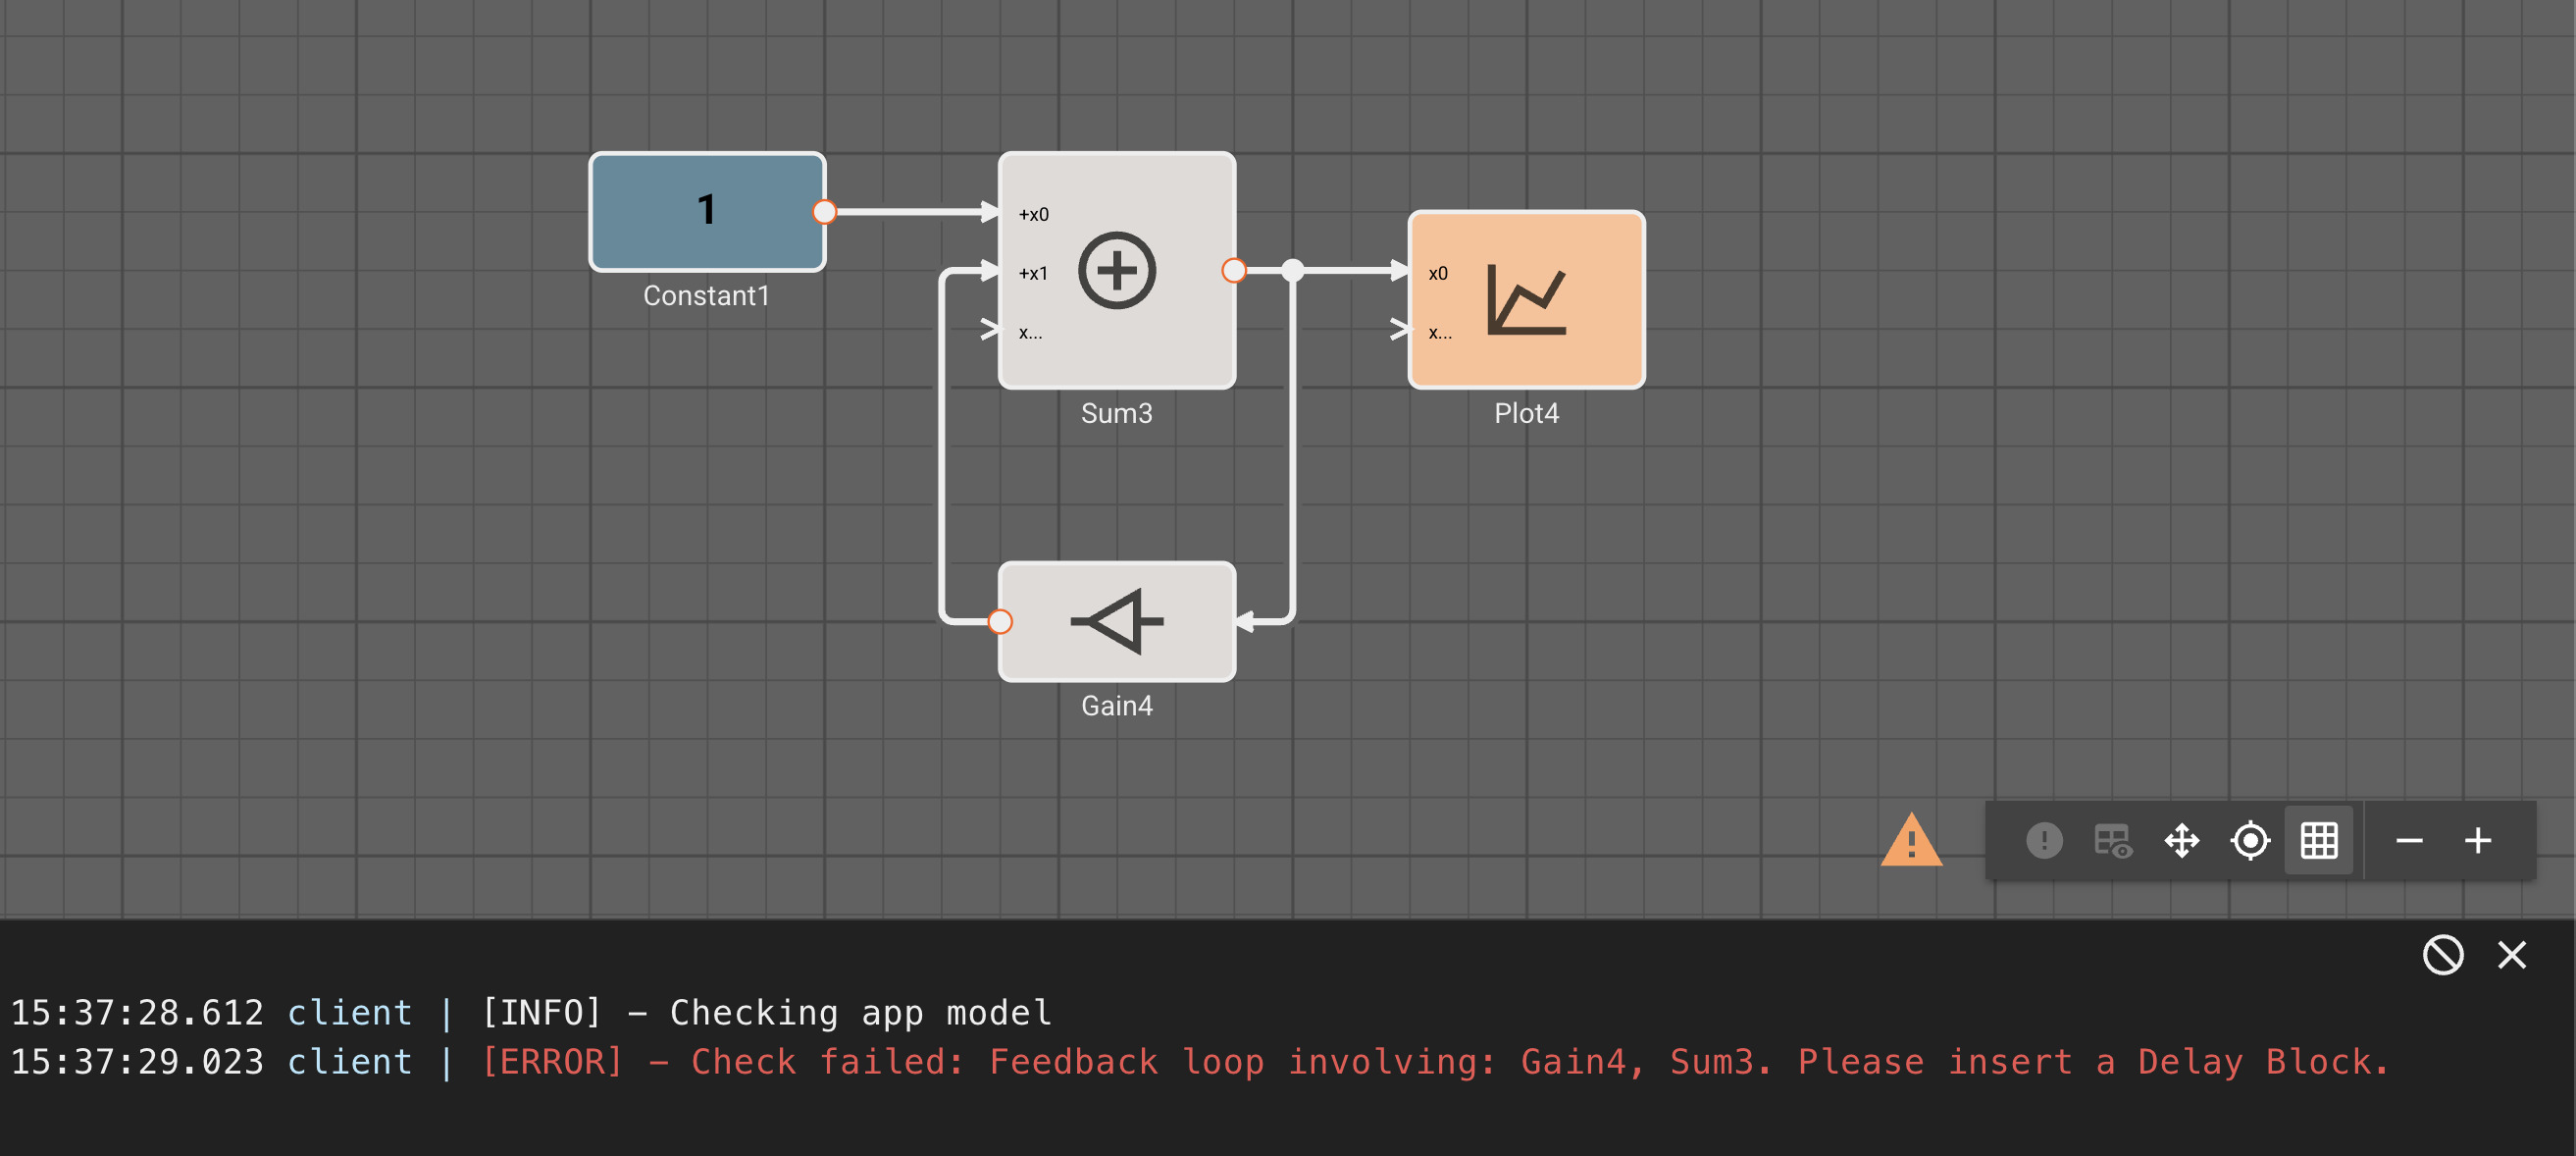 Errors tell you exactly which blocks are involved in a feedback loop and must be resolved with a stateful block.
The Role of Delay Blocks
Delay blocks, particularly unit delays (delays of exactly one timestep), are a convenient and idiomatic choice for resolving feedback loops when no other stateful block naturally exists within the cycle. A unit delay block introduces minimal computational complexity other than shifting the signal in time. Since stateful blocks are prioritized for early execution within a loop, the delay block’s output at the start of the step is simply the value from the loop in the previous iteration. On the first iteration, its output is its initial condition. This behavior provides the necessary causal break without altering the fundamental dynamics of the loop, making it the standard tool for loop resolution.
Handling Complex and Nested Loops
As illustrated in the title graphic, complex models often feature nested feedback loops and intertwined feed-forward paths. Pictorus employs a sophisticated algorithm that analyzes all signal paths, identifies dependencies, and locates stateful blocks to determine a valid, causally correct execution order for the entire model.
While the algorithm ensures that feedback loops are resolvable using stateful blocks, the presence of multiple stateful blocks within a single loop introduces additional considerations. The solver must still determine an execution order that respects dependencies between the stateful elements themselves. Improper placement of multiple stateful blocks can inadvertently introduce unintended delays into the feedback path, potentially leading to unexpected or undesirable system behavior.
Pictorus takes care to minimize solver-induced delays, prioritizing an order that relies on the user’s explicit stateful elements. However, understanding the determined execution order is key for debugging. If certain portions of your control diagram exhibit odd output behavior, it is possible that the arrangement of stateful blocks is causing unintended delays. Use the "Show Issues" feature in the UI to manually inspect detected loops and the calculated block execution order within them, helping you identify placements that could be rewritten to better align with your intended system dynamics.
Light Controller Example
Here is a simple application to control a light. The light is controlled by a switch and it can be bright, dim, or off. Diming is accomplished by rapidly turning the light on and off.
The switch output is represented by inputs x0 and x1 entering from the left. The User Setting (Sum) block combines them to produce a value of two, one, or zero. A signal determining whether the light is on or off exits on the lower left. The signal on the upper left is for inspecting the input and can be ignored.
The User Setting is encoded thus,
| Setting | Value |
|---|---|
| Bright | 2 |
| Dim | 1 |
| Off | 0 |
The User Setting block supplies the Condition input to the Frequency Selector (Switch) block, which selects one of its other inputs to pass to its output.
The input to the application is simulated for ten seconds. The light is initially off, after two seconds, it is dim, and after five seconds, it is bright. The simulated input can be derived from the application time.
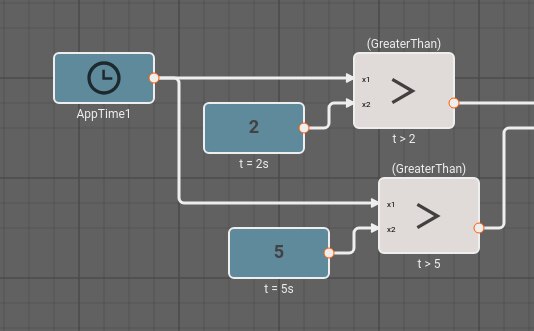
The idea is that the switch is wired so that when the dim setting is selected, the switch has one output high, and the bright setting has outputs both high. The sum of the user input over time is shown in the plot below.
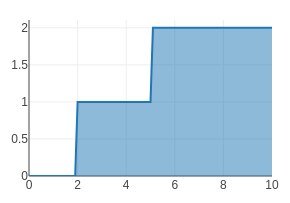
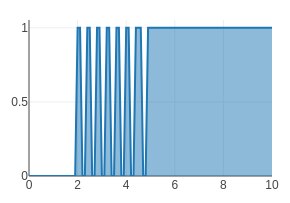
To control the brightness the application selects one of three signals values. The bright signal is always on, the dim signal is on half the time, and the off signal is, well, always off. For illustration, the dimming frequency is low, so there is no need to zoom in on the signal to see it pulse on and off.
Notice how the output is initially off, from two seconds to five seconds it pulses on and off, and after five seconds, it is solidly on.
In a real application, the inputs would come from GPIO Input blocks, and the output would go to a GPIO Output block. The output would control a solid-state relay to control the lamp. The square wave would have a frequency high enough that the flickering was imperceptable. Alternatively, the inputs could come from bus protocol block such as I2C Input or CAN Receive; and a PWM could be used instead of the square wave.
Tips and Tricks
A compendium of little tips and tricks to make diagramming easier!
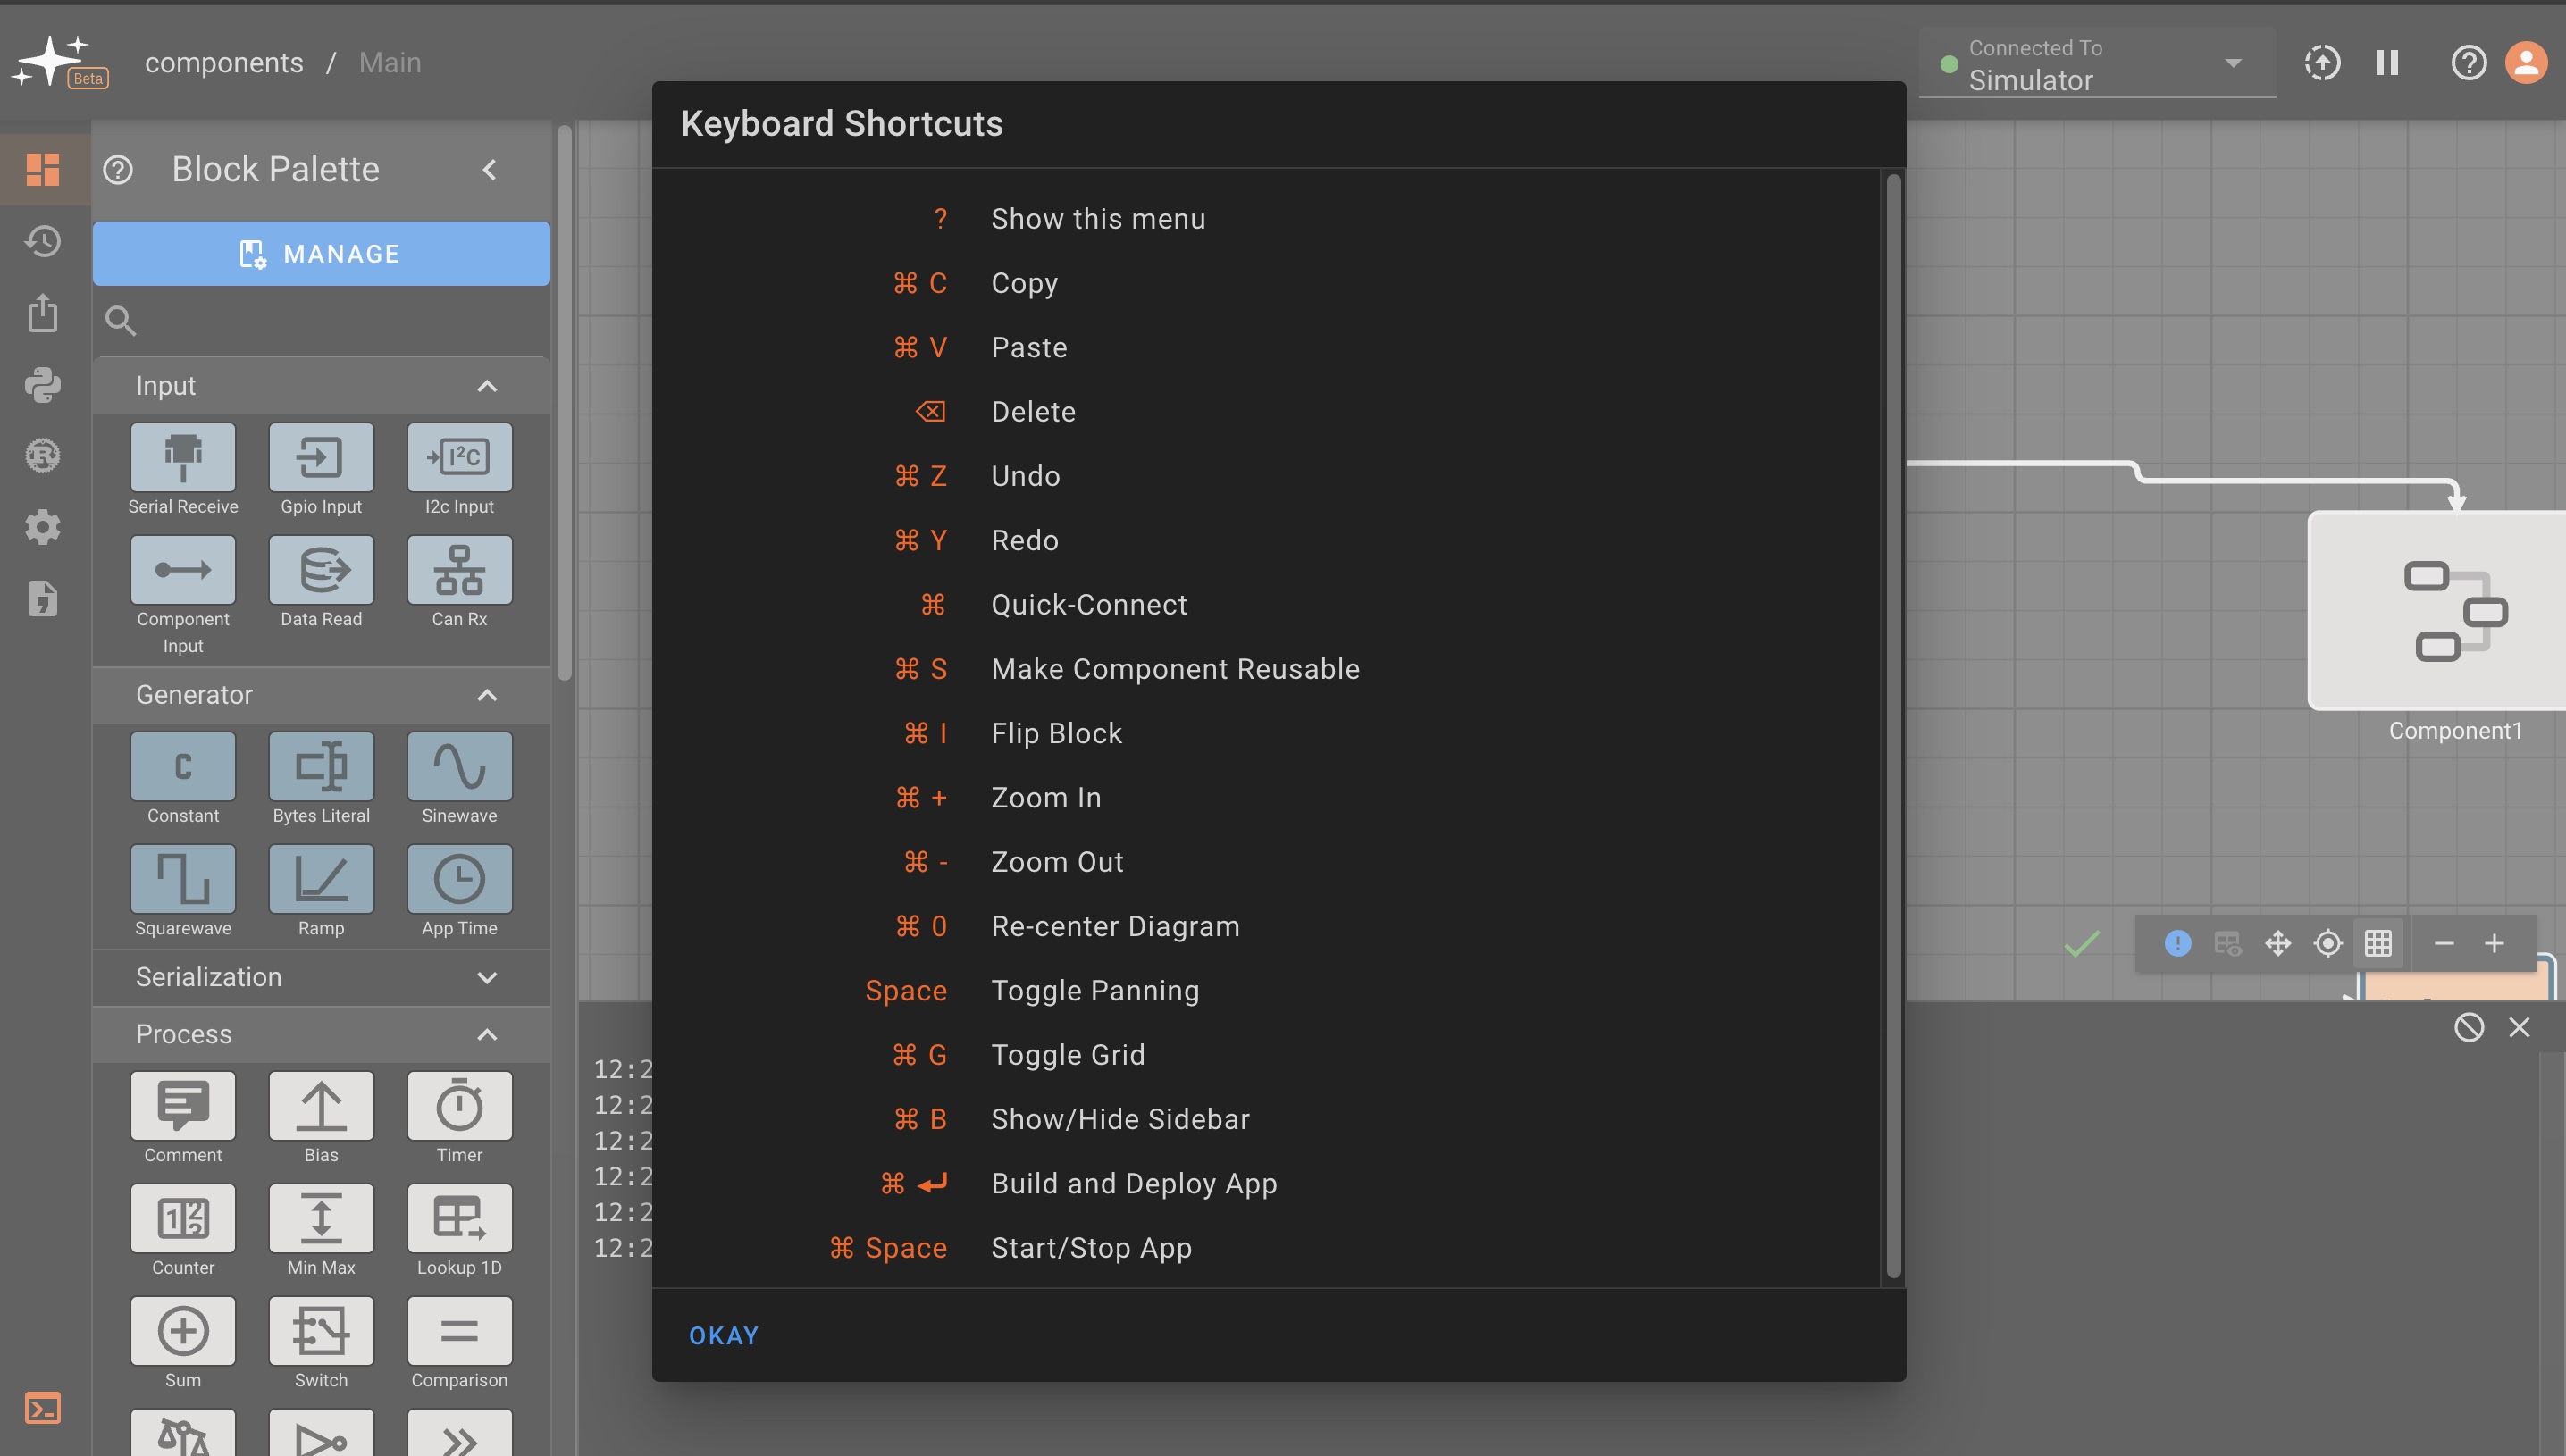
Hotkeys
We'd like to greatly expand our list of hotkeys, to eventually make a dev experience that requires little or no mouse clicking. For now, you can access the list of available hotkeys using Shift+?:
Block connection shortcuts
To quickly connect blocks, select the source block, hover near the input port to connect to, and press cmd or ctrl to make the connection:
You can also make connections in reverse, or to a shared edge as shown below:
Search for blocks
To find a specific block in your app, simply ctl + f and search by name. Clicking on an option will take you to the block's location in your diagram, regardless of where it may be nested.
Feedback loop to self
If you want to feed a block back to itself, you currently need to inject an intermediate block. The Gain block is ideal, because by default it applies no transformation to the input signal:
Flipping block horizontally
As seen with the Gain block in the feedback animation above, you can flip a block horizontally with ctl+i. You can also do this from the right-click menu. This is helpful for keeping feedback loops tidy.
Debugging Guide
In this section, we'll cover some debugging suggestions that can help track down the source of issues in an app.
Tracing Broken and Orphaned Blocks
Pictorus is constantly re-evaluating your diagram to see what it can generate code for, and what it cannot. You can highlight issues by clicking the blue exclamation mark in the bottom-right. It will highlight any Broken (blocks with bad parameters or missing inputs) in red, and any Orphaned blocks (blocks affected by a Broken block) in orange.
In the example above, we could see that the Product block was broken, since multiplication requires two inputs. By attaching another signal to it, the issue is resolved and the App compiles. By removing an input to the Sum block, new issues are reported and we can quickly identify them.
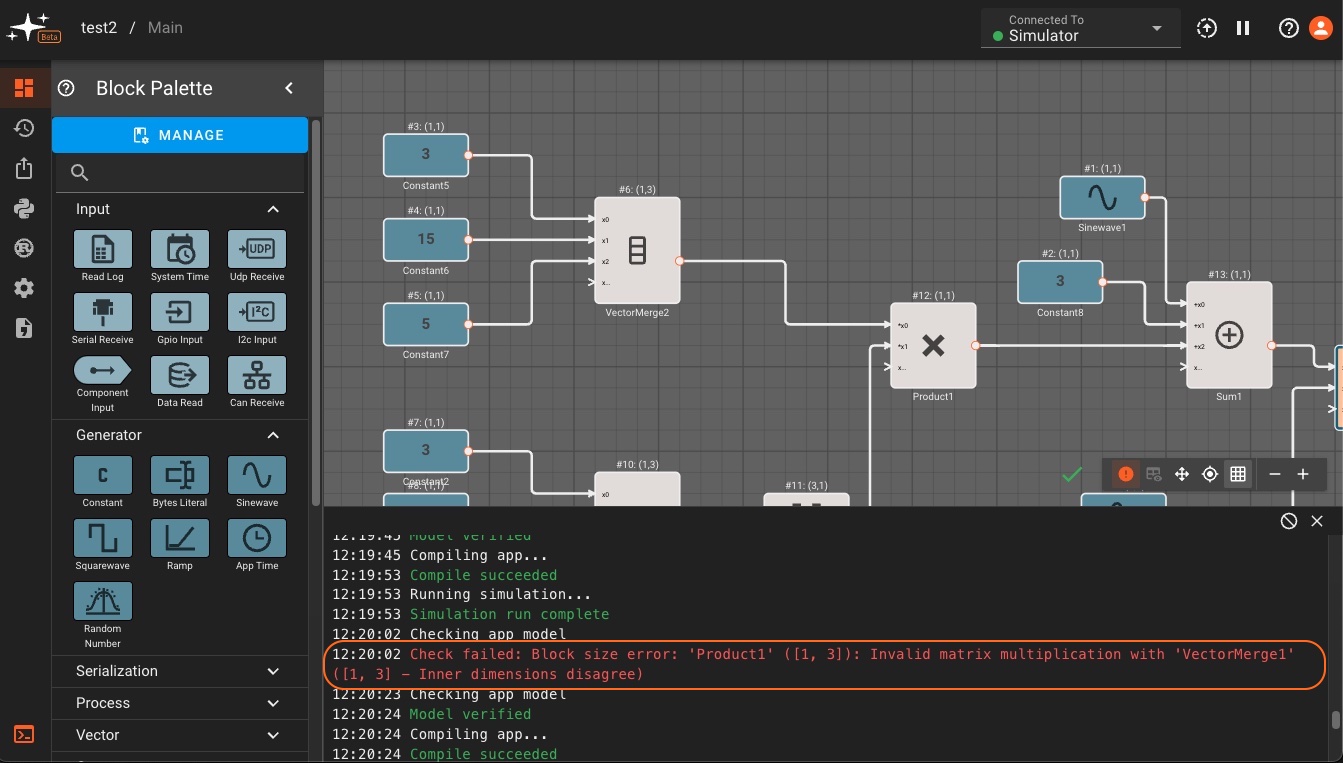
Error Messages
Certain blocks also have specific checks that run before an app can be compiled. If there is an issue that causes these checks to fail, a build error message will appear in red at the top of the canvas. We can see an example of this below, where a matrix multiplication block sees an error in the sizes of its input matrices. Errors will usually show the block name and size to help identify the source of the issue. Resizing the second input with a Vector Reshape block clears the error in this example.
Build errors will appear in the debugging terminal rather than as a banner in the canvas when the terminal is viewable. Below we see that the matrix sizing error is also logged in the debug terminal.
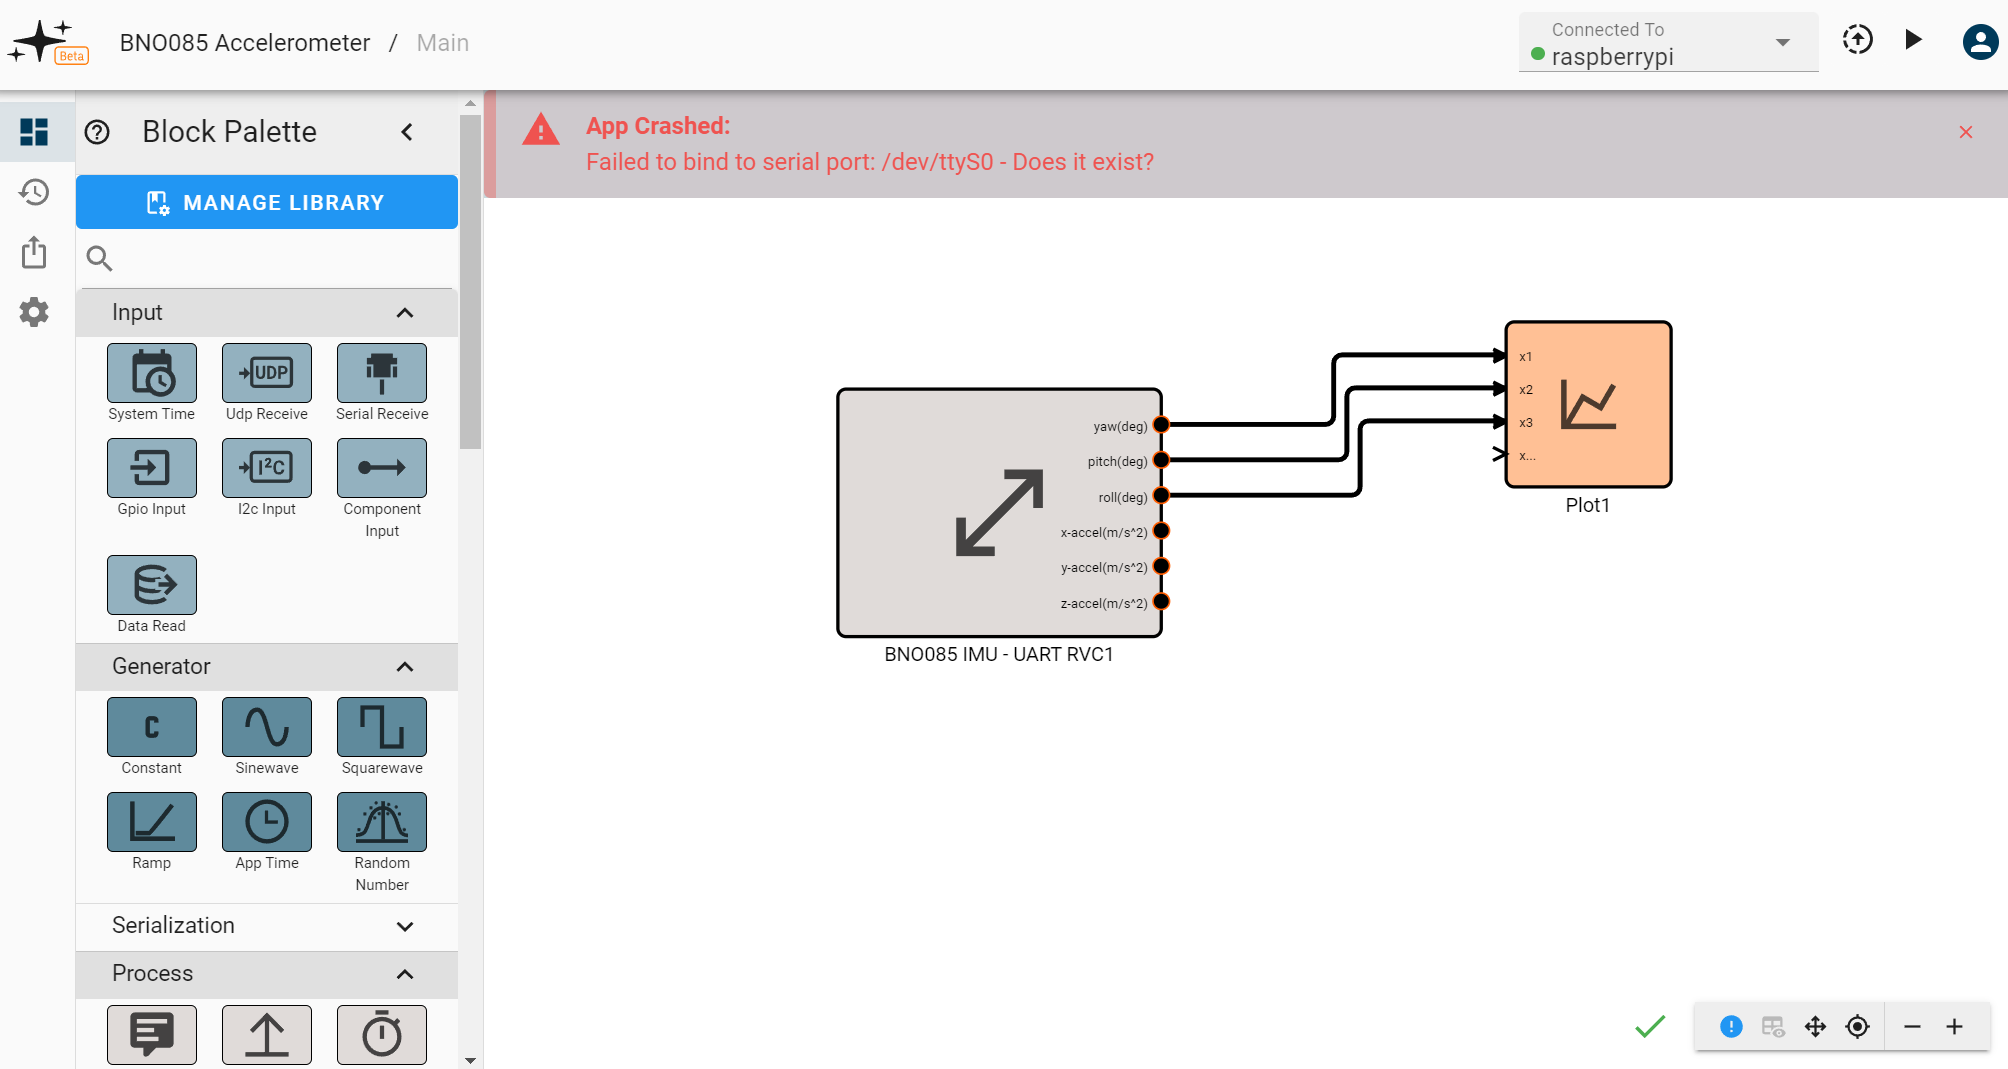
Errors that happen when an app is running will also appear at the top of the canvas and in the debug. Some examples of these errors include a device going offline or a protocol being configured incorrectly. For instance, here we see an error for a nonexistent serial port on a Raspberry Pi:
Sizing and Execution Order Hints
When an app is successfully compiled, Pictorus can also display information about the flow of data in an app. Specifically, users can see the order of execution of blocks as well as the size of the output for each block. After the app builds successfully, click the blue exclamation mark (!) in the bottom left of the UI to display block flow information. The execution order (#n) and size (m,n) will appear above each block, as outlined in orange below:

Debugging Apps on a Device
General hardware debugging guidance
Before digging into our on-hardware debugging features, here is a quick reminder to consider some general hardware debugging steps when an app does not run as expected:
-
Check your wiring. Double check that your pins, ports, and connections match those configured in your diagram.
-
Check the documentation. Devices often have nuanced bootup/configuration sequences, or odd timing steps that must be executed precisely before the device will communicate properly.
-
Check all required protocols are enabled. Some protocols on some devices (like I2C on RaspberryPi) have to be manually enabled within the OS. Check if that is the case.
-
Does it work with a trusted Python script (or any other tool)? Many device manufacturers publish simple scripts online that can verify a device is working properly.
-
When in doubt, power-cycle! The old reliable medicine for a misbehaving computer.
For devices which are online but behaving oddly, consider the following software debugging steps:
Viewing App Logs
After SSHing into your device. You should be able to see logs from the app and device manager using journalctl.
- To see all logs:
journalctl -u pictorus - To see recent log output in real time
journalctl -u pictorus -f
These logs may reveal some telling errors, especially if the app is crashing or failing to initialize properly.
Running the app manually
You can also run an app outside of the device manager and manually pass in flags to make debugging easier.
- First make sure that the app is not running to avoid any resource conflicts.
- You can do this by pausing the app from the UI, or by running
sudo systemctl stop pictorusto kill the device manager and any associated processes. If you kill the app manager, make sure to start it when you're finished:sudo systemctl start pictorus.
- You can do this by pausing the app from the UI, or by running
- You can now run the installed app manually by running
sudo /root/.pictorus/device_manager/apps/pictorus_managed_app
Debug logging
You can add the flag LOG_LEVEL=debug to print out extra information, including the value of each block at every time step. Warning: This generates a lot of verbose output, and can affect the performance of apps.
sudo LOG_LEVEL=debug /root/.pictorus/device_manager/apps/pictorus_managed_app
Recording data to a CSV
You can have the app output block values to a CSV file by setting APP_DATA_LOG_RATE_HZ=<rate_hz>, where the specified number is the maximum rate in Hz that the data will be logged. Data will be output to a file named diagram_output.csv in your current directory.
sudo APP_DATA_LOG_RATE_HZ=1 /root/.pictorus/device_manager/apps/pictorus_managed_app- This will only record data from blocks connected to a diagram output (such as plots or network/file IO blocks), so you will need to connect any blocks you're interested in to a
Plotblock.
Overriding block parameters
You can override parameters for any block in the diagram using environment variables. This can be done by locating the block ID (found in the lower right-hand corner of a block's setting panel),
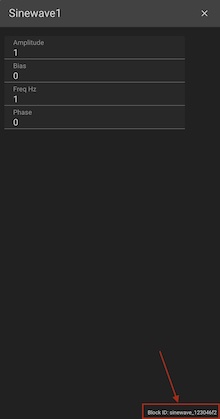
and then appending the name of the param you want to override. For instance: if I wanted to set the Amplitude of a block with ID = sinewave_123 to 42, I would add the flag SINEWAVE_123_AMPLITUDE=42 (note this must be all caps!) to the run command.
sudo SINEWAVE_123_AMPLITUDE=42 /root/.pictorus/device_manager/apps/pictorus_managed_app
Environment variables
There are other environment variables your App will respond to. Below is a list of them:
- APP_DATA_LOG_RATE_HZ (default = 0): Sets the rate, in hertz (times per second), at which output data is logged to file. If the rate is 0 (as it is by default), no data output file will be created. An App cannot publish faster than its fundamental update rate (specified in browser).
- APP_RUN_PATH (default = ""): The run path sets the local path where any assets generated by the app (i.e. the data log) will be stored.
- APP_TRANSMIT_ENABLED (default = True): Enables/Disables any communication with hardware and protocols. When running in Simulation mode, for example, this prevents apps from attempting to communicate with non-existent hardware.
- APP_PUBLISH_SOCKET (default = ""): Sets the UDP socket for communication with the Pictorus Device Manager.
- LOG_LEVEL (default =
INFO): Sets the logging level. Options are currentlyINFOandDEBUG. Info level shows very little logging, but will capture any major failure messages. Debug level dumps every single block’s value at every single time step. Use with caution!
Block Reference
The set of standard Pictorus blocks are divided into six categories: Input, Generator, Serialization,Process, Vector and Output.
This section contains a reference to every block available in the Pictorus block palette. Each section contains a description of the block as well as what inputs and parameters are available.
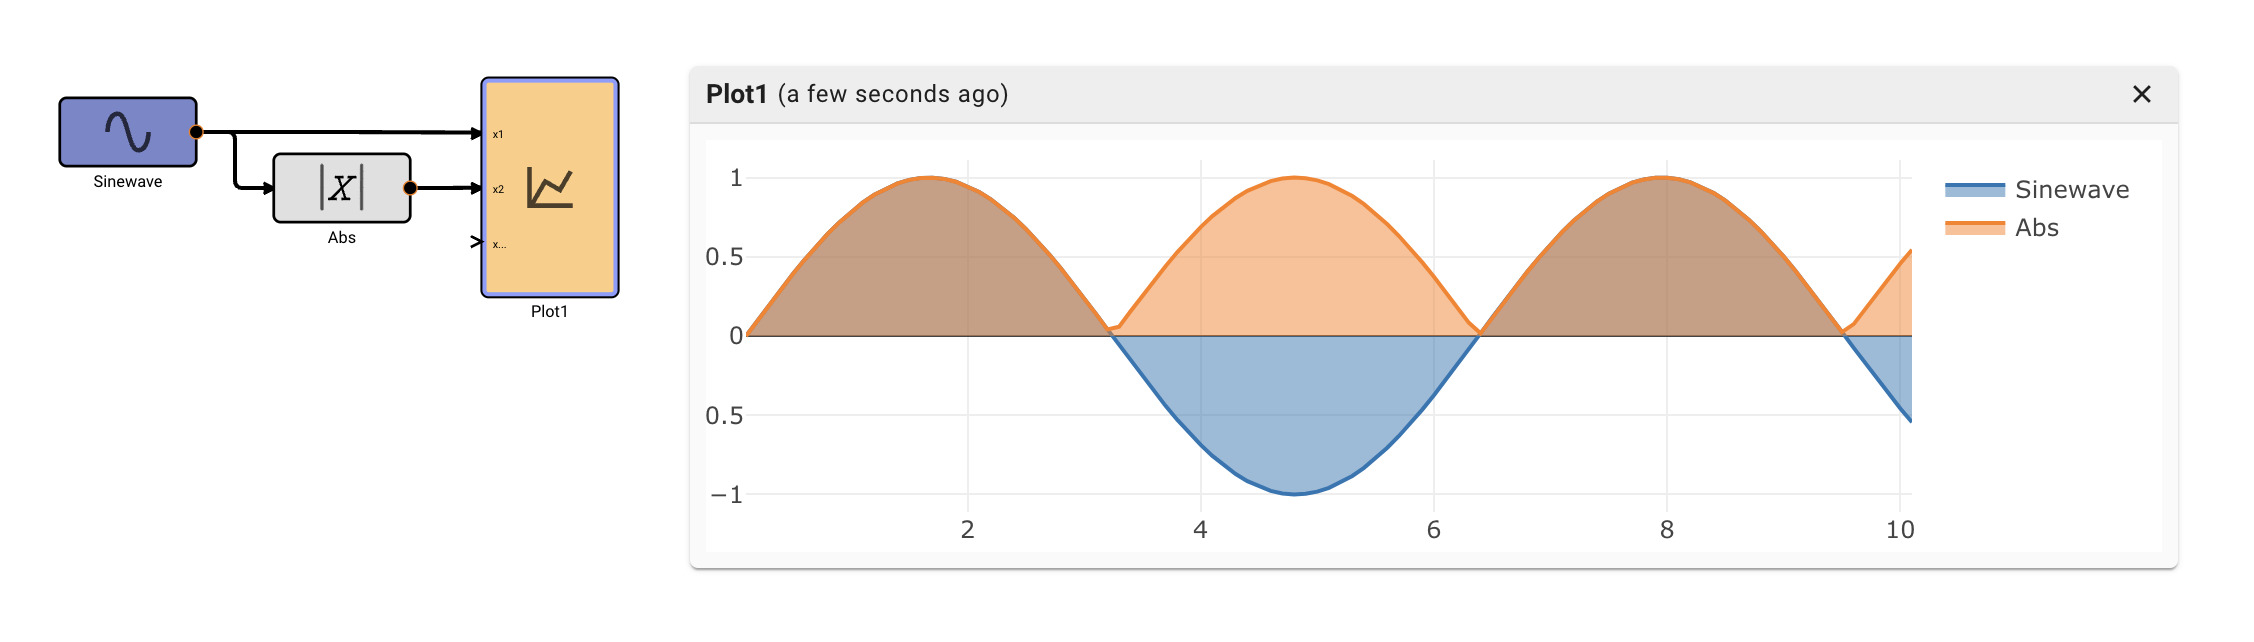
Abs Block

The Absolute Value block emits the absolute value of its input signal.
Parameters
None
Examples
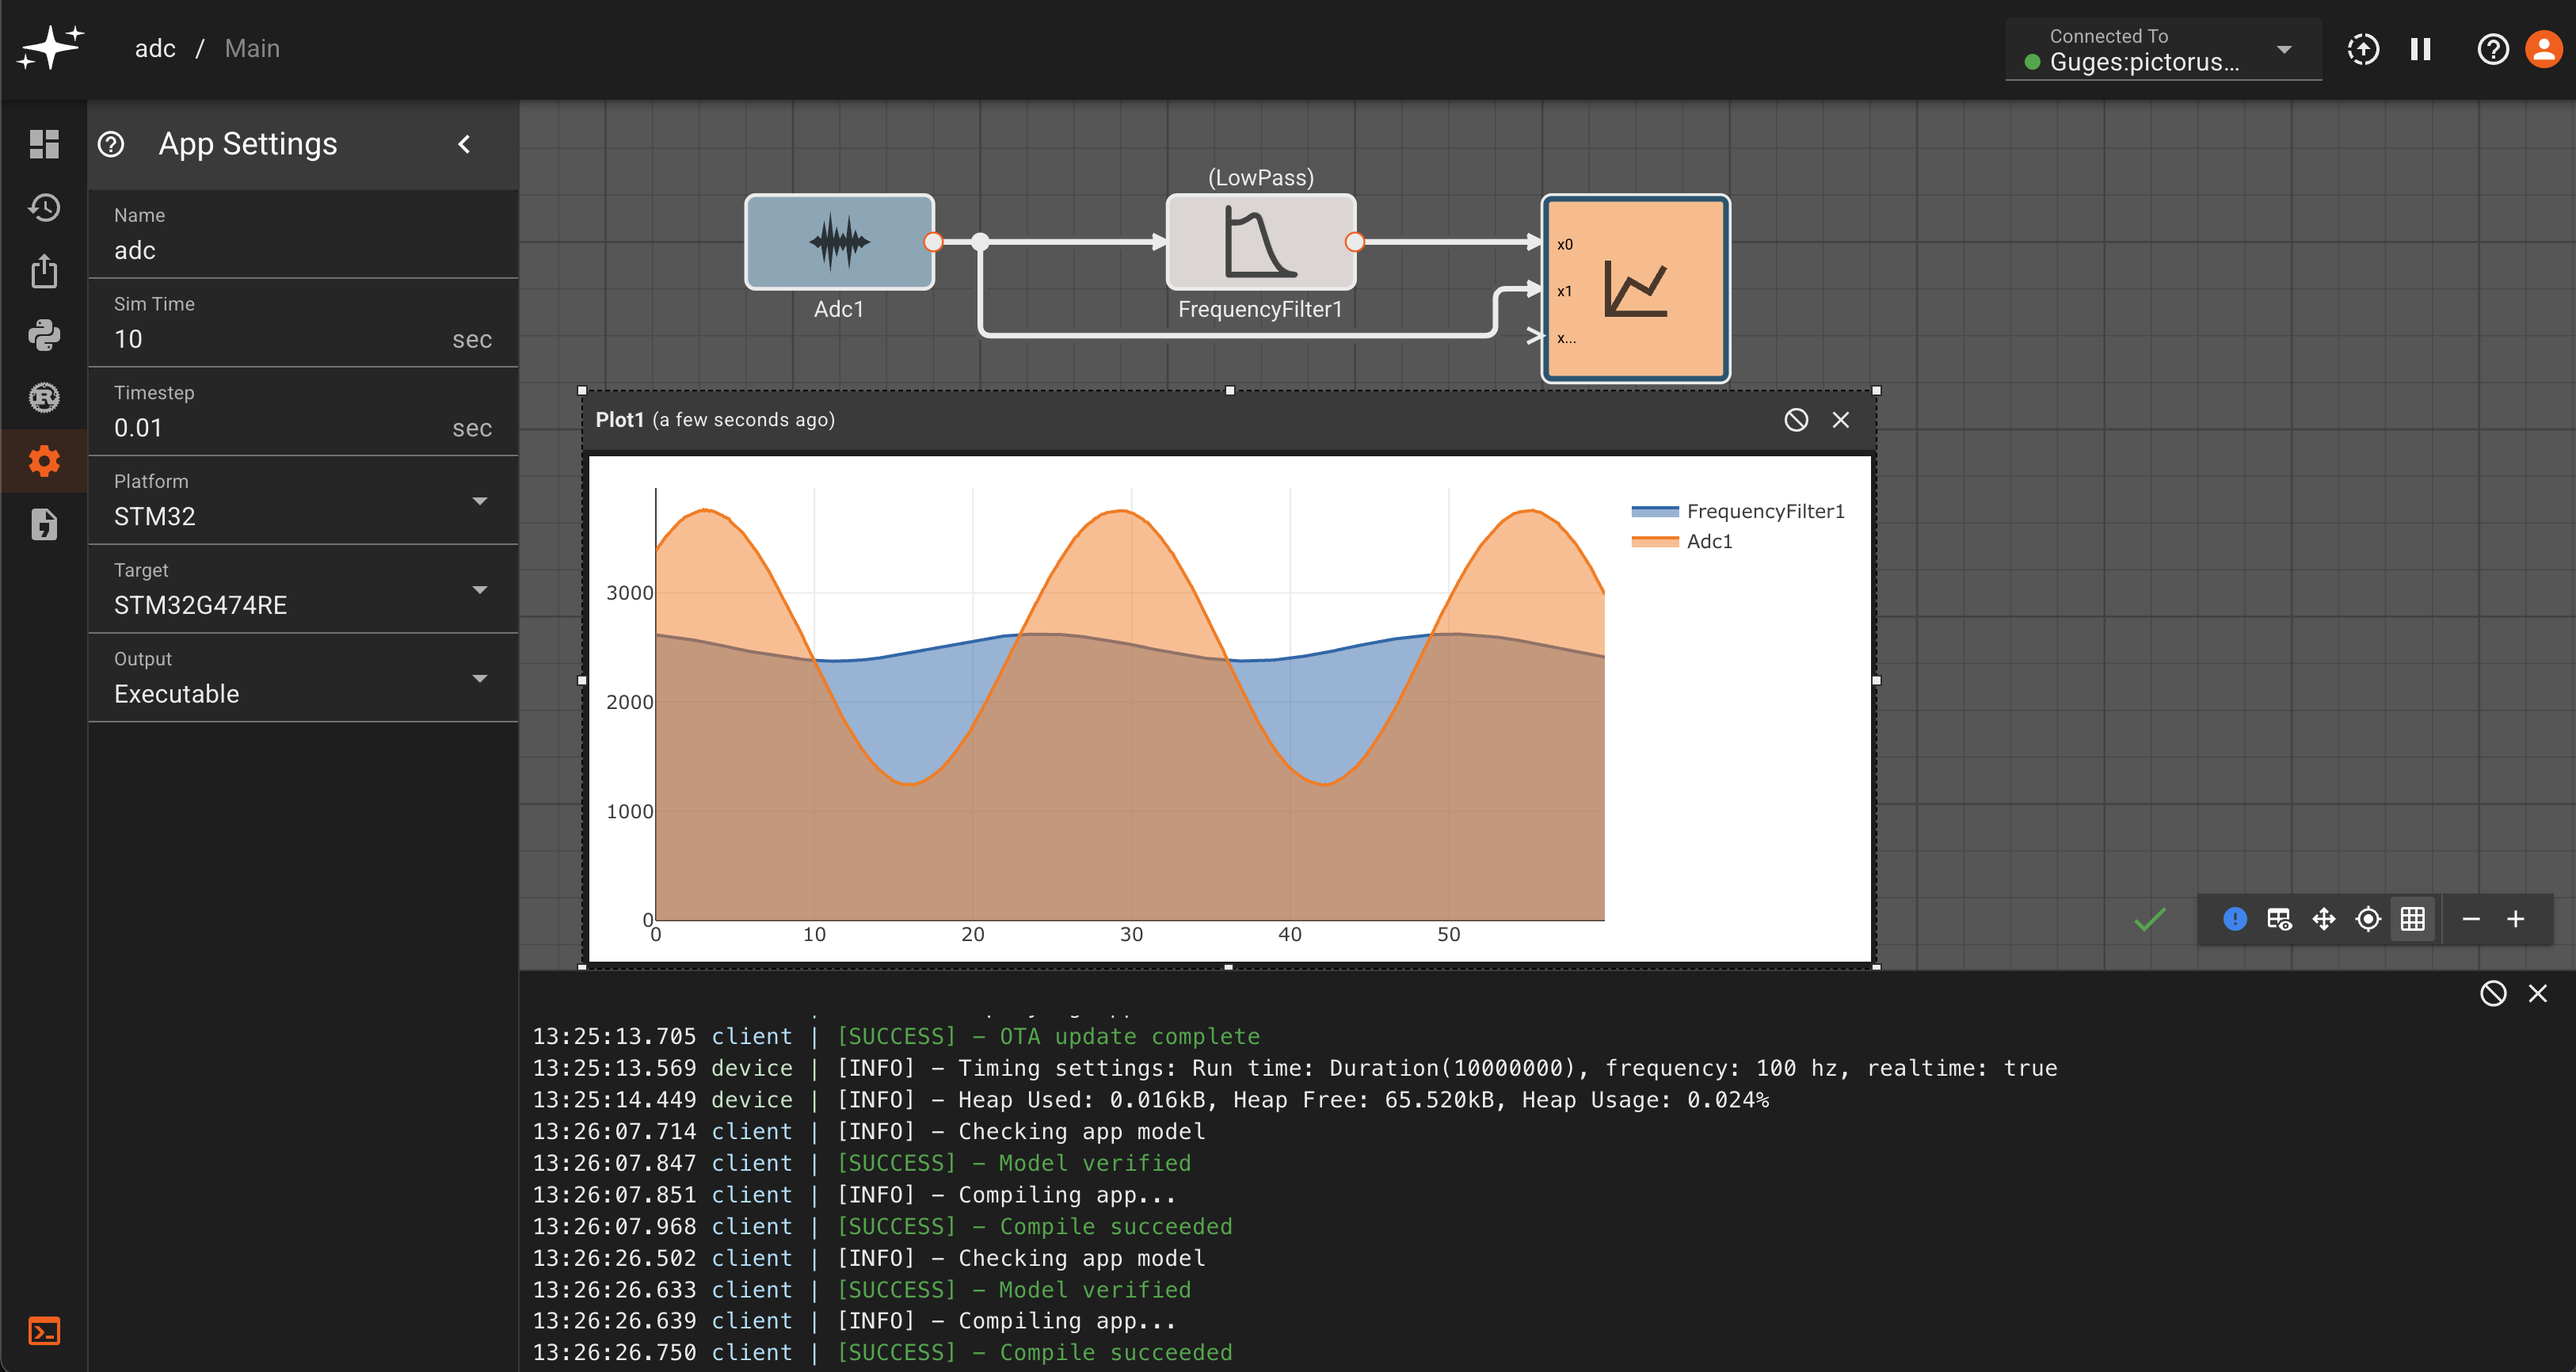
ADC Block
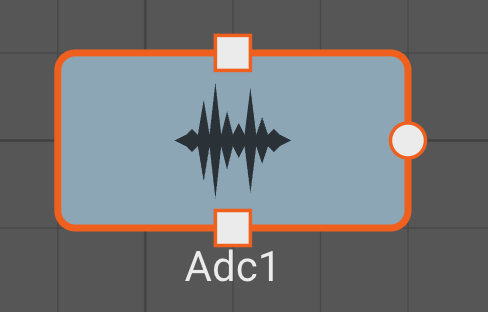
Note: This block is only available on STM32 processors.
The Adc Block uses an STM32 Analog to Digital Convertor (ADC) to acquire a single sample per tick of the model from the ADC and pin selected. Different STM32 processors have different resolutions and sampling times, so consult individual reference manuals for more information. Input voltage is typically from 0 to 3.3V and quantized by the resolution of the ADC.
Parameters
- Adc The ADC peripheral to use for sampling.
- Adc Pin The pin that the ADC will sample from.
- Resolution The resolution of the ADC in bits.
- Sample Time The time in clock cycles that the ADC will sample for. This varies depending on the STM32 processor, but generally the higher the sample time, the more accurate and longer the reading.
Examples
Aggregate Block
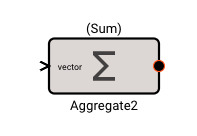
The Aggregate block emits a scalar result of some aggregation function applies to an input vector.
Parameters
- Method [Sum | Mean | Median | Min | Max]
- Sum Emits the sum of all elements in the input vector.
- Mean Emits the average of all elements in the input vector.
- Median Emits the median value of all elements in the input vector. If there are two median values, it averages them.
- Min Emits the smallest of all elements in the input vector.
- Max Emits the largest of all elements in the input vector.
Examples
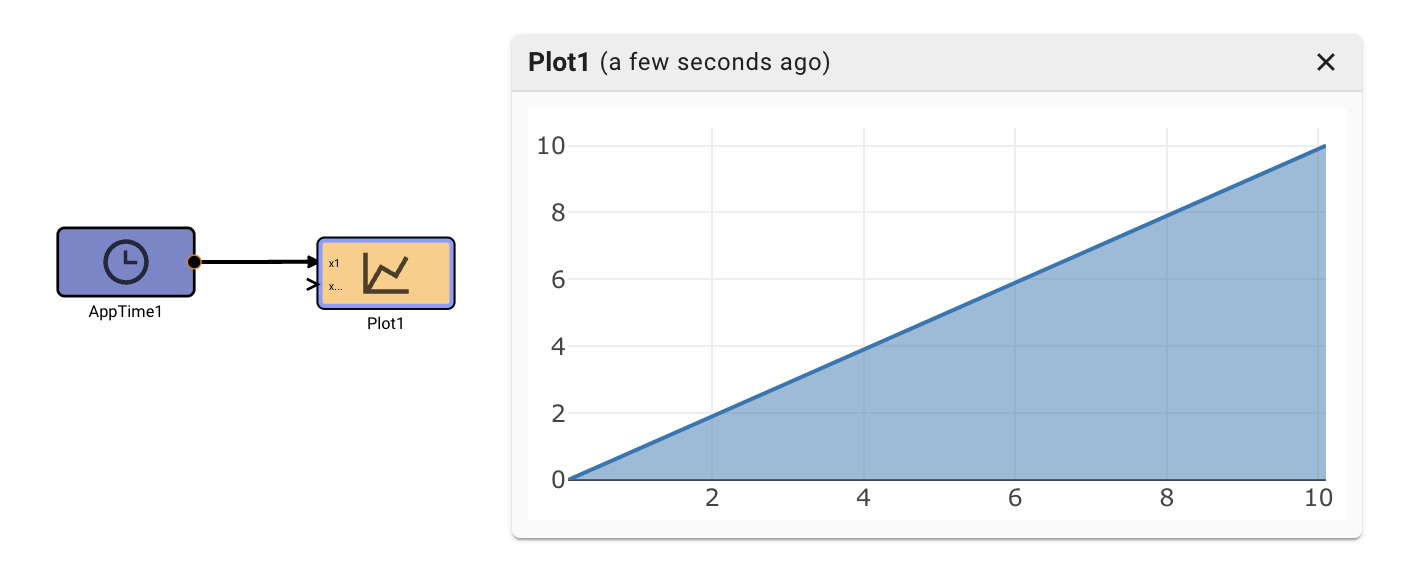
App Time Block

The App Time block emits the number of seconds since the app launched.
Parameters
None
Examples
Arg Min Max Block
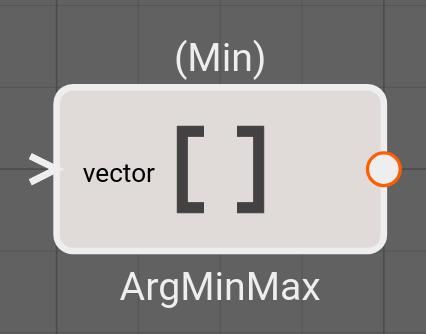
The Arg Min/Max block emits either the index of the minimum or index of the maximum of the vector/matrix passed into it. If a matrix is passed in, the block will emit the index of the minimum/maximum of the entire matrix, that index will be a linear index.
Parameters
- Method [Min | Max]
- Min: Emit the index of the smallest of all input signal.
- Max: Emit the index of the largest of all input signal.
Examples
Bias Block
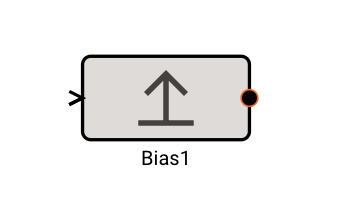
The Bias block emits the value of its input, offset (biased) by the amount specified.
Parameters
- Offset (default = 0): Amount to offset the input by.
Examples
Bit Shift Block
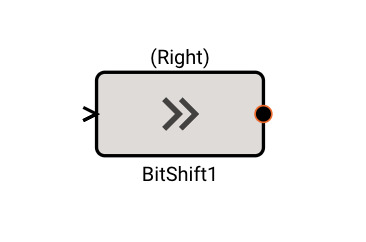
The Bit Shift block emits the logical bit shift of its input, either left or right, by a specified number of bits.
Parameters
- Bits (default = 0): The number of bits to shift the input by.
- Method [Right | Left]
- Right: Right shifts (>>) all the bits of its operand.
- Left: Left shifts (<<) all the bits of its operand.
Examples
Bitwise Operator Block
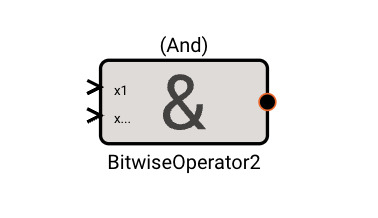
The Bitwise Operator block emits the result of bitwise logical operations on its inputs. For an arbitrary number of inputs, each column of each input's binary representation will be compared to that same column of the other inputs, and logical comparisons will be made, the result of which are re-interpretted as a numerical value.
Parameters
- Method [And | Or | Nor]
- And: Applies logical AND to each bit of the inputs.
- Or: Applies logical OR to each bit of the inputs.
- Nor: Applies logical NOR to each bit of the inputs.
Examples
Bytes Join Block
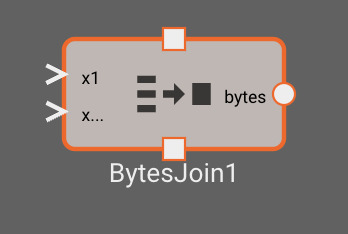
The Bytes Join block joins data on a specified delimiter, and outputs the resulting bytes
Inputs
- x (dynamic): data that will be joined by the delimiter
Outputs
- bytes: the inputs joined by the specified delimiter
Parameters
- Field Delimiter: (default = ","): String or bytes delimiter to join the data on. For a bytes literal, escape the characters using
\x(i.e.\x20for the unicode ' ' corresponding to the hexadecimal value 0x20).
Bytes Literal Block

The Bytes Literal block emits a fixed bytes Value specified in its parameters.
Parameters
- Value (default = ""): Bytes value to emit each time step. This can be input as a string or a bytes literal. For a bytes literal, escape the characters using
\x(i.e.\x20for the unicode ' ' corresponding to the hexadecimal value 0x20).
Examples

Bytes Split Block
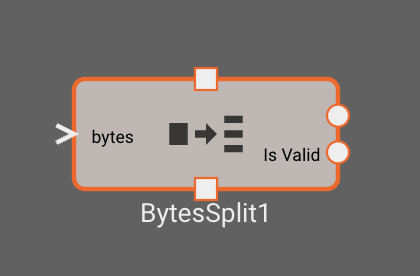
The Bytes Split block attempts to split byte data based off a given delimiter
Inputs
- bytes: bytes data to split
Outputs
- output_n (dynamic): Scalar or bytes signal corresponding to values configured in the block parameters
- Is Valid: A boolean representing whether the data is valid as determined by the
Stale Age (ms)param
Parameters
- Field Delimiter (default = ","): String or bytes delimiter to split the data on. For a bytes literal, escape the characters using
\x(i.e.\x20for the unicode ' ' corresponding to the hexadecimal value 0x20). - Select Indexes: The indexes to pick from the split data. These will be output as individual signals from the block.
- Label: The name of the signal that will be output from the block
- Data Index: The index (zero-indexed) to extract from the split data. For instance, selecting index
1from the input data "1.0,2.0,3.0,4.0" split on the character ",", would return the scalar2.0 - Type (Number | Bytes): Select whether the data should be interpreted as a scalar number, or bytes that will be parsed again downstream
- Stale Age (ms) (default = 1000): Age from last valid data parsed when the block will output
Is ValidasFalse
Bytes Pack Block
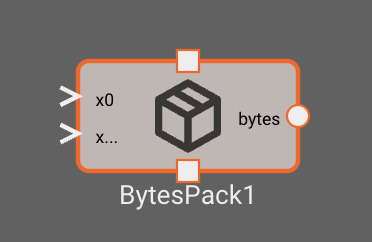
The Bytes Pack block joins scalar data into a packed struct that gets serialized to bytes
Inputs
- x (dynamic): scalar values that will be packed into the output data
Outputs
- bytes: packed byte data
Parameters
- Pack Bytes: Configure how input data will be packed
- Label: The name of the input port corresponding to this value
- Type: The data type and size this value will be encoded as
- The letter indicates the type of data: u = unsigned integer, i = signed integer, f = float
- The numbers indicate the number of bits used to encode the value
- For instance, specifying
i64will encode the value as a 64-bit signed integer
- Order: The endianness used to encode the value
Bytes Unpack Block
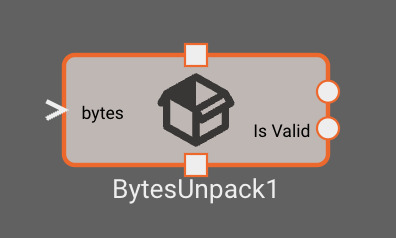
The Bytes Unpack block unpacks data from a packed struct
Inputs
- bytes: bytes data to unpack
Outputs
- output_n (dynamic): Scalar signal corresponding to values configured in the block parameters
- Is Valid: A boolean representing whether the data is valid as determined by the
Stale Age (ms)param
Parameters
- Unpack Bytes: Configure how input data will be unpacked
- Label: The name of the output signal corresponding to this value
- Type: The data type and size this value will be interpreted as for decoding
- The letter indicates the type of data: u = unsigned integer, i = signed integer, f = float
- The numbers indicate the number of bits used to represent the value
- For instance, specifying
i64will decode the value as a 64-bit signed integer
- Order: The endianness used to decode the value
- Stale Age (ms) (default = 1000): Age from last valid data parsed when the block will output
Is ValidasFalse
CAN Receive Block
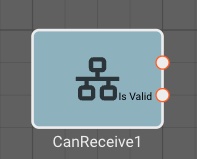
The CAN Receive block reads messages from a given CAN bus and message type. In order to decode messages, first upload a DBC file for your expected CAN message format.
Outputs
- One output for each "signal" defined in the chosen CAN message type.
- isValid: A boolean representing whether the data is valid as determined by the
Stale Age (ms)param
Parameters
- Iface (default = can0): CAN bus for reading messages.
- Can Message: CAN message type to read. This field will populate when a CAN database file is uploaded to Static Assets.
- Stale Age Ms (default = 1000): Allowable amount of time between valid data packets. If new data is not received within this amount of time, the block will output
Is ValidasFalse.
Examples
CAN Transmit Block
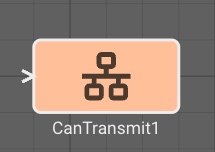
The CAN Transmit block writes messages of a given type to a CAN bus. In order to encode messages, first upload a DBC file for your expected CAN message format.
Inputs
- One input for each "signal" defined in the chosen CAN message type. Available CAN message types will appear in the dropdown menu based on uploaded DBC files.
Parameters
- Iface (default = can0): CAN bus for writing messages.
- Can Message: CAN message type to write. This field will populate when a CAN database file is uploaded to an app's
Static Assets.
Examples
Change Detection Block
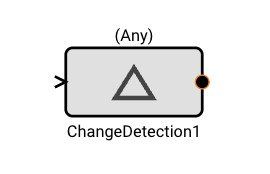
The Change Detection block emits True when the input signal changes value. It has three different modes of operation: Any, Rising, and Falling.
Parameters
- Method [Any | Rising | Falling]
- Any: Emits True on any change to input signal, otherwise False
- Rising: Emits True when the input signal increases value, otherwise False.
- Falling Emits True when the input signal decreases value, otherwise False.
Examples
Clamp Block

The Clamp block caps the minimum and maximum values of its input signal. This is useful when you have an actuator you do not want to accidentally attempt to command beyond its known limit.
Parameters
- Lower Limit (default = -1.0): Minimum value this block will emit.
- Upper Limit (default = 1.0): Maximum value this block will emit.
Examples
Comment Block

The Comment block is a non-functional block that simply allows users to add text comments to their apps.
Compare To Value Block
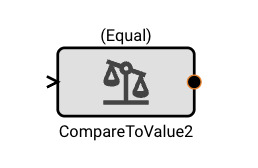
The Compare To Value block emits True when the comparison between the input signal and a specified Value is true. It has six different modes of operation: Equal, NotEqual, GreaterThan, GreaterThanOrEqual, LessThan, and LessThanOrEqual.
Note - Equal and NotEqual options look for exact floating point agreement. This can lead to confusion, particularly when the app time step results in close but not exactly the expected value, like zero-crossings.
Parameters
- Value (default = 0): A numeric value to perform comparisons against.
- Method [Equal | NotEqual | GreaterThan | GreaterThanOrEqual | LessThan | LessThanOrEqual]
- Equal: Emits True when the input signal exactly equals the Value parameter, otherwise False
- NotEqual: Emits True when the input signal does not exactly equal the Value parameter, otherwise False.
- GreaterThan: Emits True when the input signal is greater than the Value parameter, otherwise False.
- GreaterThanOrEqual: Emits True when the input signal is greater than or exactly equal to the Value parameter, otherwise False.
- LessThan: Emits True when the input signal is less than the Value parameter, otherwise False.
- LessThanOrEqual: Emits True when the input signal is less than or exactly equal to the Value parameter, otherwise False.
Examples
Comparison Block
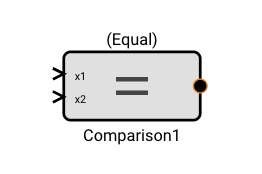
The Comparison block emits True when the comparison between two input signals is true. It has six different modes of operation: Equal, NotEqual, GreaterThan, GreaterThanOrEqual, LessThan, and LessThanOrEqual.
Note - Equal and NotEqual options look for exact floating point agreement. This can lead to confusion, particularly when the app time step results in close but not exactly the expected value, like zero-crossings.
Parameters
- Method [Equal | NotEqual | GreaterThan | GreaterThanOrEqual | LessThan | LessThanOrEqual]
- Equal: Emits True when the first input signal exactly equals the second input signal, otherwise False
- NotEqual: Emits True when the input signal does not exactly equal the second input signal, otherwise False.
- GreaterThan: Emits True when the input signal is greater than the second input signal, otherwise False.
- GreaterThanOrEqual: Emits True when the input signal is greater than or exactly equal to the second input signal, otherwise False.
- LessThan: Emits True when the input signal is less than the second input signal, otherwise False.
- LessThanOrEqual: Emits True when the input signal is less than or exactly equal to the second input signal, otherwise False.
Examples
Component Input Block
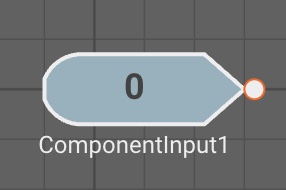
The Component Input block allows a signal from the diagram level above to be passed into the current Component. This block is only available when you navigate inside a Component.
Parameters
- Port Ordering: When multiple component inputs exist, they can be dragged and reordered from the settings panel. The port ordering will be reflected at the component level, and will also appear as a number inside the component input block (0 to n starting from the topmost input).
Examples
Component Output Block
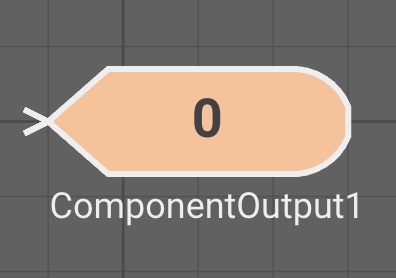
The Component Output block allows a signal from the current diagram level to be passed to level above. This block is only available when you navigate inside a Component.
Parameters
- Port Ordering: When multiple component outputs exist, they can be dragged and reordered from the settings panel. The port ordering will be reflected at the component level, and will also appear as a number inside the component output block (0 to n starting from the topmost output).
Examples
Constant Block
The Constant block emits a fixed numeric Value specified in its parameters.
Parameters
- Value (default = 0): Numeric value to emit each time step.
Examples
Counter Block
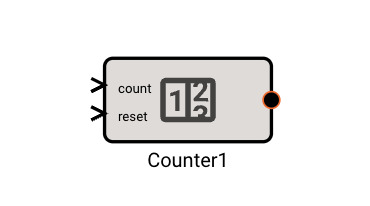
The Counter block maintains a running counter of every iteration the input value was True (non-zero). It can be reset using its second inport.
Examples
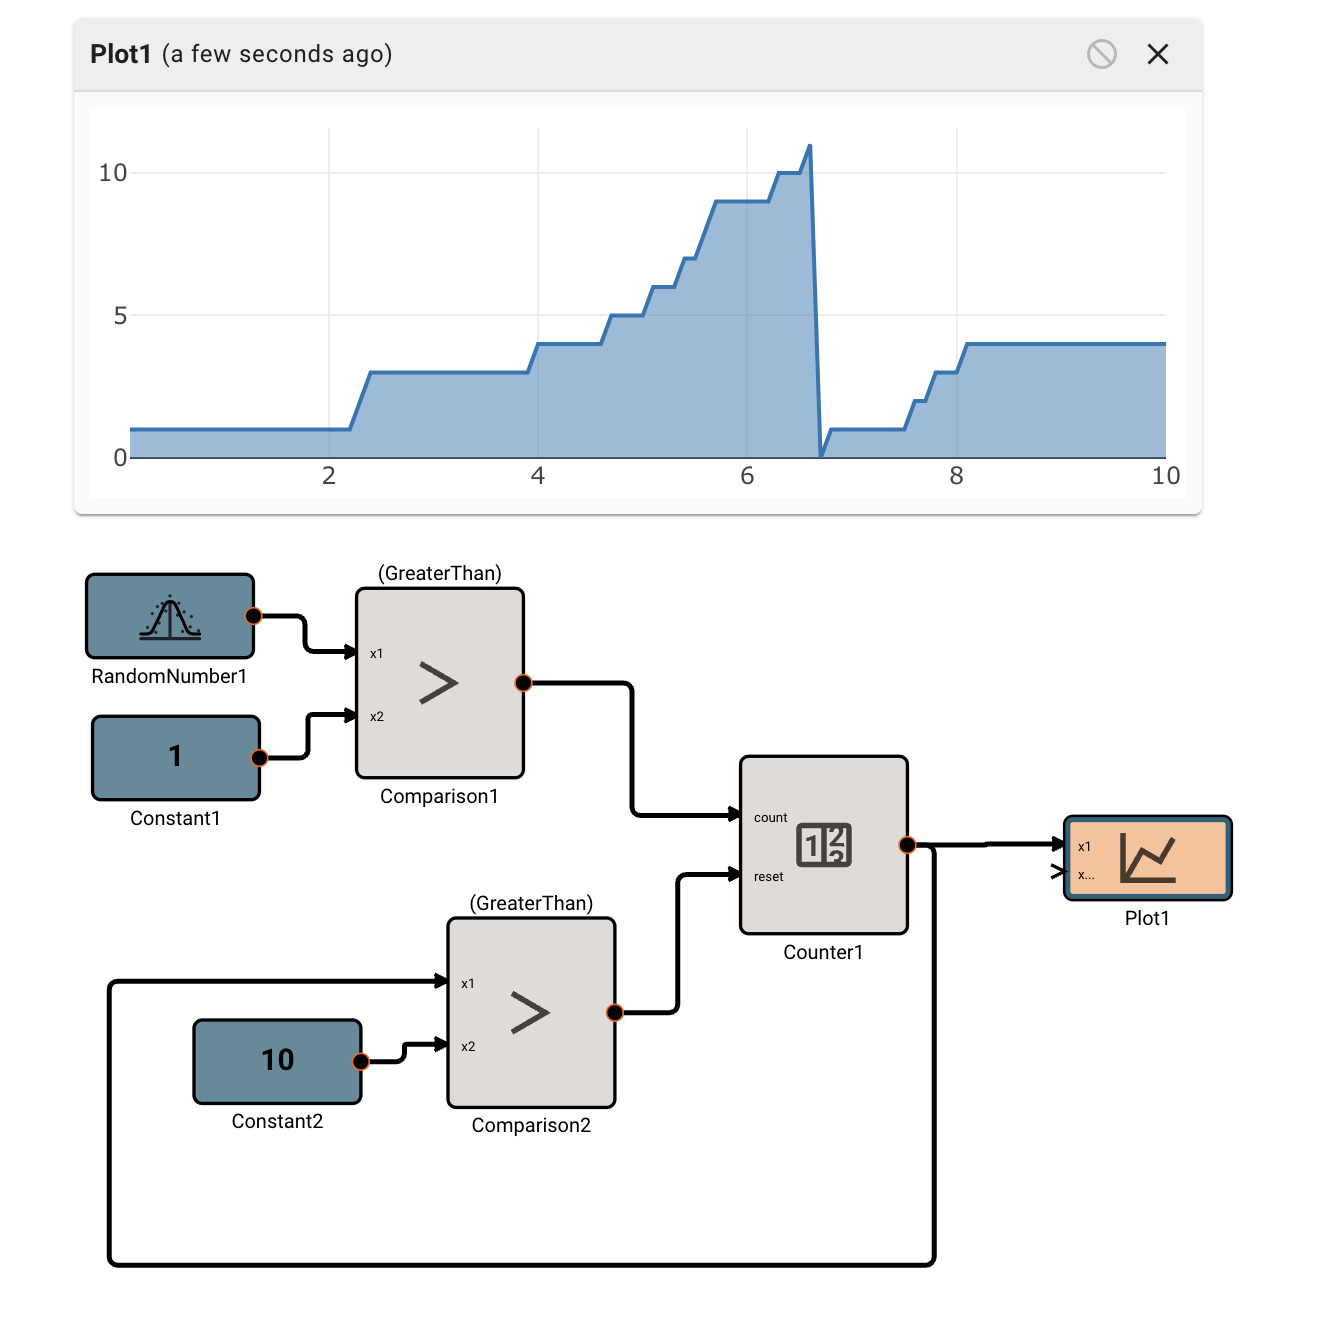 |
|---|
| Counts the number of times a randomly generated number is greater than 1, and resets when the counter exceeds 10 |
Cross Product Block
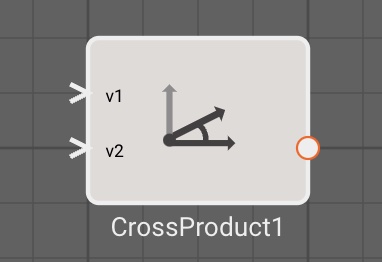
The Cross Product block emits the vector cross product of two input vectors. The input vectors are required to be of the same dimensions, either both (1, 3) or both (3,1) otherwise the cross product will fail to compile.
Examples
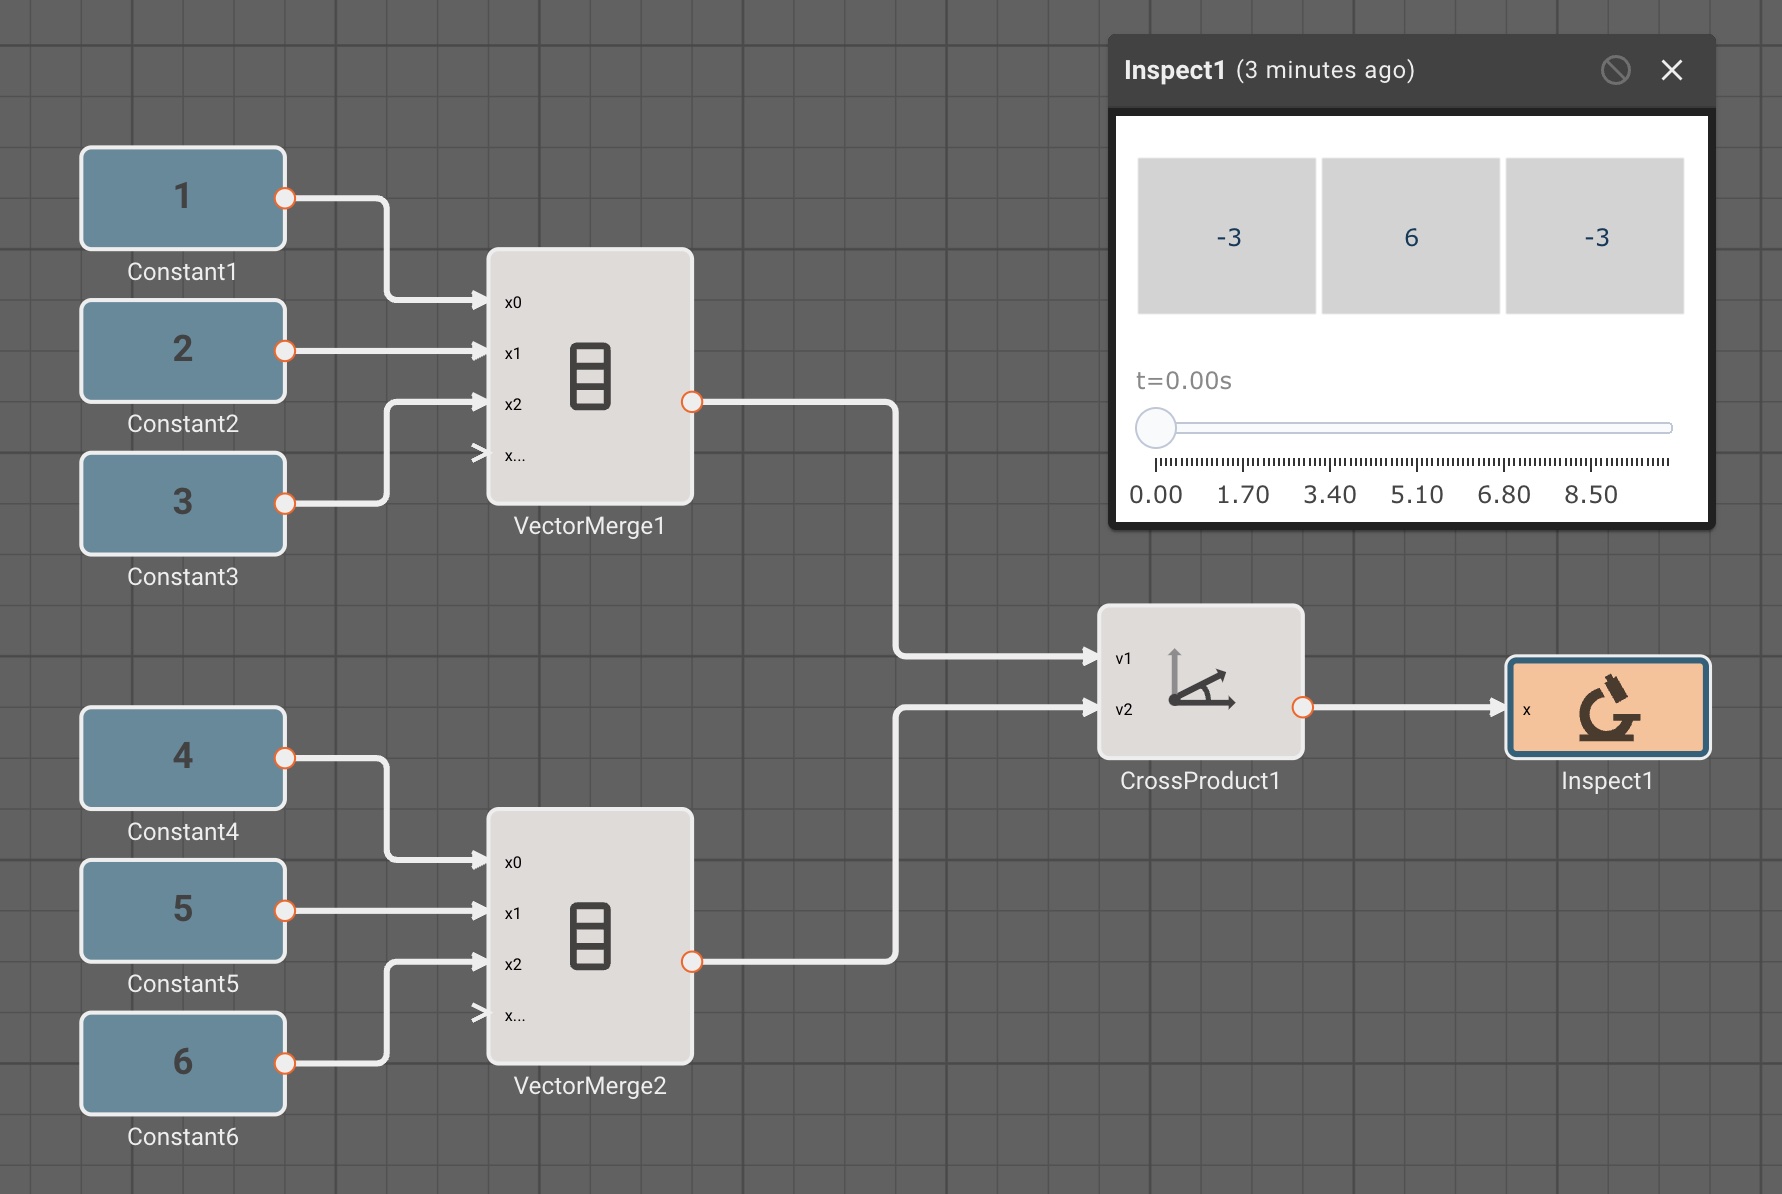
DAC Block
Note: This block is only available on STM32 processors.
The Dac Block uses an STM32 Digital to Analog Converter (DAC) to output a single sample per tick of the model from the DAC and pins selected. Different STM32 processors have different quantizations, so consult individual reference manuals for more information. For example, the STM32G474 has a 12-bit DAC (0 to 4095 values) that outputs between 0 to 3.3V, so it is important to scale and bias floating point numbers correctly before sending them to the DAC.
The input to the DAC block needs to be a 1x2 array (rows by columns), where the 1st column is Dac Pin 1 and the 2nd column is Dac Pin 2. DAC block currently only supports 1x2 arrays (1 sample for 2 channels) per tick of the model.
Parameters
- Dac The DAC peripheral to output on.
- Dac Pin 1 The 1st pin that the DAC will output to.
- Dac Pin 2 The 2nd pin that the DAC will output to.
Examples
Data Read Block
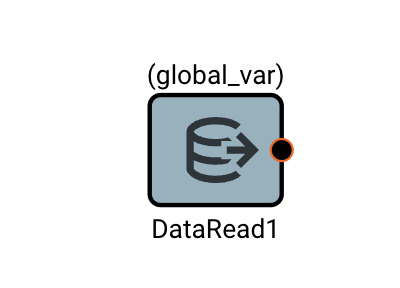
The Data Read block will emit the value of a custom variable that was assigned elsewhere in the app. This can be useful when needing to share data across States or Components.
You must create a custom variable in the scope of a Data Read block in order for this block to compile.
In general, Data Read/Writes within the same visual level of an app are discouraged. The example below is just meant to illustrate functionality in one screen capture. If your diagram is so convoluted that you want to use Data Read/Writes to avoid crossing signal wires, you should consider refactoring your diagram into smaller, cleaner components.
However, if you need to share data from one side of an app to another, and don't want to plumb in a bunch of signals to do so, Data Read/Writes are great. They are particularly powerful for State Machines, which otherwise don't have a means of sharing data. Eventually we will allow targetted data handoffs between States, but for now, use Data Read/Writes.
Examples
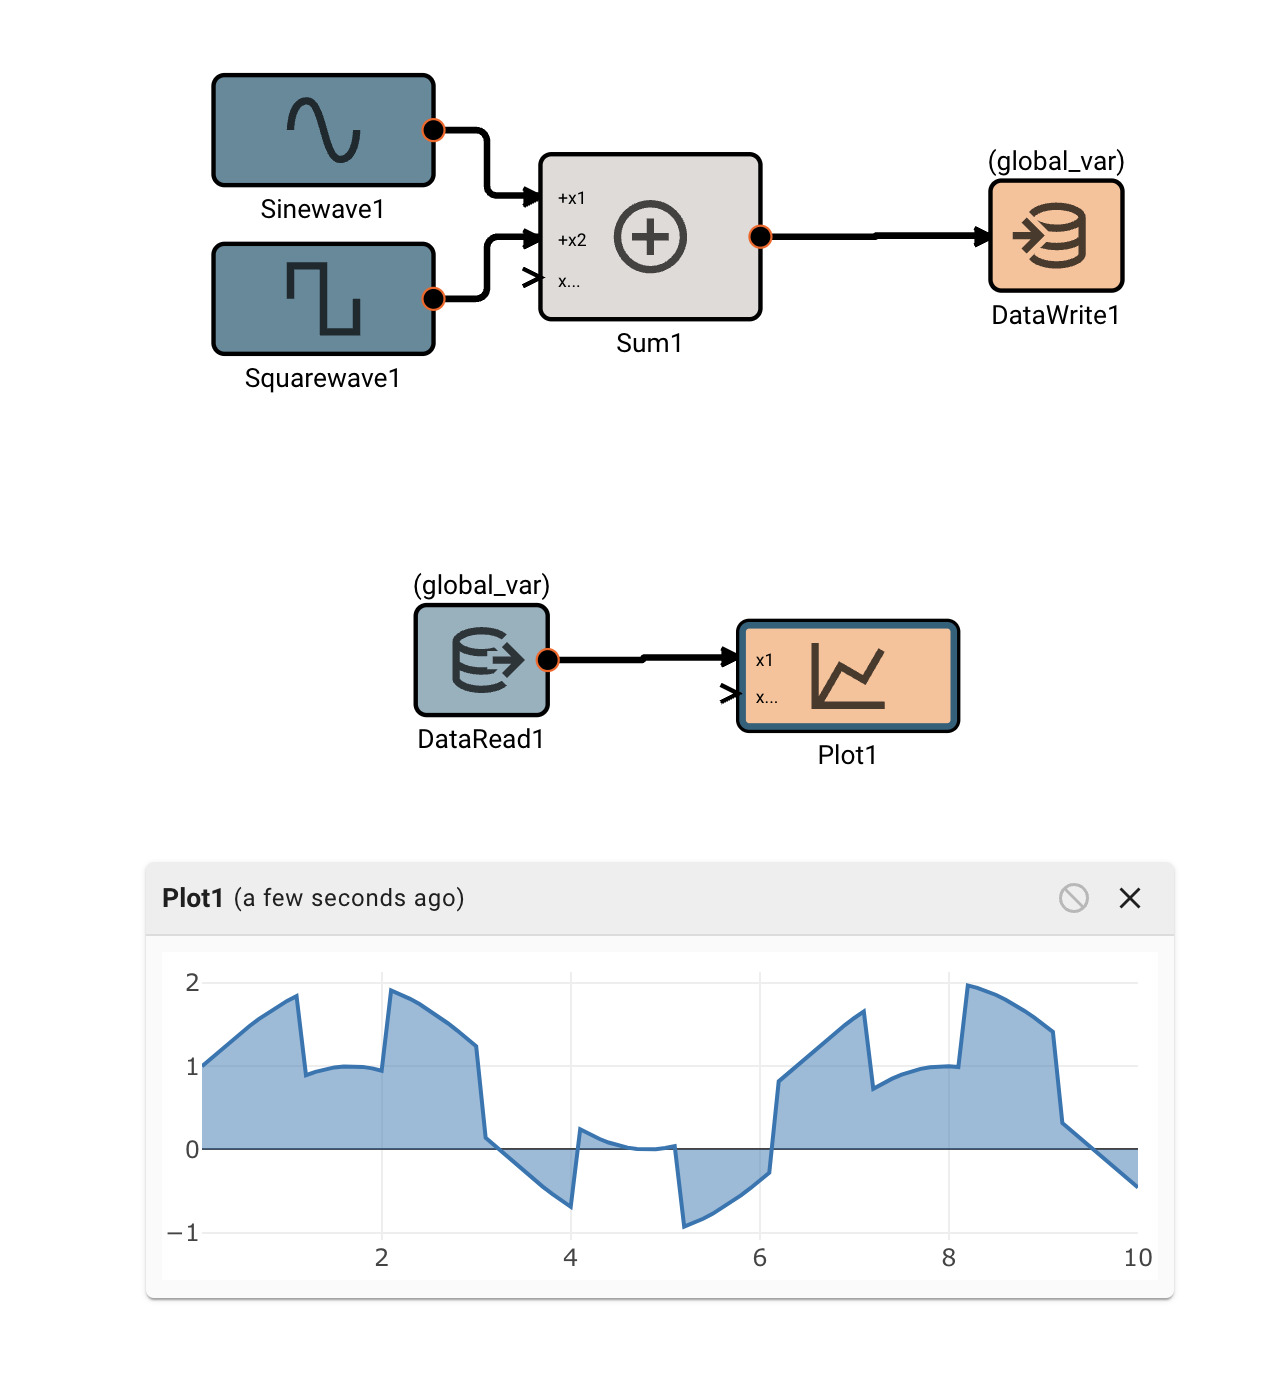
Data Write Block
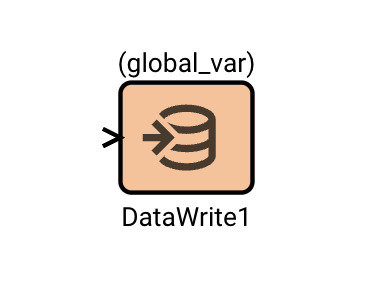
The Data Write block will store the value of its input to a custom variable. This can be useful when needing to share data across States or Components.
You must create a custom variable in the scope of a Data Write block in order for this block to compile.
In general, Data Read/Writes within the same visual level of an app are discouraged. The example below is just meant to illustrate functionality in one screen capture. If your diagram is so convoluted that you want to use Data Read/Writes to avoid crossing signal wires, you should consider refactoring your diagram into smaller, cleaner components.
However, if you need to share data from one side of an app to another, and don't want to plumb in a bunch of signals to do so, Data Read/Writes are great. They are particularly powerful for State Machines, which otherwise don't have a means of sharing data. Eventually we will allow targetted data handoffs between States, but for now, use Data Read/Writes.
Examples
Deadband Block

The Deadband block emits the input signal, unless it's within the Upper and Lower bounds specified in its parameters, in which case it emits zero.
Useful for zeroing out a measurement within some noise threshold.
Parameters
- Lower Limit (default = -1): Numeric value specifying the floor of the deadband zone.
- Upper Limit (default = 1): Numeric value specifying the ceiling of the deadband zone.
Examples
Delay Block
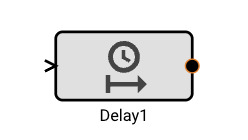
The Delay block delays the input signal by the number of iterations specified by the Samples parameter.
Parameters
- Samples (default = 1): Numeric value specifying how many iterations to delay the input signal by.
- Initial Condition: (default = 0): Specifies an initial value for the Delay to emit prior to N samples have been received.
Examples

Delay Control Block
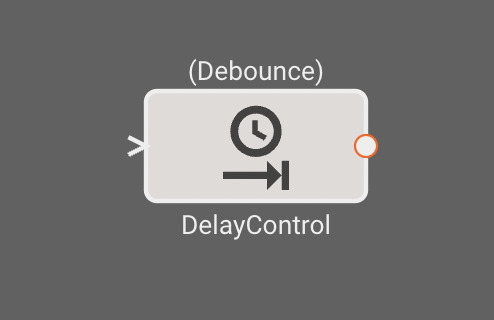
The Delay Control block addresses the rapid firing of a noisy input by rate limiting the output one of two ways. The Debounce method waits for the input to go from true to false for a fixed delay_time after before emitting true. The Throttle method emits true immediately upon true input, but then will not emit true again for at least delay_time seconds.
Parameters
- Method [Debounce | Throttle]
- Debounce: Wait until the input signal stops being true for delay_time before emitting true.
- Throttle: Immediately emit true on first true input, but then wait delay_time before passing through a true input again.
- Delay Time (S) Amount of time to throttle or debounce by, in seconds.
Examples
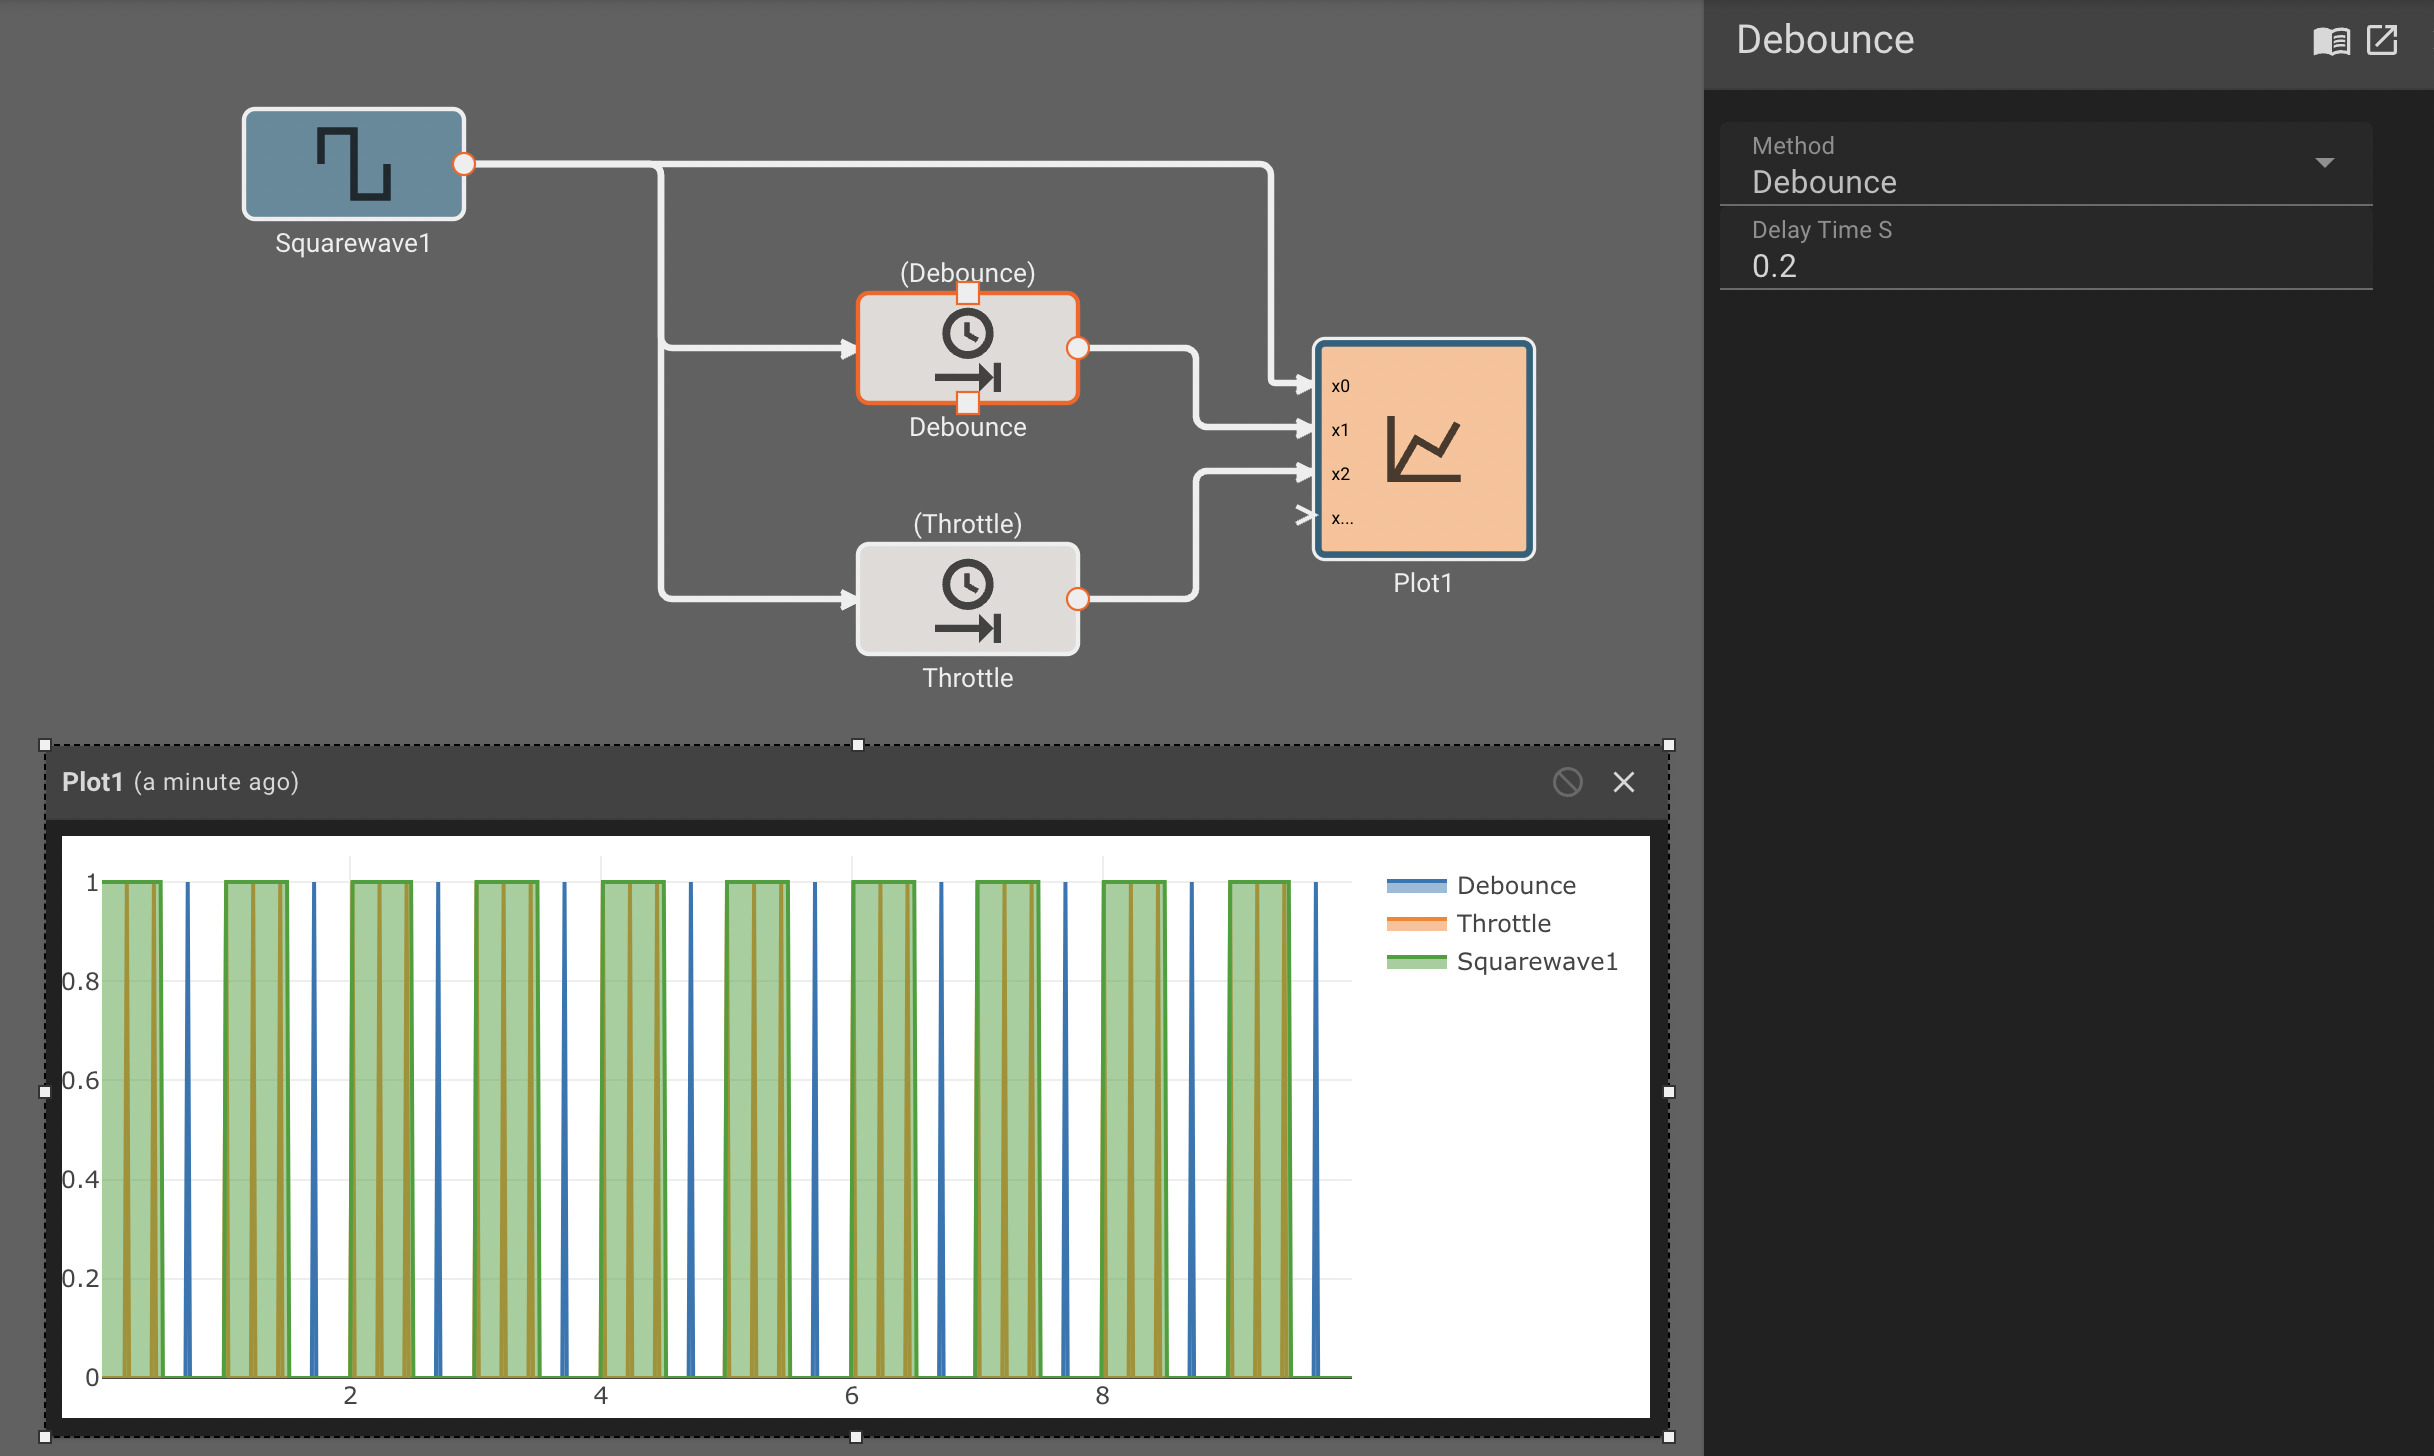
Derivative Block
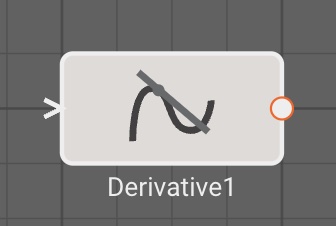
The Derivative block emits the discrete derivative of the input signal.
The derivative is computed from the difference between the input signal now and the input signal Max Samples ago, divided by the time between those two samples:
\( \ f(xi) = \frac{x_i - x{i-s}}{dt * s} \)
Since the derivative block requires Max Samples to compute the derivative, it will output Initial Condition for the initial timesteps.
Parameters
- Initial Condition (default = 0): Initial value to output prior to the first derivative computation.
- Max Samples (default = 3): Number of samples to compute the derivative over.
Examples
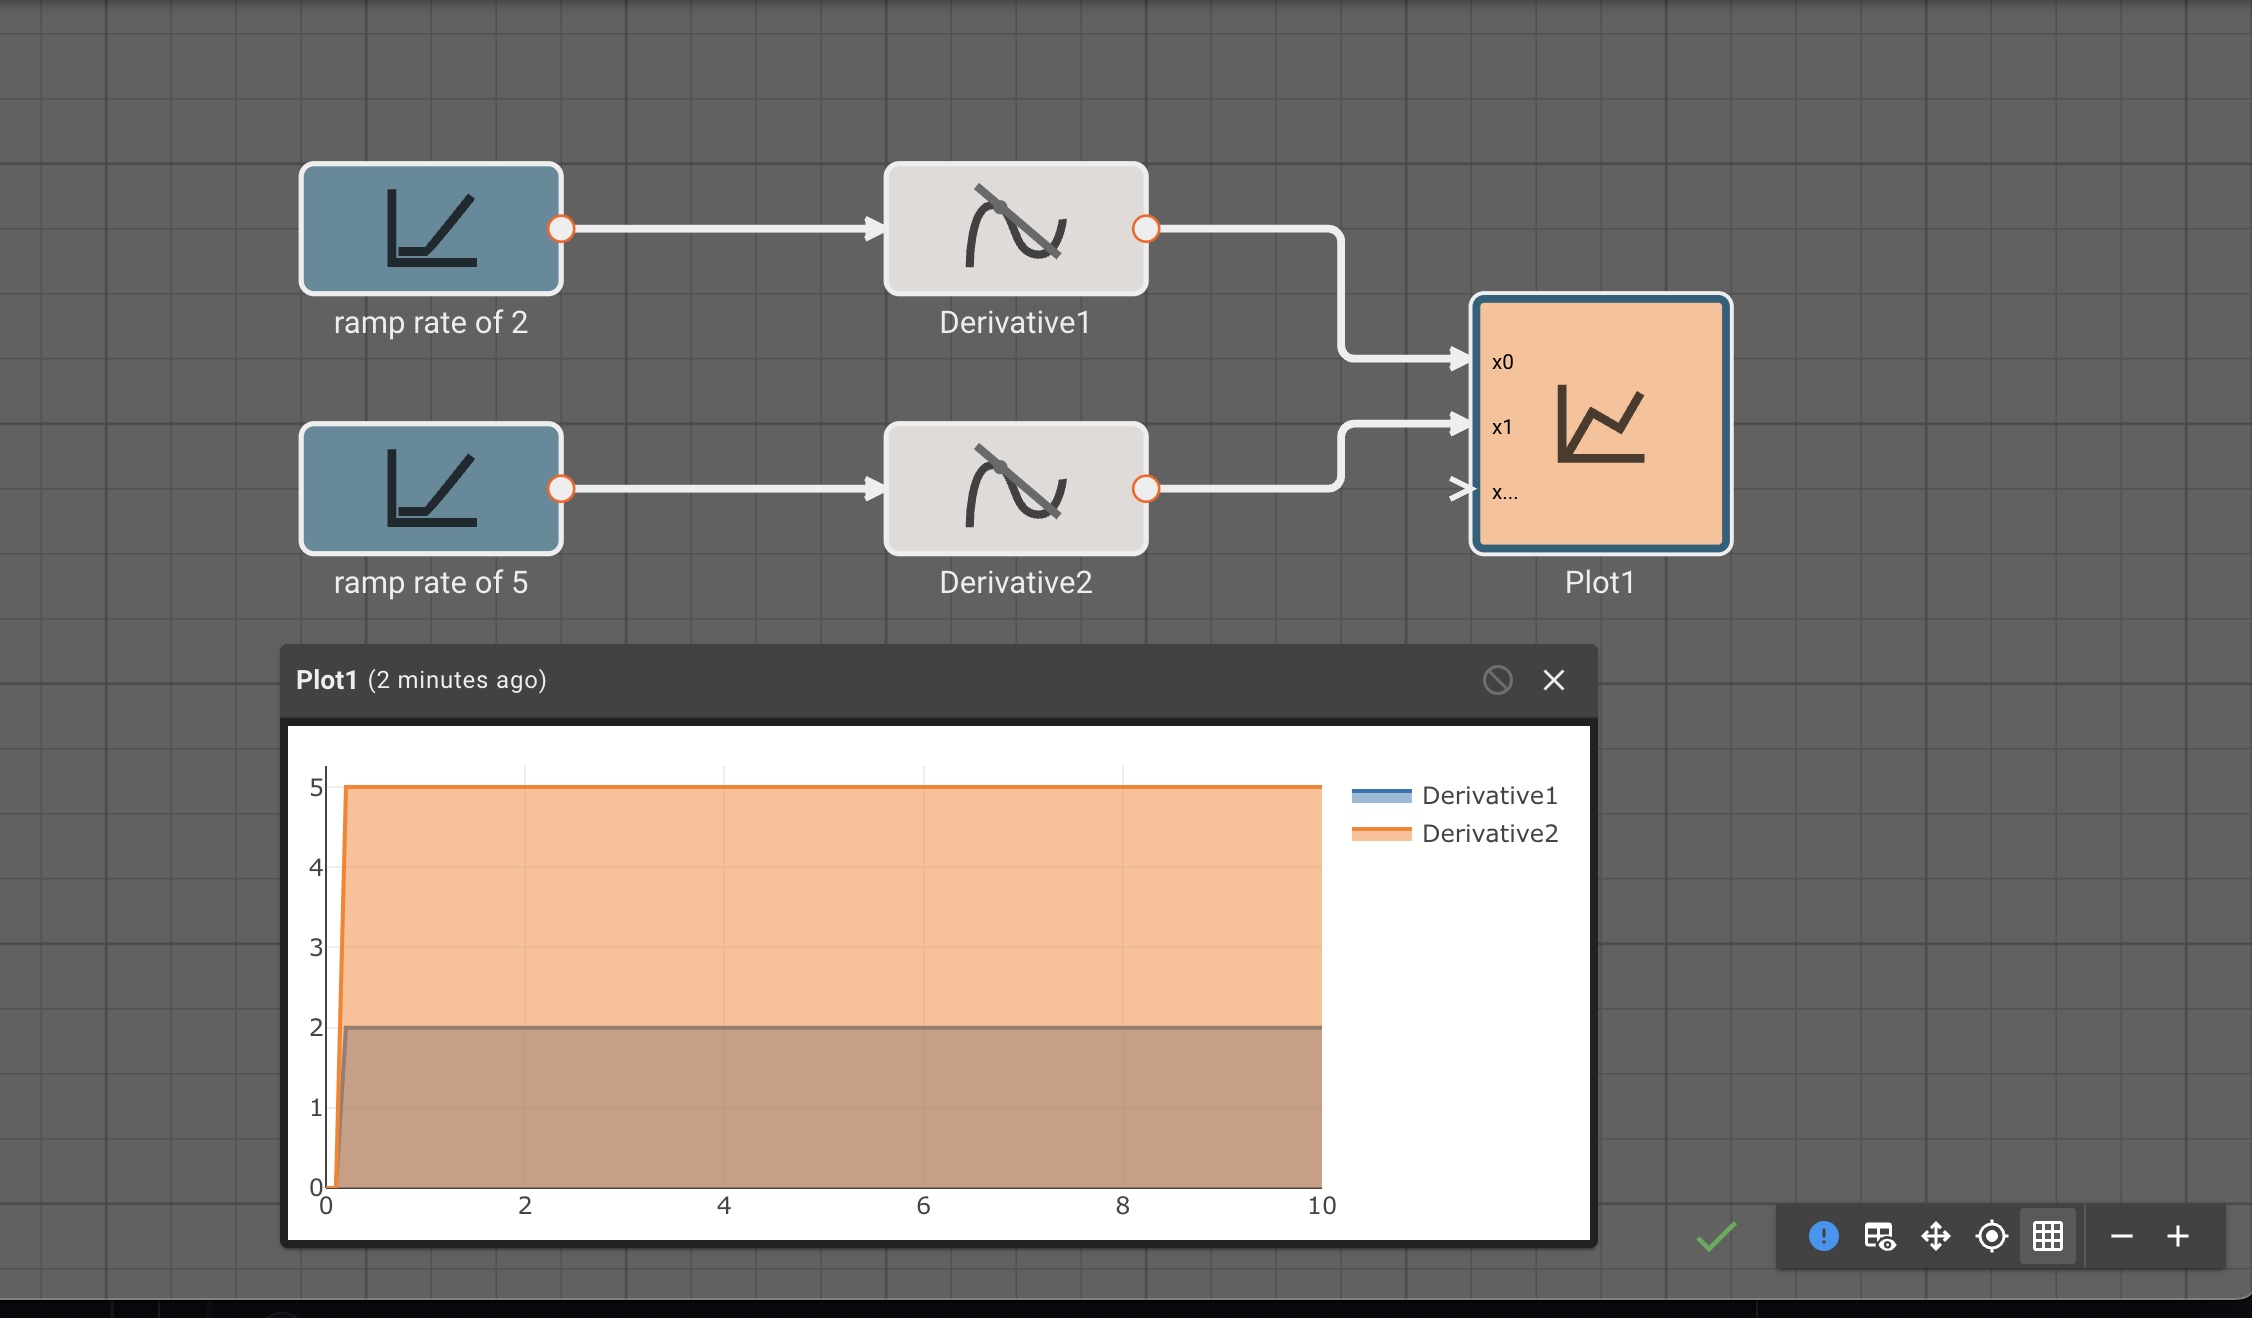
Determinant Block
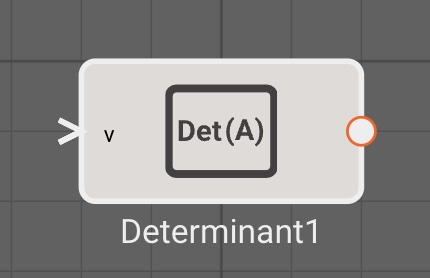
The Determinant block emits the scalar determinant of a square input vector. The input vector must be invertible or else the determinant will output zero.
Examples
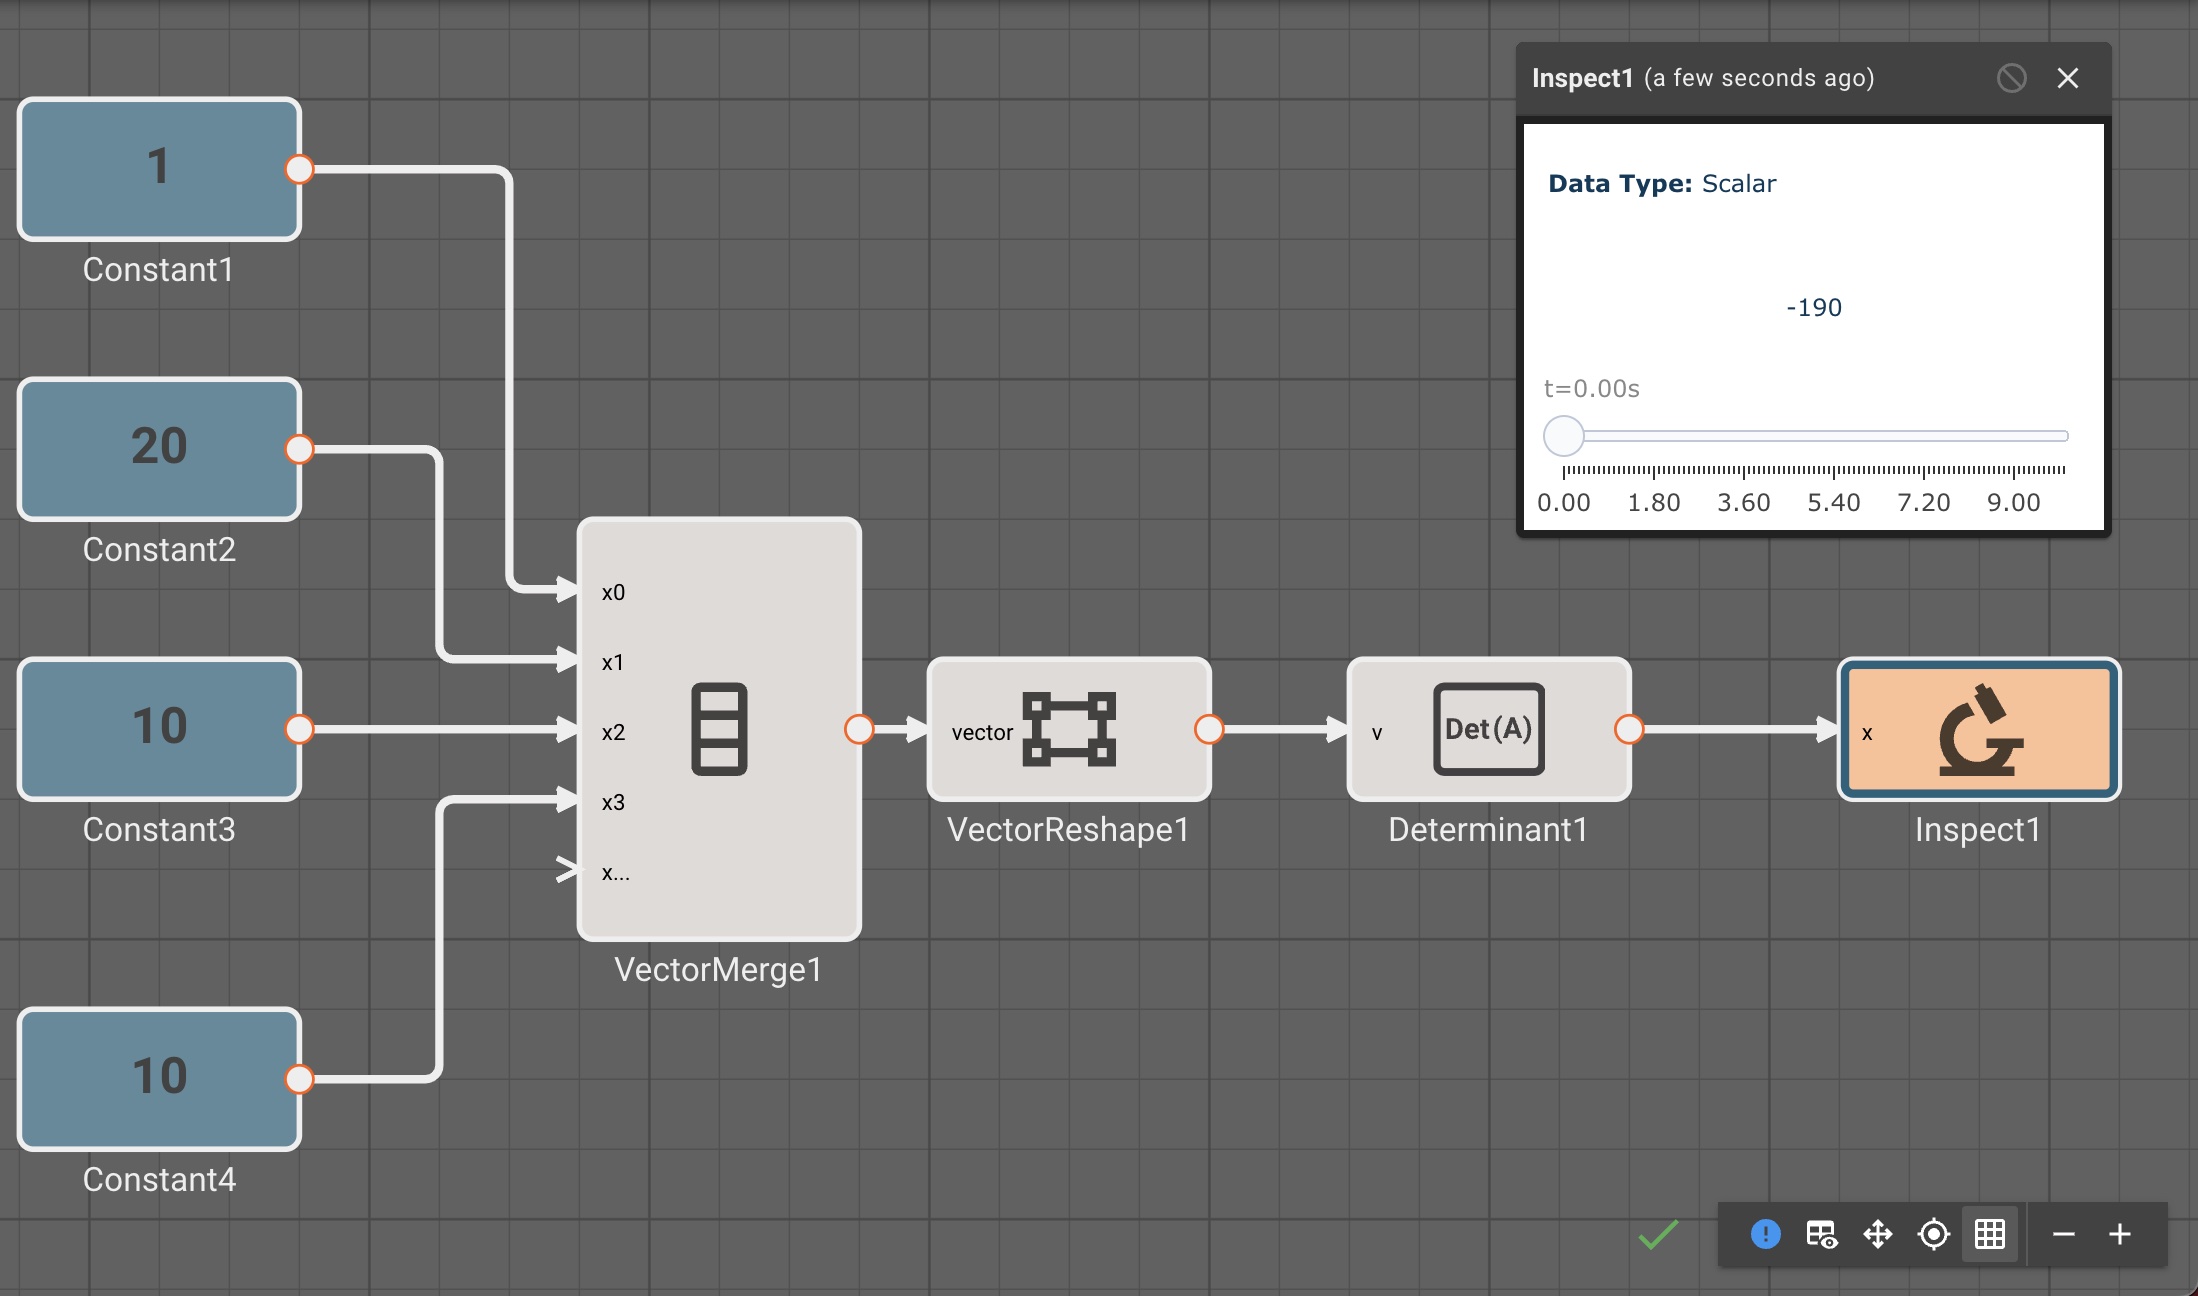
Dot Product Block
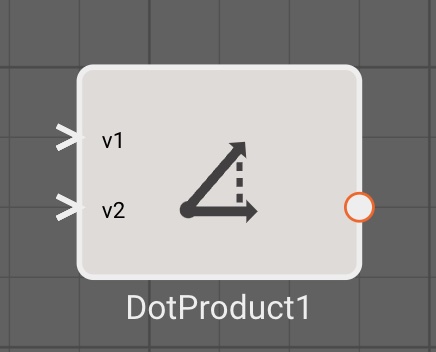
The Dot Product block emits the scalar dot product of two input vectors. The input vectors must have the same sizes.
Examples
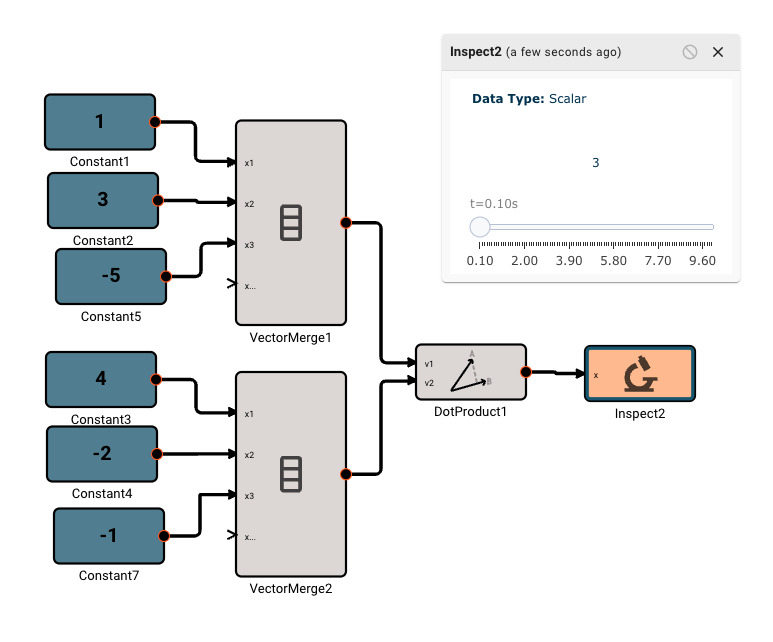
Equation Block
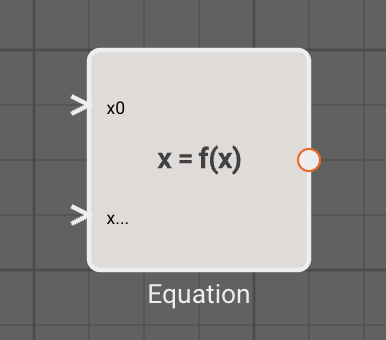
The Equation block allows users to specify simple functions with valid SymPy statements. The syntax for supported SymPy expressions is fairly limited at the moment. Mostly, this provides an easy way to write a one-line equation of multiple variables.
As indicated by the inport labels, each signal into the block is referenced as x[i] in the Expression, where i is the inport number (starting with 0).
Parameters
- Expression (default =
x0**2.0 + 1): Symbolic math equation to execute.
Examples
Exponent Block
The Exponent block emits the value of the input signal, raised to the Coefficient parameter. Coefficients < 1.0 are roots (i.e. square root = 0.5).
The Preserve Sign parameter forces the output to match the sign of the input.
Note: For roots, negative inputs will cause the app to fail, unless Preserve Sign is enabled.
Parameters
- Coefficient (default = 2.0): Numeric coefficient to raise the input signal to.
- Preserve Sign (default = False): Specifies whether block should force the output sign to match the input sign.
Examples
Fast Fourier Transform Block
The Fast Fourier Transform block emits the Discrete Fourier Transform (DFT) of an input signal, implemented using the computationally efficient Fast Fourier Transform (FFT) algorithm. We use rustfft crate to implement the FFT.
The DFT analyzes a sequence of discrete measurements to estimate the component frequencies present in a signal. The output is a vector of length equal to the buffer size, and represent frequency bins. The frequency represented by each bin depends on the sampling rate and buffer size. The 0th bin represents the DC offset of the signal, essentially any fixed bias.
This block is useful for analyzing a sensor reading to determine what frequencies are present. It's an approximation that depends highly on the buffer size and sampling rate (See: Nyquist Frequency).
Parameters
- Buffer Size (default = 10.0): Number of samples to accumulate before performing the FFT.
Examples
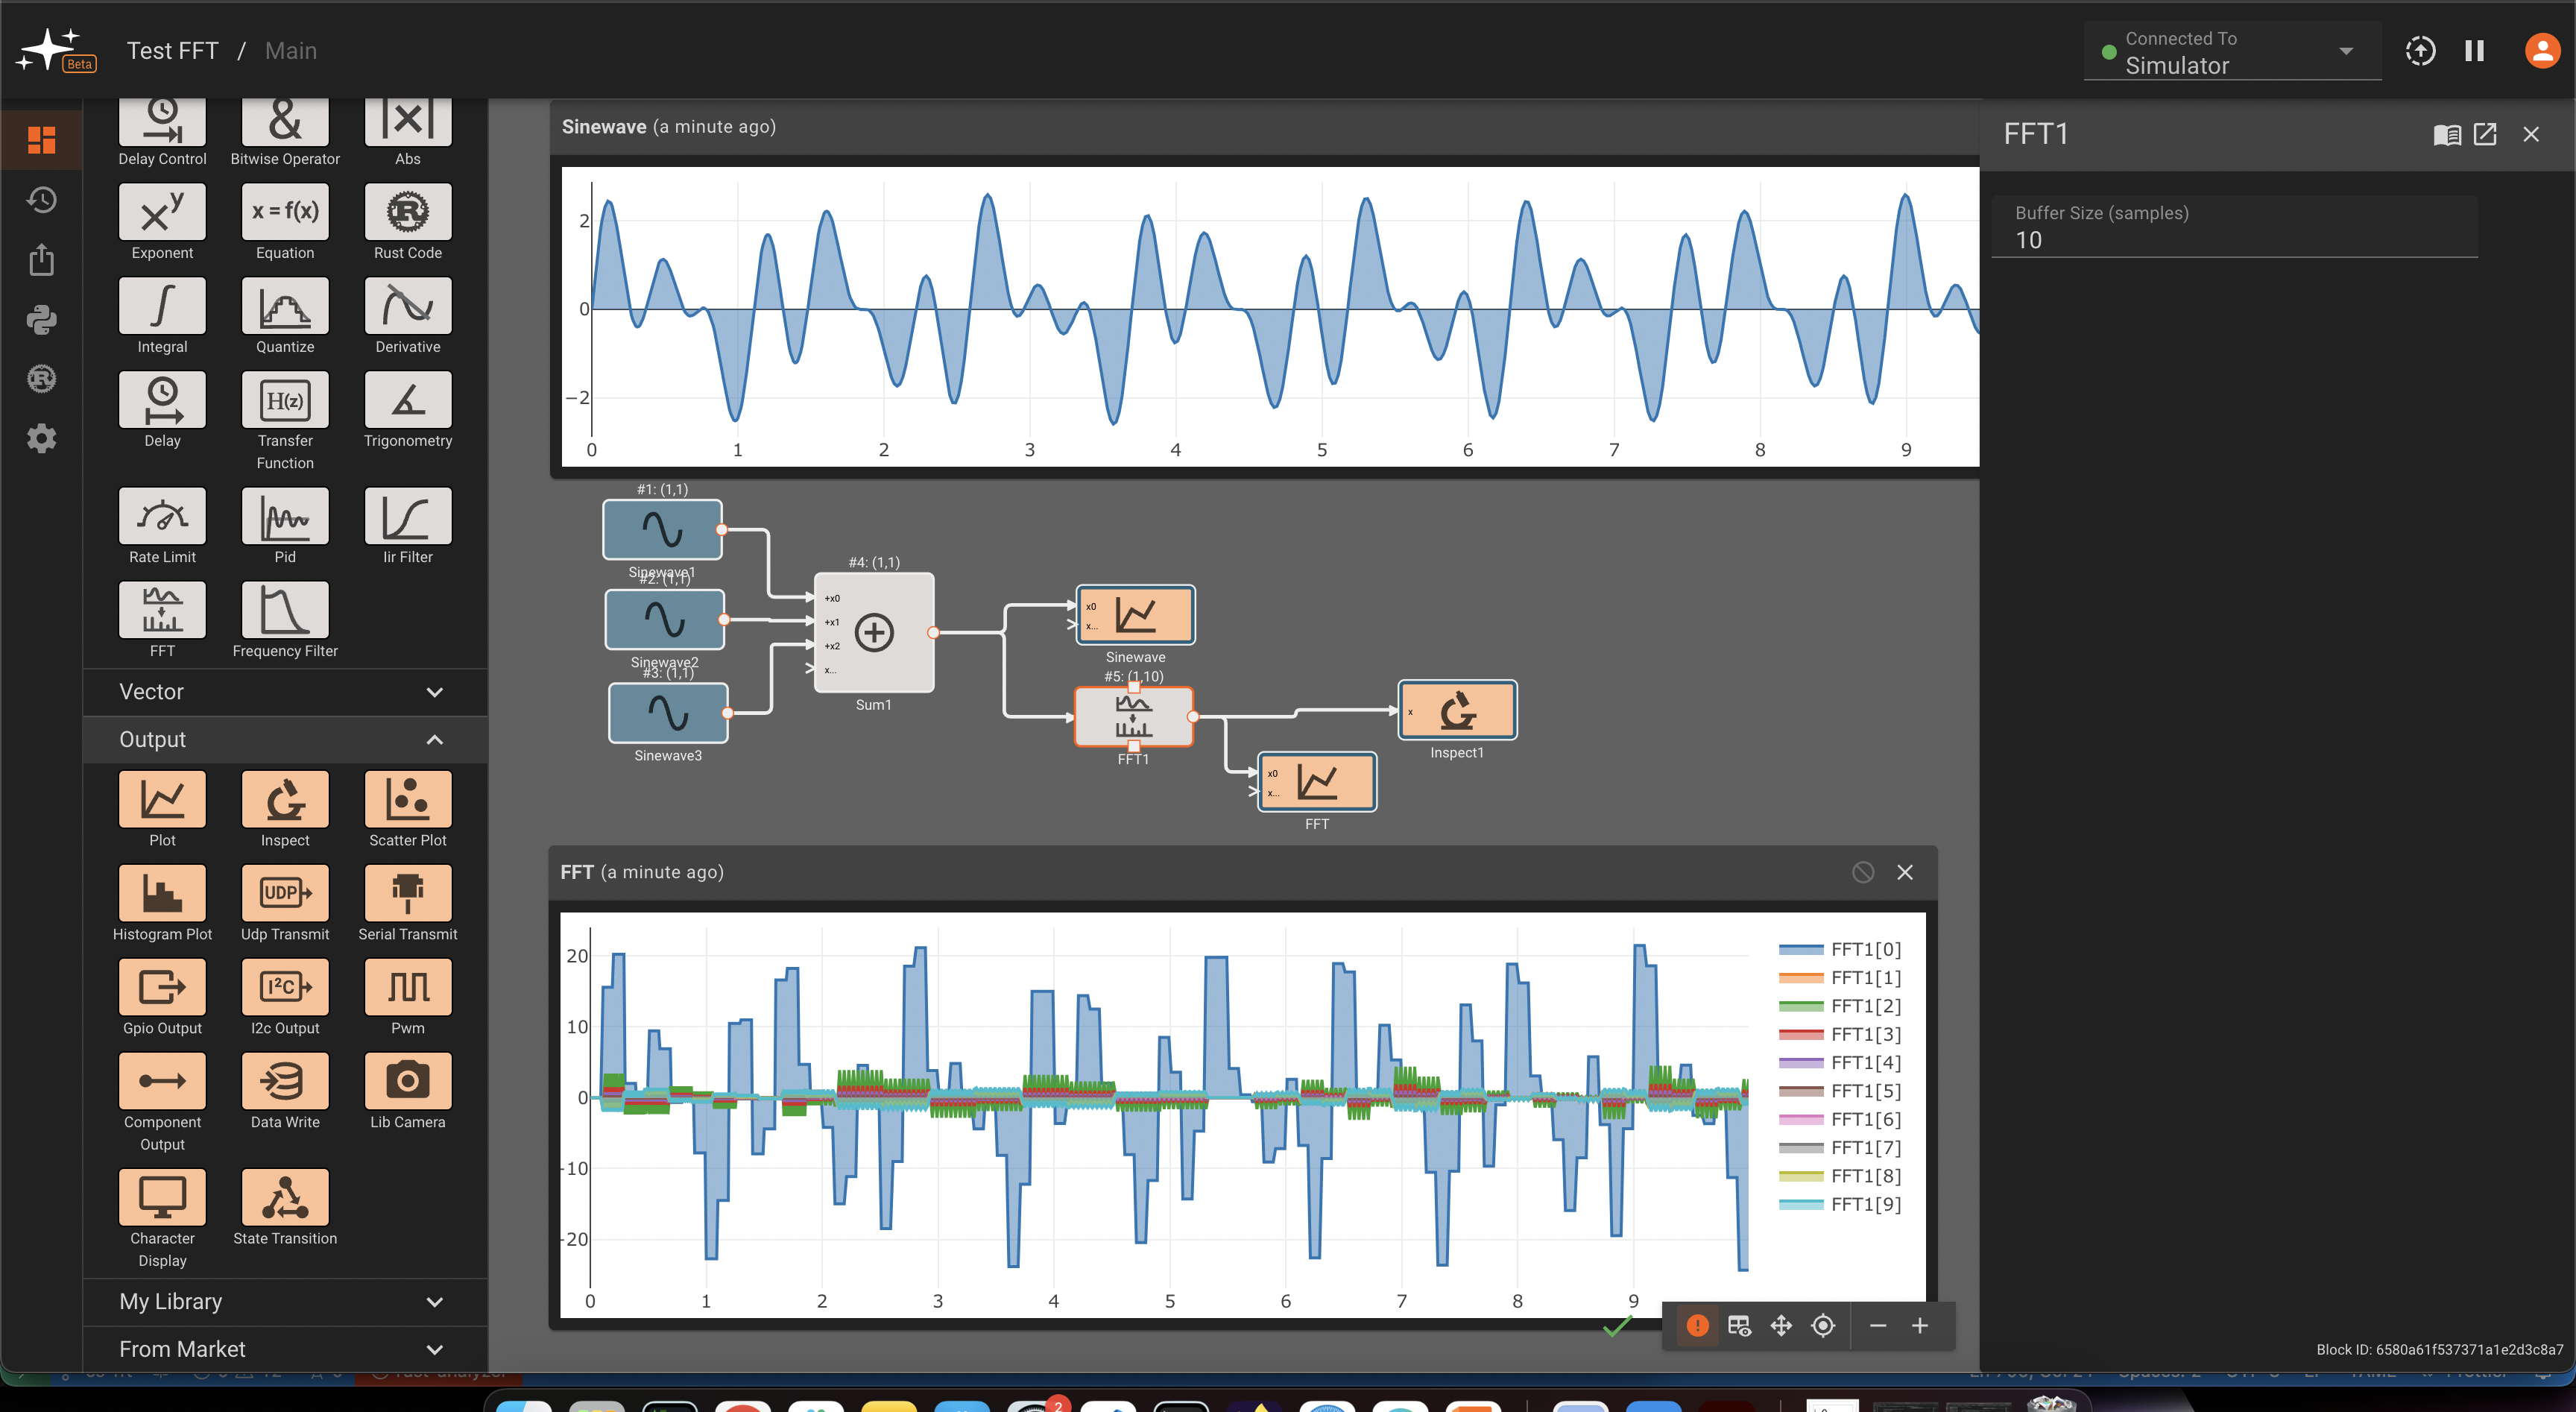
FMU Block
The FMU block can be used to interact with a Functional Mock-up Unit (FMU) model for co-simulation. The FMU block determines its inputs, outputs, and parameters based on the values defined in the associated FMU. In order to use an FMU block, you must first upload a statically linked FMU file.
Inputs
- One input for each model variable of causality "input".
Outputs
- One output for each model variable of causality "output".
Parameters
- FMU: Which FMU type to use. This field will be a dropdown that allows you to select from the FMU files uploaded to Static Assets.
- The block will also have parameters for each variable of causality "parameter" in the FMU model.
Examples
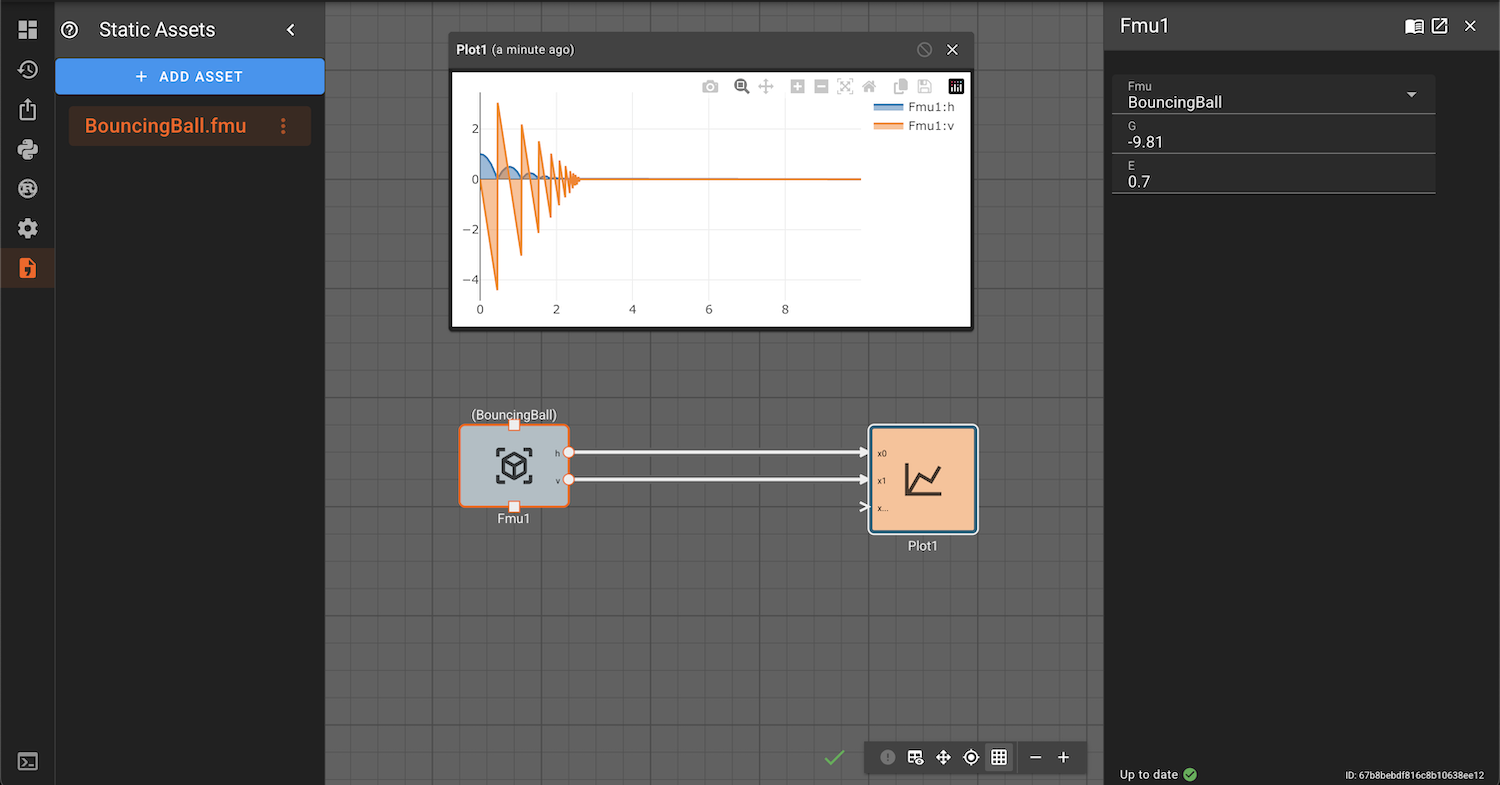
Frequency Filter Block
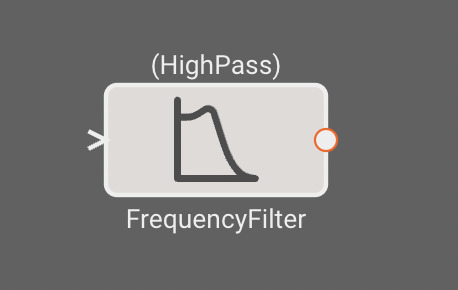
The Frequency Filter block emits either a high pass or low pass filter of the input, analogous to a first-order RC filter, specified by a cutoff frequency. For more details on derivation, read up here.
This first-order filter is effective for attenuating undesirable frequencies from sensor measurements, enhancing the quality of the signal. In the context of a high-pass filter, components of the signal with frequencies below the specified cutoff frequency will be attenuated, allowing only higher frequencies to pass through. Conversely, the low-pass filter implementation will attenuate signal components with frequencies above the cutoff, allowing only lower frequencies to pass through. A first-order filter provides a balance between simplicity and effectiveness, making it suitable for many applications where precision and computational efficiency are crucial.
Parameters
- Method [HighPass | LowPass]
- HighPass: Preserves the power of high-frequency signals while attenuating signals with frequencies below the cutoff.
- LowPass: Preserves the power of low-frequency signals while attenuating signals with frequencies above the cutoff.
- Cutoff Frequency (hz) (default = 10.0): Frequency above or below which attenuation will be focused for the filter.
- Initial Condition (default = 0.0): Initial output of the filter.
Examples
Gain Block
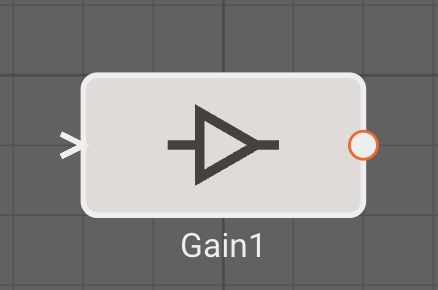
The Gain block emits the value of the input block, scaled by the Gain parameter.
Parameters
- Gain (default = 1.0): Numeric value to scale the input by.
Examples
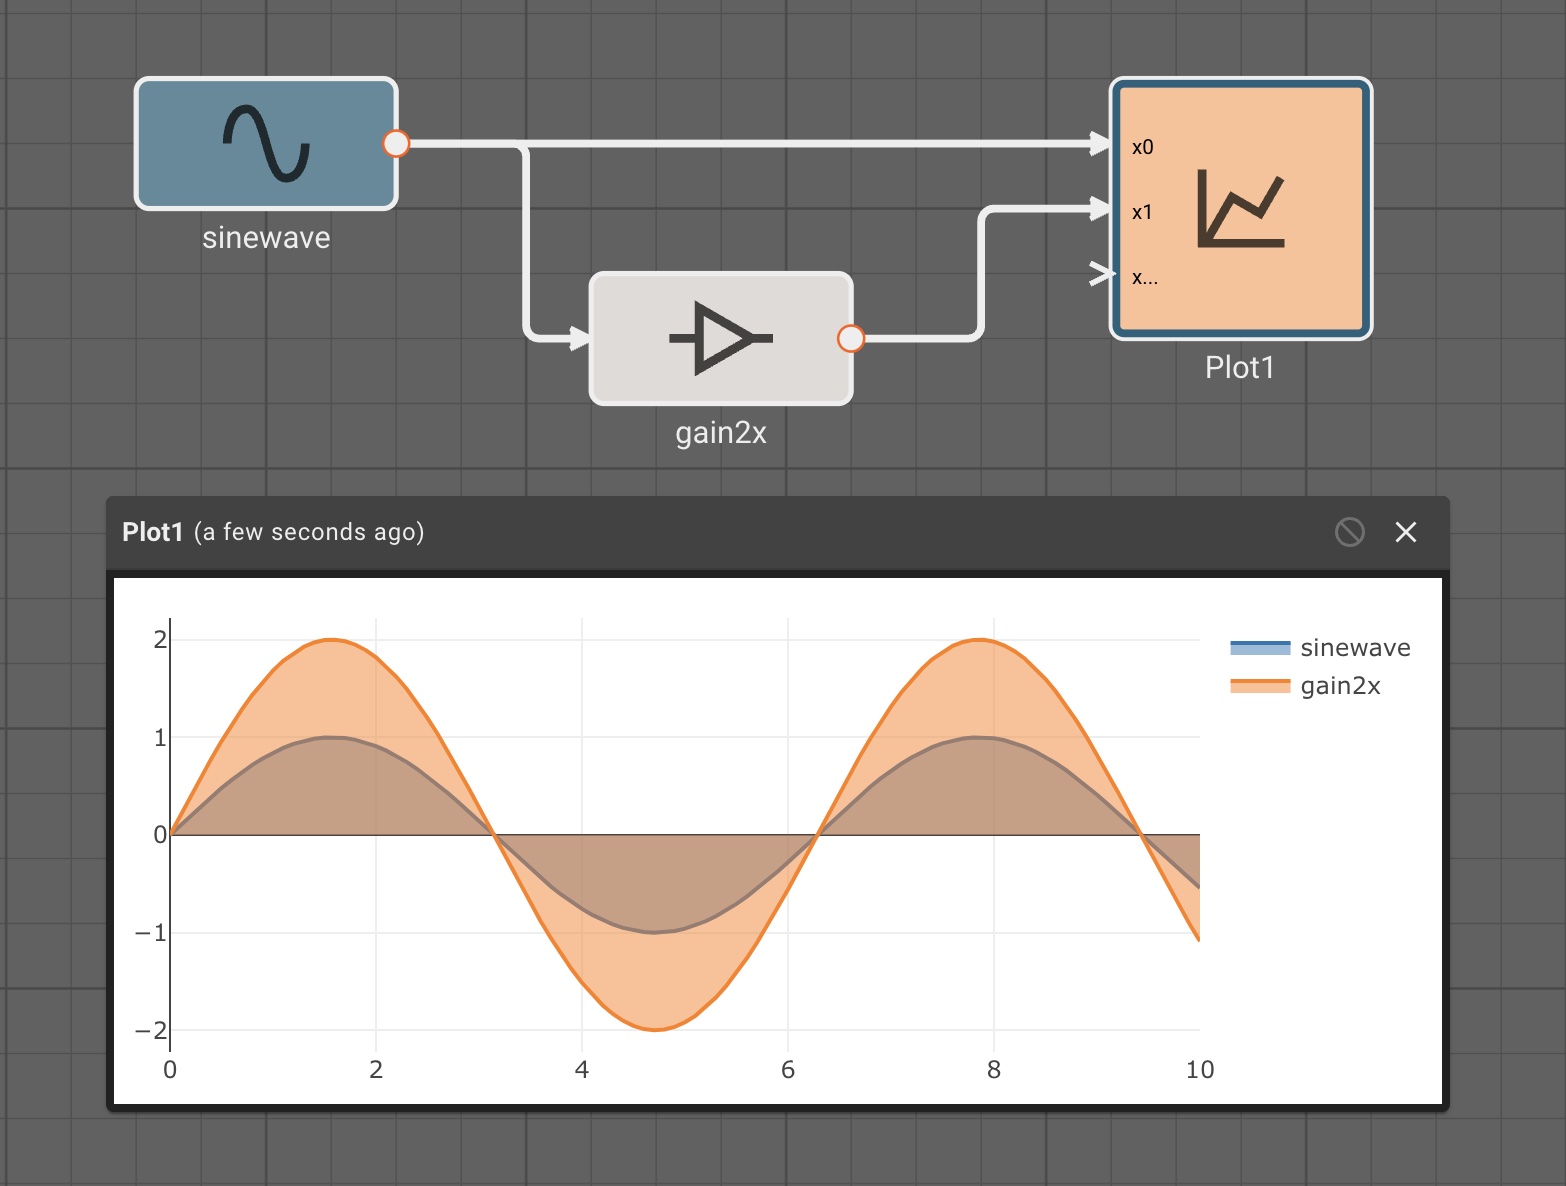
Gpio Input Block
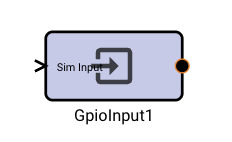
The Gpio Input block reads the value of a specified GPIO pin and outputs its state as a value: 1 = pin is high; 0 = pin is low.
You can optionally provide an input that will be passed through as the signal for simulations.
Parameters
- Pin Number (default = 0): The pin number (using BCM numbering) to read.
Gpio Output Block
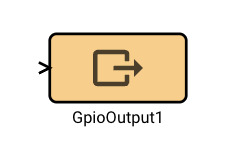
The Gpio Output block writes the input value to the specified GPIO pin. A value of 0 will set the pin low, any other value will set it high.
Parameters
- Pin Number (default = 0): The pin number (using BCM numbering) to write to.
Histogram Plot Block
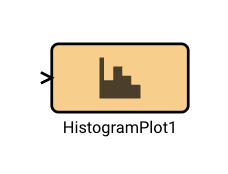
The Histogram block plots vertical bins representing the number of samples (Y axis) falling within the ranges specified by the X-axis.
Currently, bin count and ranges are automatically generated, and chosen so that this number is comparable to the typical number of samples in a bin.
Parameters
None
Examples
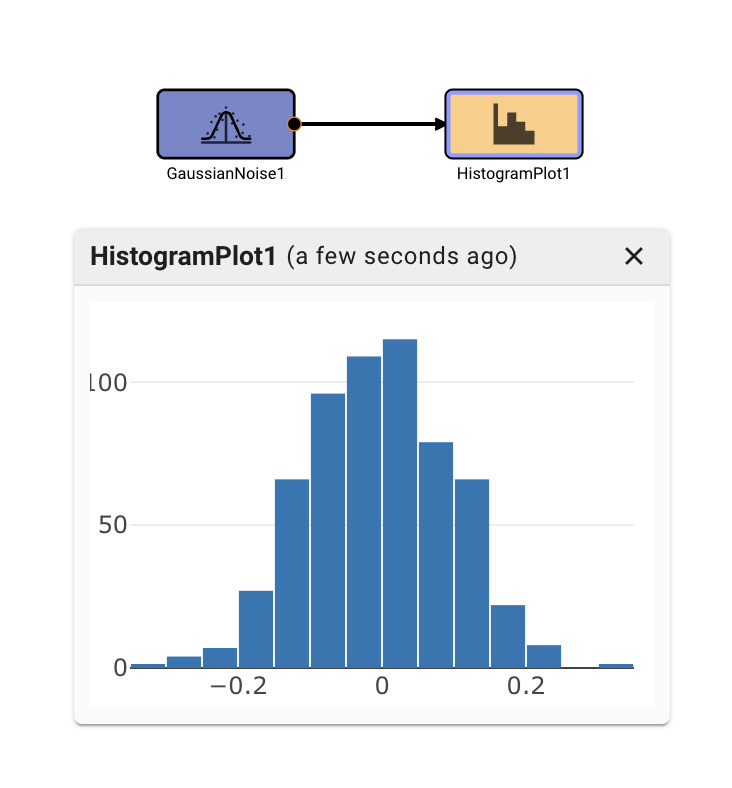
I2C Input Block
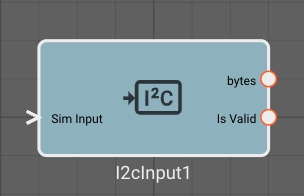
The I2C Input block reads data from a given I2C address and register.
Inputs
- Sim Input: Optional bytes data that will be passed through in simulation mode
Outputs
- bytes: bytes received by the read command. The number of bytes is controlled by the
Read Bytesparameter. - Is Valid: A boolean representing whether the data is valid as determined by the
Stale Age (ms)param
Parameters
- Address (default = 0): I2C address to read from.
- Command (default = 0): Command to send to the device. This is typically the register number you want to read.
- Read Bytes (default = 1): Number of bytes to read from the register.
- Stale Age (ms) (default = 1000): Age from last valid data received when the block will output
Is ValidasFalse
I2C Output Block
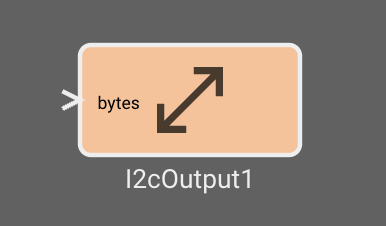
The I2C Output block writes data to a given I2C address and register.
Inputs
- bytes: bytes that will be sent to the register.
Parameters
- Address (default = 0) - I2C address to write to.
- Command (default = 0): Command to send to the device. This is typically the register number you want to write to.
IIR Filter Block
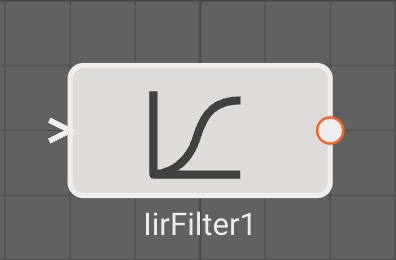
The Infinite Impulse Response Filter block emits a low pass filter of the input, analogous to a first-order RC filter. For more details on derivation, read up here.
This simple, efficient filter is generally good at removing noise from a sensor measurement, with only a single, intuitive parameter to tune.
The value of the filter at each step is the weighted sum of the current input value, and the previous output value:
\( \ f(x_i) = \alpha*x_i + (1 - \alpha) * f(x_{i-1}) \)
where
\( \ \alpha = \frac{dt}{RC +dt} \)
Parameters
- Time Constant (default = 1.0): Time constant (
RC) for the filter. Physically, the time constant represents the elapsed time required for the system response to decay to zero if the system had continued to decay at the initial rate (source). - Initial Condition (default = 0.0): Initial condition to set the filter value to at t=0
Examples
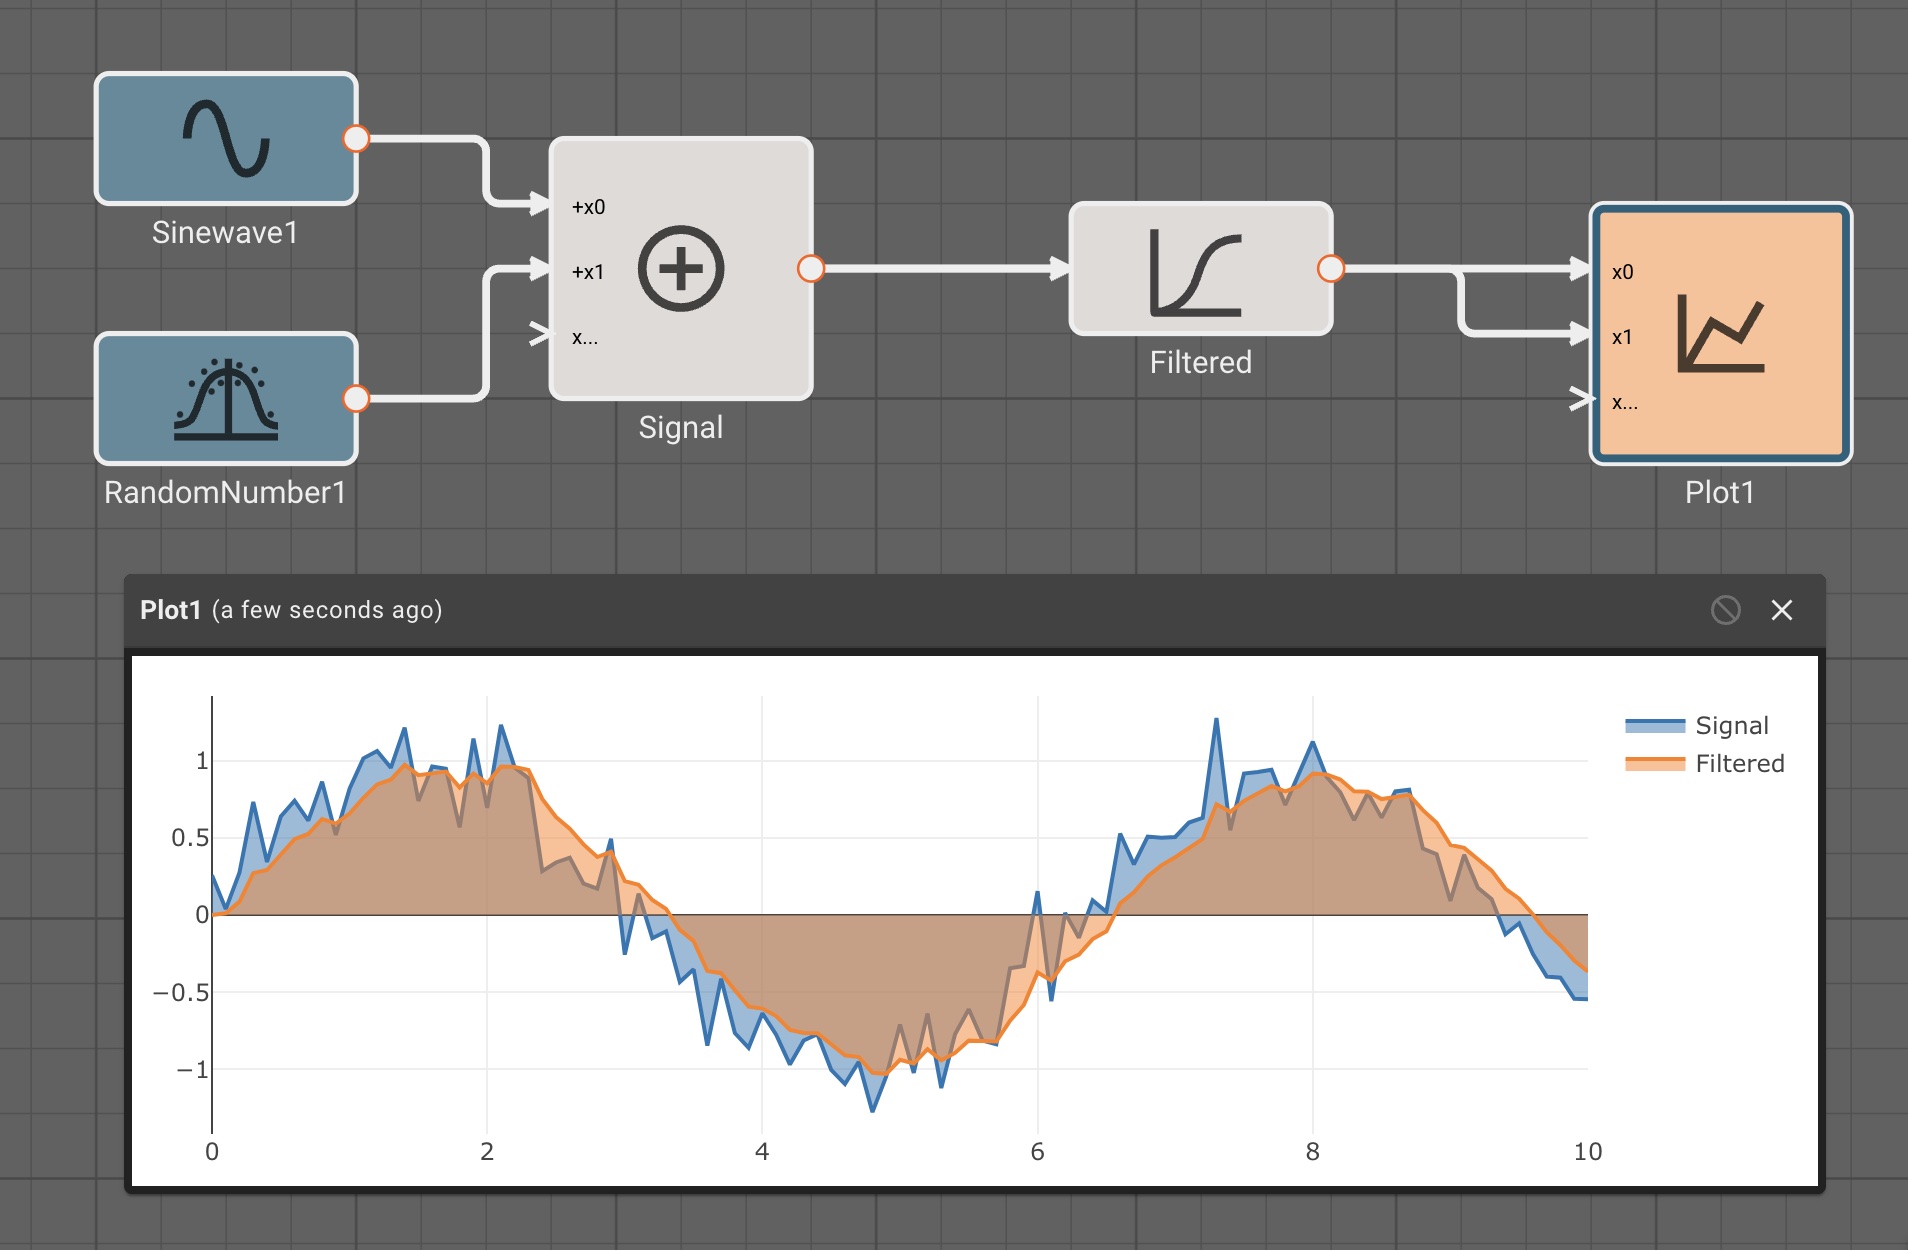
Integral Block
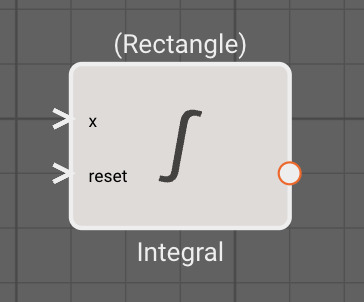
The Integral block emits the discrete integral of the input signal to approximate the definite integral.
Optionally, the integral can be reset to 0.0 if a reset signal is attached that emits a truthy value.
Parameters
- Method [Rectangle | Trapezoidal]
- Rectangle: Performs Rectangle-rule discrete integration. While often less accurate that Trapezoidal, it is slightly faster, and has the benefit of sympletic conservation.
- Trapezoidal: Performs Trapezoidal rule discrete integration. Generally more accurate than Rectangular, but can diverge more noticebly if large step sizes are used.
- Initial Condition (default = 0): Specifies an initial offset value for the integral.
- Clamp Limit (default = 1e100): Specifies a maximum magnitude for the integral. Beyond this limit (positive or negative), no further integration will occur.
Examples
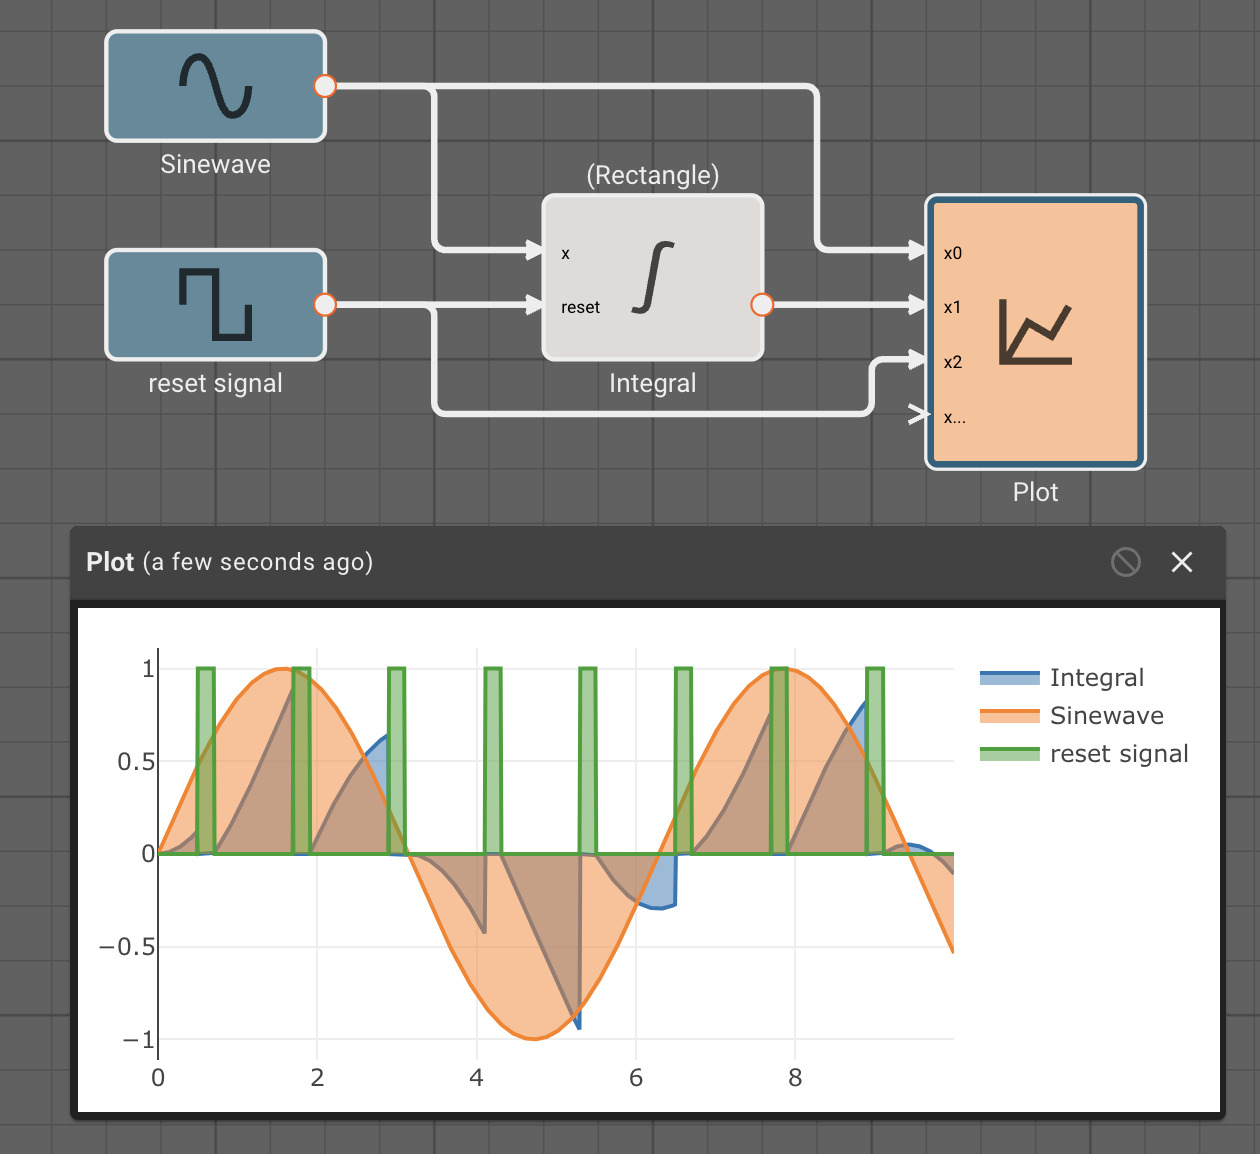
Inspect Block
The Inspect block allows users to inspect the exact value of a signal at every time step. It is intended as a debugging tool.
As shown in the examples below, the Inspect block renders differently for scalars, vectors, and byte streams:
Examples
 |
|---|
| For scalars, the full floating-point representation for each signal is shown, and allows users to scrub through time to observe exact values at precise moments. |
 |
|---|
| For vectors, each element is rendered in a box, arranged to show the rows and columns of the vector. |
 |
|---|
| For byte streams, three representations are shown: The string interpretation, the hex interpretation, and the u8 interpretation. |
JSON Load Block
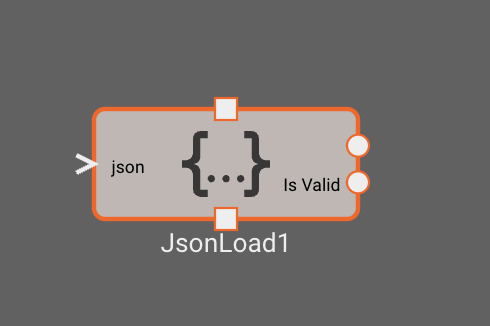
The JSON Load block attempts to parse the input bytes as JSON and output values from the specified keys
Inputs
- JSON: bytes data to parse
Outputs
- output_n (dynamic): Scalar or bytes signal corresponding to keys configured in the block parameters
- Is Valid: A boolean representing whether the data is valid as determined by the
Stale Age (ms)param
Parameters
- Select Keys: The keys to extract from the JSON object. These will be output as individual signals from the block.
- Key: The name of the key to extract from the JSON object
- Type (Number | Bytes): Select whether the data should be interpreted as a scalar number, or bytes that will be parsed again downstream
- Stale Age (ms) (default = 1000): Age from last valid data parsed when the block will output
Is ValidasFalse
JSON Dump Block
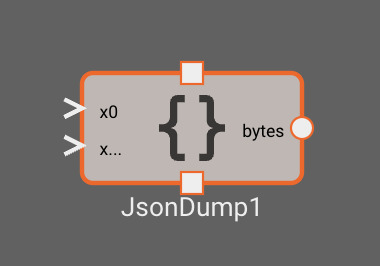
The JSON Dump block attempts to serialize the inputs to a byte representation of a JSON object
Inputs
- x (dynamic): data that will be set as values of the output JSON
Outputs
- bytes: the serialized JSON object as bytes
Parameters
- Output Keys: The keys to add to the JSON object
- Data Key: The name of the key that will be added to the JSON object
- Encoding (Default | String): Select how the data will be encoded for output.
Defaultwill attempt to encode to the corresponding numeric type (scalar, array, or matrix)Stringwill encode the the output value as a string. This is particularly useful if the input is bytes data that represents a string. For instance you can encode a JSON string and feed it as the input to another JSON Dump Block.
Logical Block
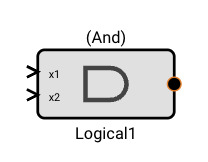
The Logical block emits a boolean comparison of two input signals. It has four different modes of operation: And, Or, Nor, and Nand.
In Pictorus, any non-zero value is considered "Truthy", whereas "Falsy" is represented by 0.0.
Parameters
- Method [And | Or | Nor | Nand]
- And Emits True when both inputs are True (non-zero).
- Or Emits True when either input is True (non-zero).
- Nor Emits True when neither input is True (non-zero).
- Nand Emits True when both inputs are False (zero).
Examples

Lookup 1d Block
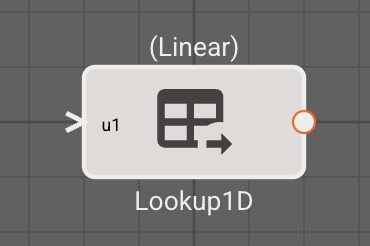
The Lookup 1D block performs a lookup from a table. The linear method emits the linear interpolation of the input signal with respect to 1-dimensional Break Points (input references) and Data Points (output references) specified in the block parameters. The nearest method selects the table value of the nearest breakpoint.
Each iteration, the block determines where the input signal falls within the Break Points array, and emits the interpolated value correspondingly from the Data Points array. If the input signal falls outside the bounds of the Break Points, it will choose the nearest point, thereby clamping the output to within the bounds of the Data Points array.
Break Points must be monotonically increasing to be valid. A sequence is monotonically increasing if each term is greater than or equal to the one before it.
This block is particularly useful when real-world tabulated data is known for some dynamical system, and rather than curve-fitting or approximating the system with an equation, a direct table lookup is preferred. When linear interpolation is performed (as opposed to cubic or a higher order polynomial), large differences in consecutive Data Point values can lead to abrupt discontinuities in the output.
Parameters
- Method [Linear | Nearest]
- Linear: Calculate the lookup value using the point-slope method between the two nearest breakpoints.
- Nearest: Return the table value of the nearest breakpoint to the lookup value. Always rounds up when equidistant between two breakpoints.
- Break Points U1 (default = [-1, 1]): List of monotonically-increasing lookup points for interpolation against the input signal.
- Data Points (default = [0, 1]): List of output values that correspond to each Break Point, between which intermediate outputs are computed proportionally.
Examples
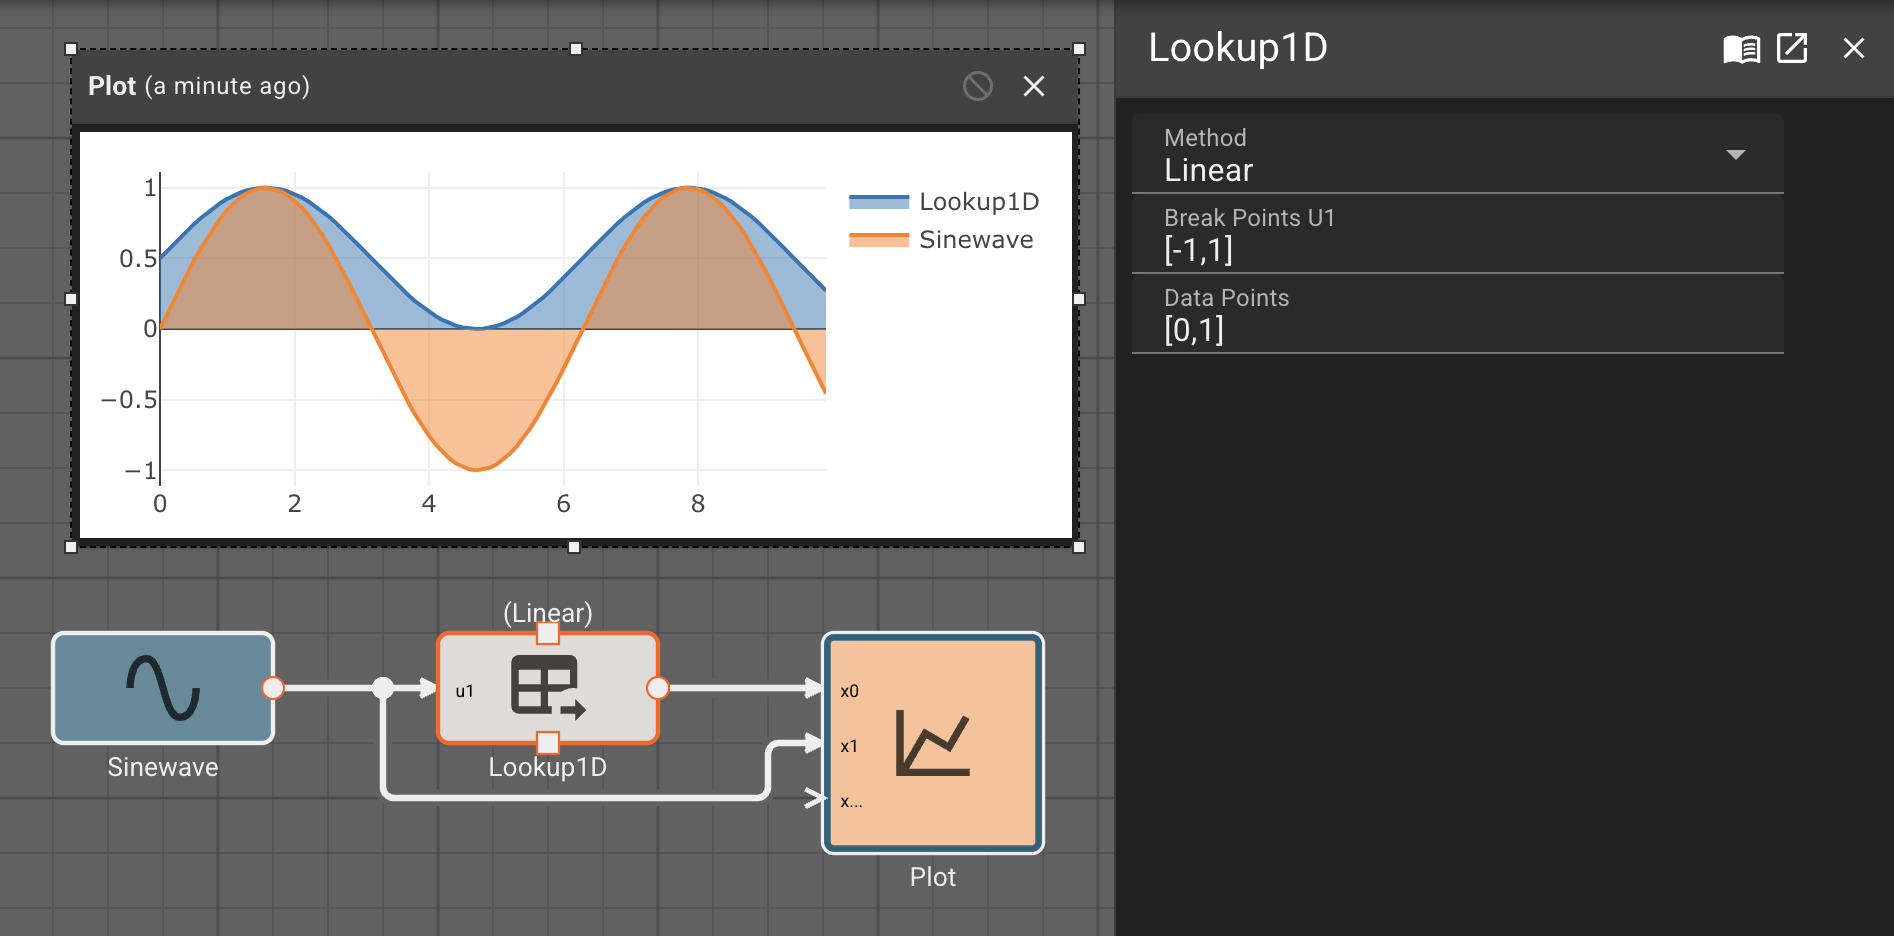
Lookup 2d Block
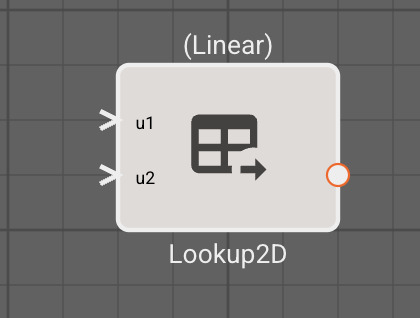
The Lookup 2D block performs a 2d lookup from a 2d data table. The linear method emits the bi-linear interpolation of the input signal with respect to two Break Points arrays (input references) and a 2d Data Points (output references) specified in the block parameters. The nearest method selects the table value of the nearest breakpoint.
Each iteration, the block determines where the input signal falls within the Break Points arrays, and emits the interpolated value correspondingly from the Data Points array. If the input signal falls outside the bounds of the Break Points, it will choose the nearest point, thereby clamping the output to within the bounds of the Data Points array.
Break Points must be monotonically increasing to be valid. A sequence is monotonically increasing if each term is greater than or equal to the one before it.
This block is particularly useful when real-world tabulated data is known for some dynamical system, and rather than curve-fitting or approximating the system with an equation, a direct table lookup is preferred. When linear interpolation is performed (as opposed to cubic or a higher order polynomial), large differences in consecutive Data Point values can lead to abrupt discontinuities in the output.
Parameters
- Method [Linear | Nearest]
- Linear: Calculate the lookup value using the point-slope method between the two nearest breakpoints.
- Nearest: Return the table value of the nearest breakpoint to the lookup value. Always rounds up when equidistant between two breakpoints.
- Break Points U1 (default = [-1, 1]): First dimension, monotonically-increasing lookup points for interpolation against the input signal.
- Break Points U2 (default = [-1, 1]): Second dimension, monotonically-increasing lookup points for interpolation against the input signal.
- Data Points (default = [[0, 1], [0, 1]]): 2d table of output values that correspond to the Break Points, between which intermediate outputs are computed proportionally.
Examples
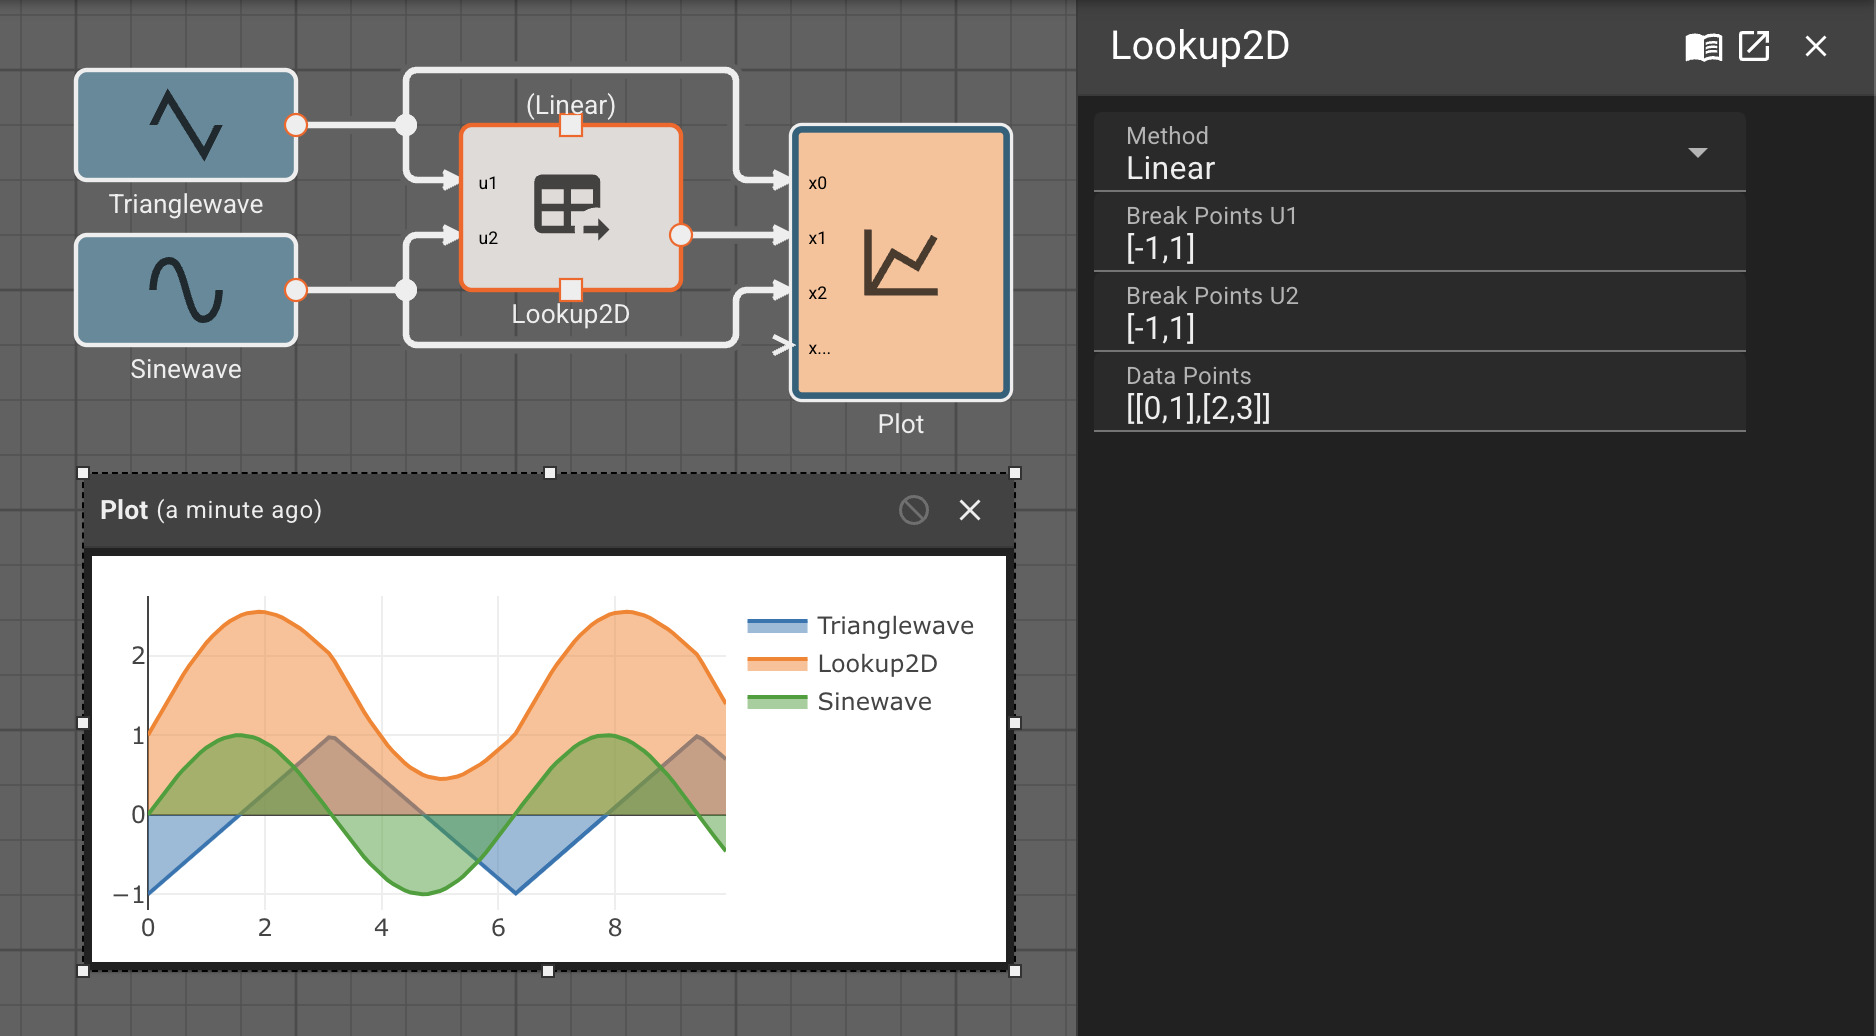
Matrix Inverse Block
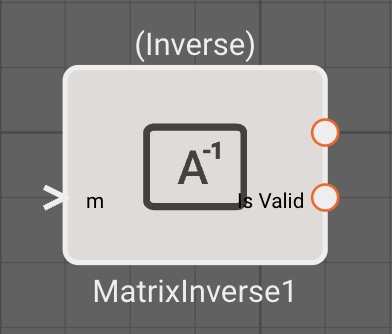
The Matrix Inverse block emits the vector solution to the invertible matrix problem for an input matrix (2d vector). The input must square (rows == columns).
The second outport of the block emits True if the input was successfully inverted, False otherwise.
Parameters
- Method [Inverse | SVD ]
- Inverse: Emits the matrix inversion of the input, if it is indeed invertible.
- SVD: Emits the Singular Value Decomposition Pseudoinverse of the input matrix. This is an iterative, least-square approximate solution. Although more computationally intensive, it better handles over-determined input, rank deficient input, and is more numerically stable. For more details on Rust implementation, check out NAlgebra's documentation, or view the source code here.
Examples
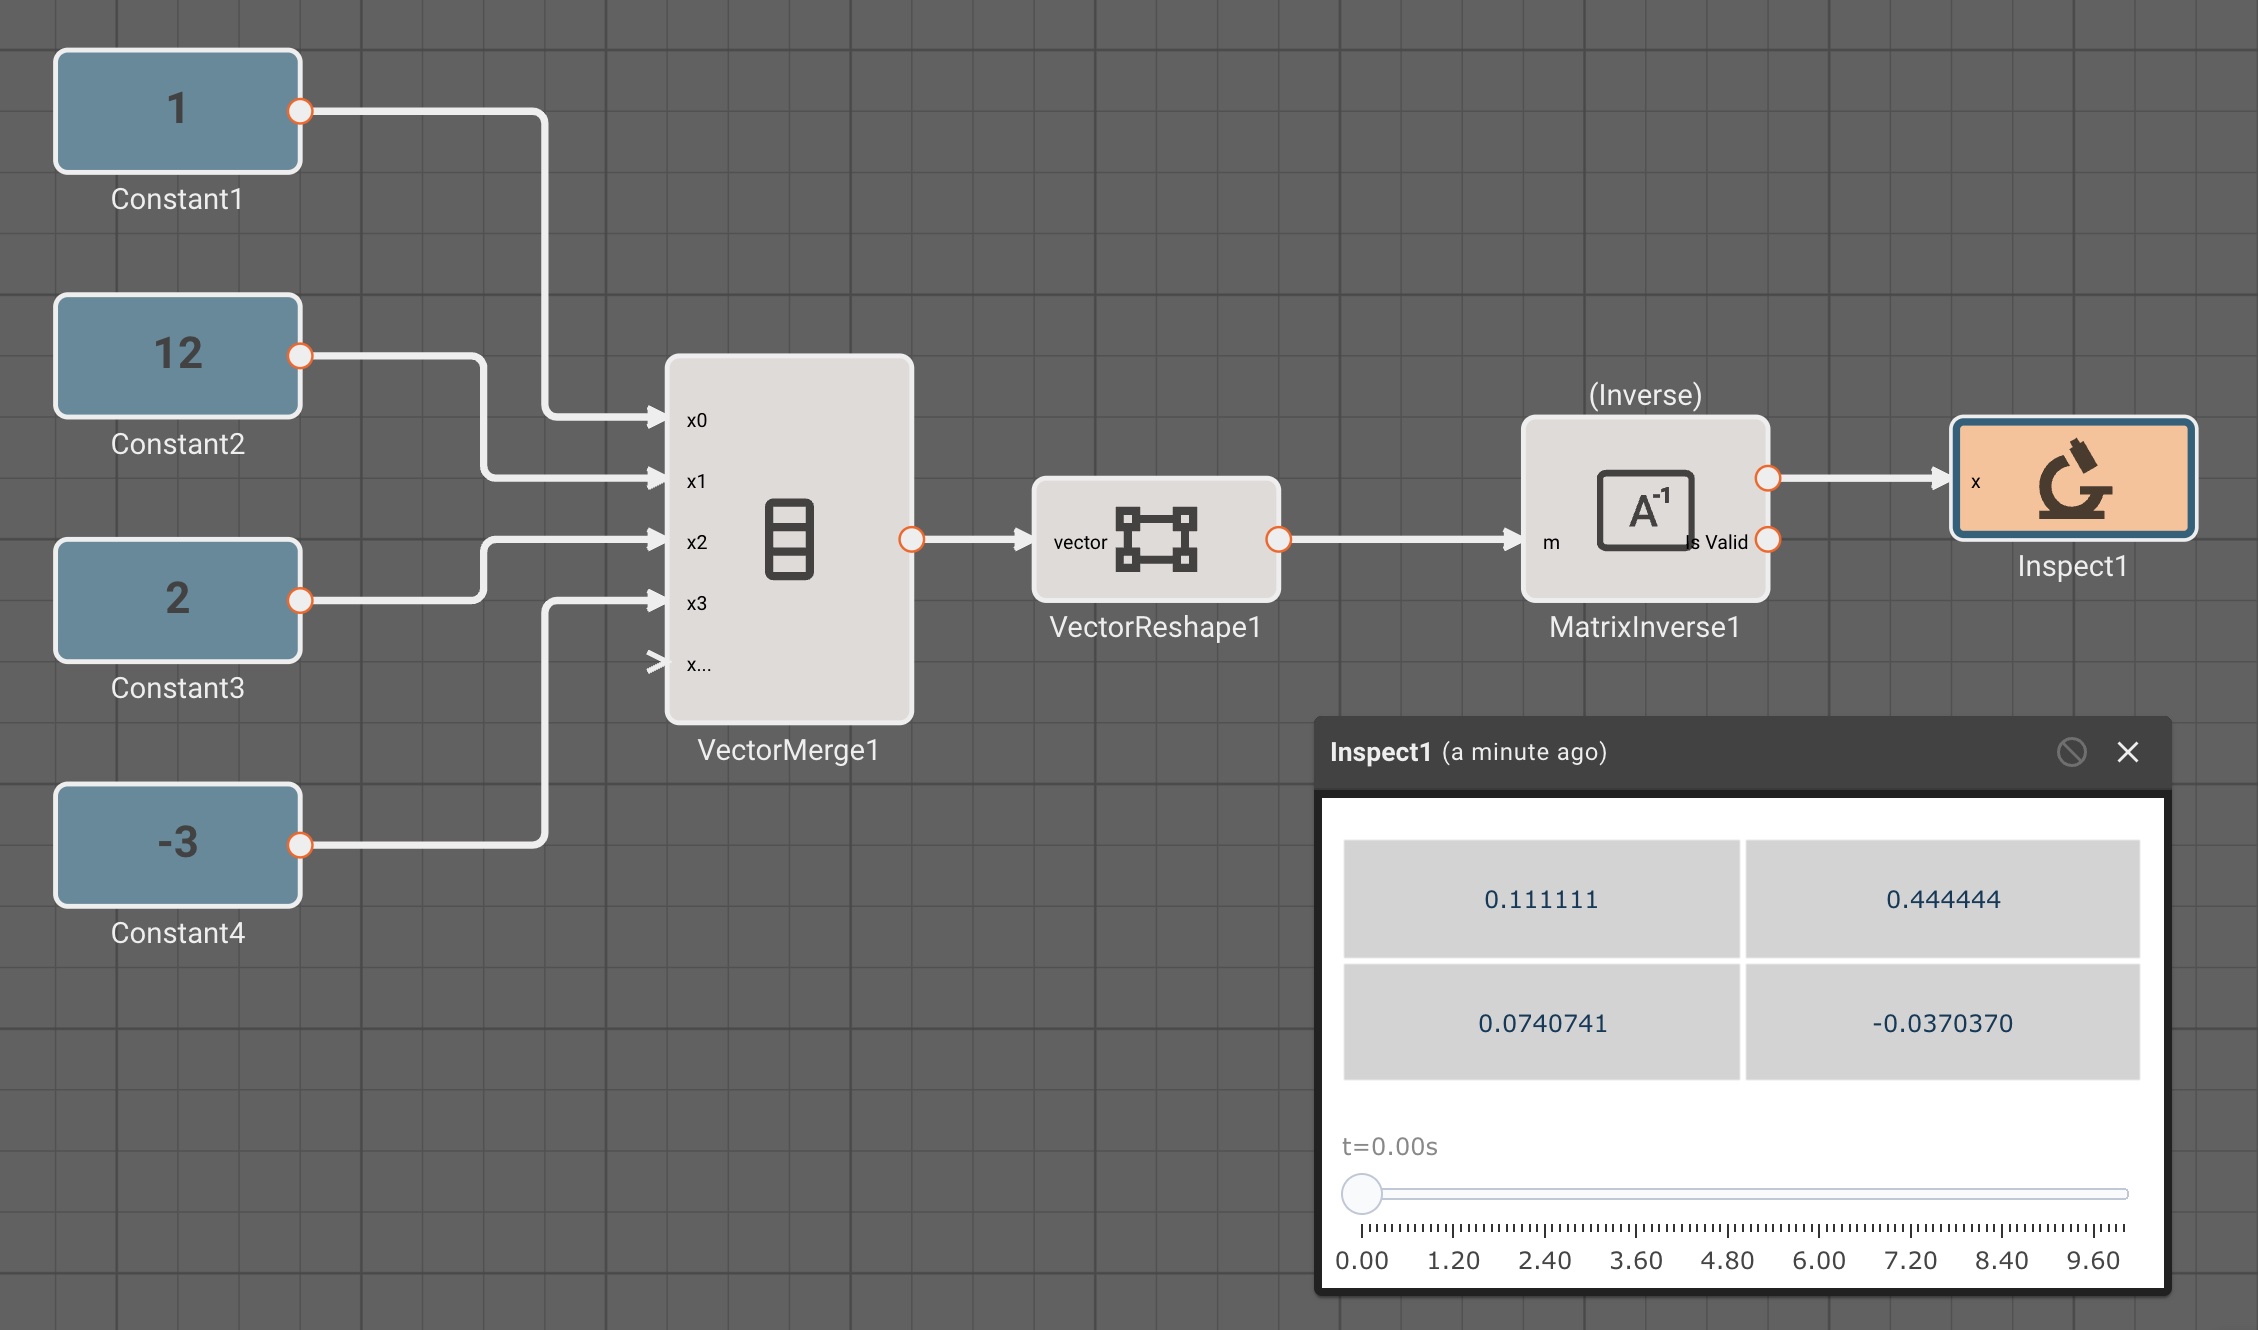 |
|---|
Inverting a square 2x2 matrix using the default Inverse method |
 |
|---|
Inverting a square 2x2 matrix using the SVD method, which solves the non-invertible example matrix. The Is Valid outport shows the SVD solution marked valid, while the normal inverse solution is invalid. |
Min Max Block
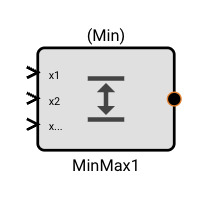
The Min/Max block emits either the minimum or maximum of all input signals, depending on the mode of operation specified.
Parameters
- Method [Min | Max]
- Min: Emit the smallest of all input signals.
- Max: Emit the largest of all input signals.
Examples
Not Block
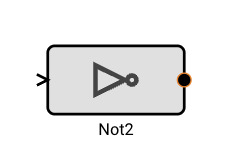
The Not block returns the logical negation of the input signal. In Pictorus, all non-zero inputs are treated as "Truthy", and inputs exactly equal to 0.0 are treated as "Falsy". See "True" and "False" in a floating point world for more explanation.
Parameters
None
Examples
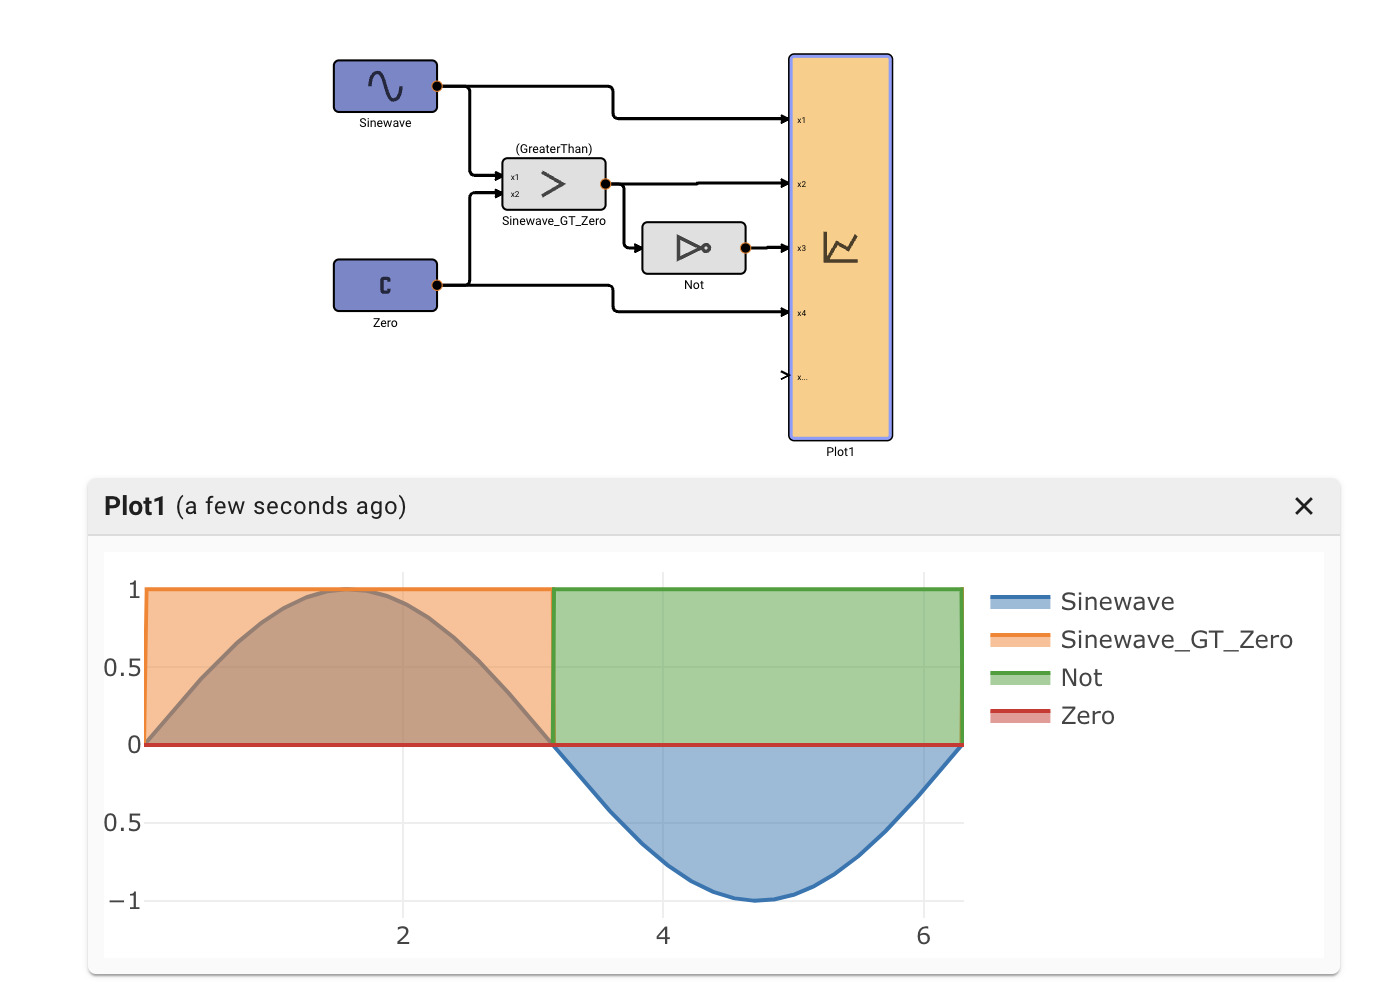
Pid Block
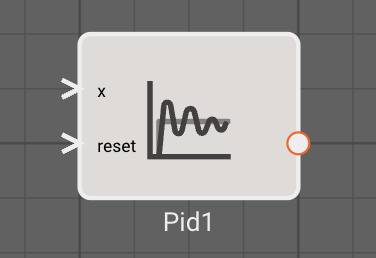
The PID block emits the output of a Proportional-Integral-Derivative feedback controller.
PID controllers are a simple and intuitive way to perform closed-loop feedback control. Generally speaking, the input signal is some error you wish to minimize, and the output signal controls some affector of the input signal. An example would be controlling an aircraft rudder to minimize yaw rate.
The output of the PID controller is the simple the sum of three terms: The Proportional (P), the Integral (I), and the Derivative (I), which each have their own gain to tune.
Optionally, the PID's integrator can be reset to 0.0 if a reset signal is attached that emits a truthy value.
Parameters
- Kp (default = 1.0): Proportional gain to apply directly to the input signal
- Ki (default = 0.0): Gain to apply to the integral of the input signal. See Integral Block for more information on how integration is computed.
- Kd (default = 0.0): Gain to apply to the derivative of the input signal. See Derivative Block for more information on how derivatives are computed.
- Kd_samples (default = 3): Number of prior samples to use to compute the derivative over. More samples tends to smooth the derivative, but also introduces phase lag.
- I_max (default = 1e100): Maximum value the Integral term can attain. By default effectively set to infinity. Setting a lower value can help prevent integral windup.
Example
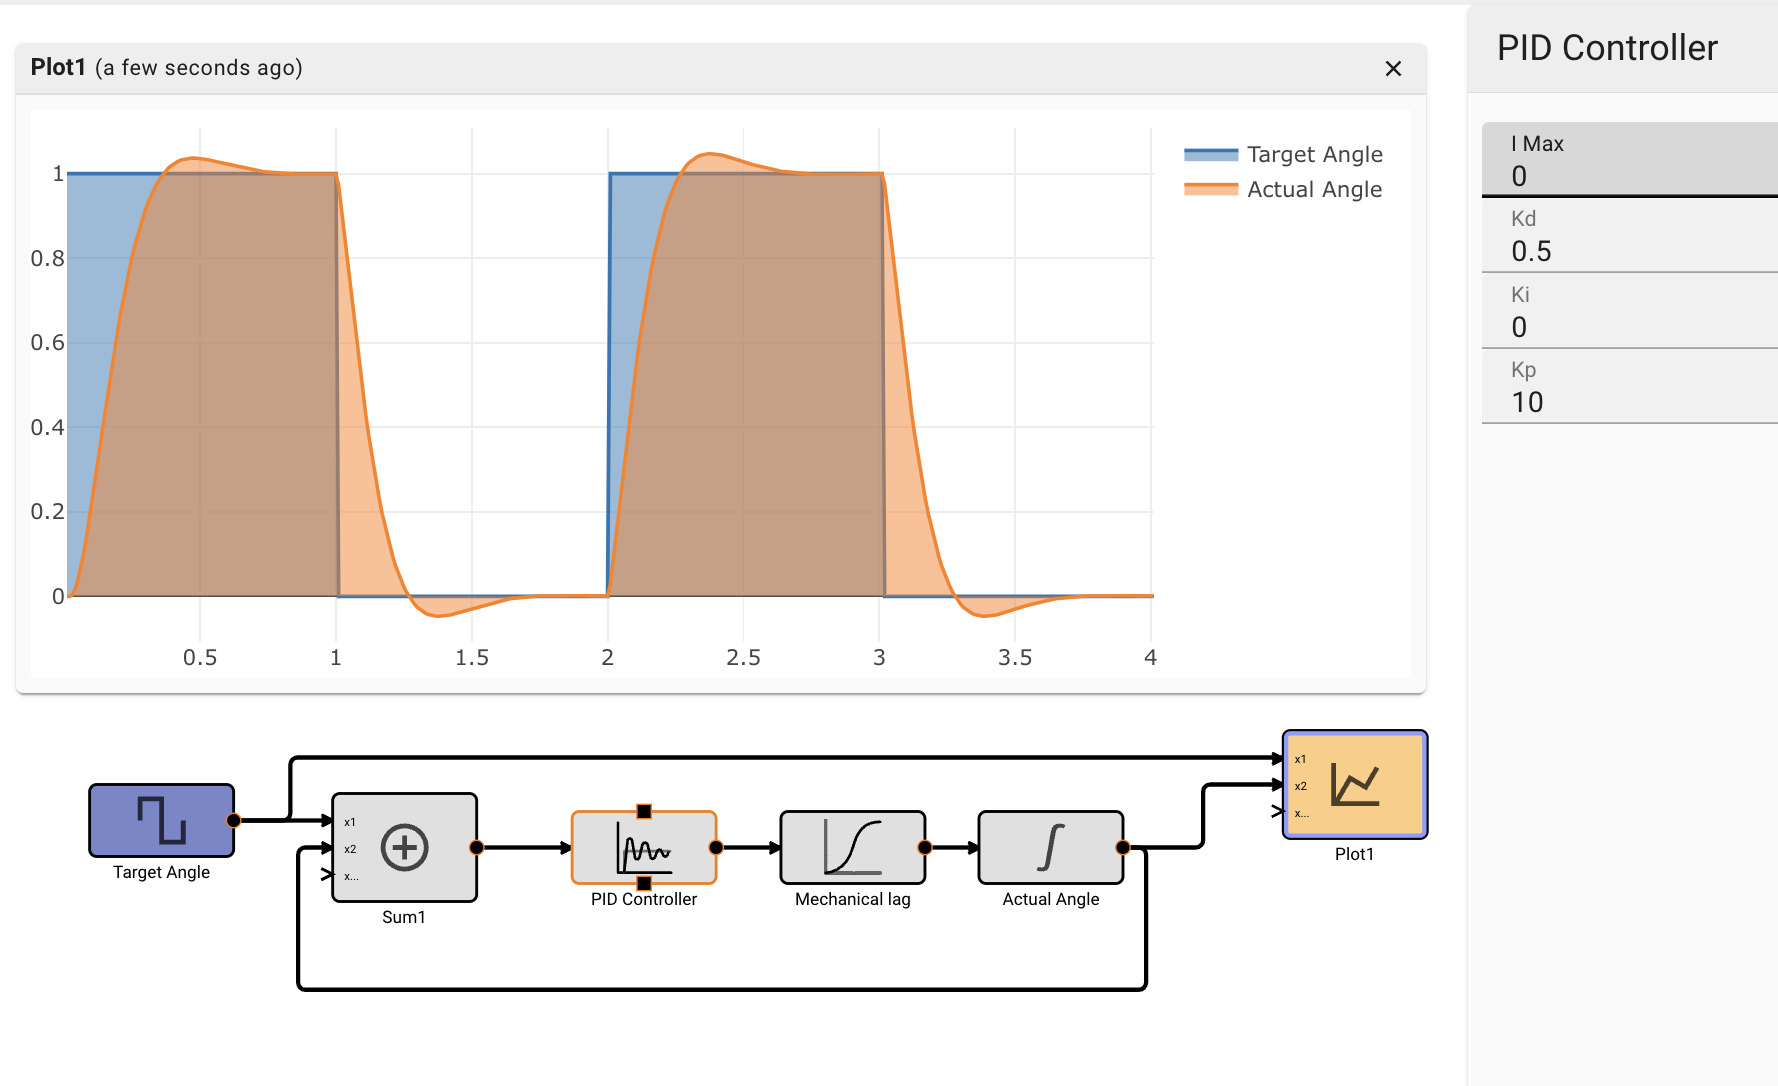 |
|---|
| PD Controller with Kp = 10, Kd = 0.5, attempting to control an imaginary actuator modeled simply as an integrator with lag. |
Plot Block
The Plot block visualizes input signals as timeseries in browser. It allows an arbitrary number of inputs. The visualization permits toggling of individual signals in the plot. Hovering over the plot window will reveal a series of icons that correspond to plot view controls and options for downloading plot data.
During Simulation Mode, the time plotted on the X-axis is simulated time, and the entire plot renders at once. When connected to real hardware, the time represents real app time, and shows up to 60 seconds of recent telemetry.
Parameters
None
Examples
Product Block
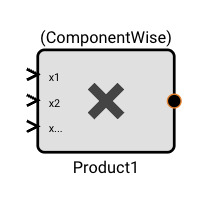
The Product block emits the result of multiplication (and/or division) of all its input signals.
Parameters
- Method [Component-Wise | MatrixMultiply]: Specifies the component-wise (element by element) product, or matrix multiplication. For matrix multiply, the resulting matrix has the number of rows of the first and the number of columns of the second matrix.
When the Component-Wise method is selected each input port can be set to either be a multiplier or a divisor. These setting have no effect for Matrix Multiplication.
Example
Pwm Block
The PWM block is used to send PWM (Pulse-width Modulation) signals to a specified address. Frequency is in Hz and duty cycle is a number from 0 to 1 that represents the percentage of time the signal is high (0 = always low, 1 = always high). On the STM32, the minimum PWM frequency is 1 Hz.
The Frequency input is required. Duty Cycle pins that are not connected will default to 0.0.
Parameters
Raspberry Pi
- PWM Number (default = 0): The PWM pin to control.
- If 0 or 1 is specified, the block will attempt to control one of the hardware PWM pins (PWM0 = GPIO 12; PWM1 = GPIO 13). Any other pin number will attempt to control the given GPIO pin using software PWM. For use-cases that require high frequency and/or high accuracy PWM signals, a hardware implementation is preferred.
STM32
- Timer: The timer peripheral to use for hardware PWM generation.
- PWM Pin CH1: The pin to use for the PWM output signal for Channel 1. Can be set to None.
- PWM Pin Ch2: The pin to use for the PWM output signal for Channel 2. Can be set to None.
- PWM Pin CH3: The pin to use for the PWM output signal for Channel 3. Can be set to None.
- PWM Pin CH4: The pin to use for the PWM output signal for Channel 4. Can be set to None.
Quantize Block
The Quantize block rounds the input signal to the nearest increment specified by the Interval parameter.
Parameters
- Interval (default = 1.0): Discrete increments to quantize to.
Examples
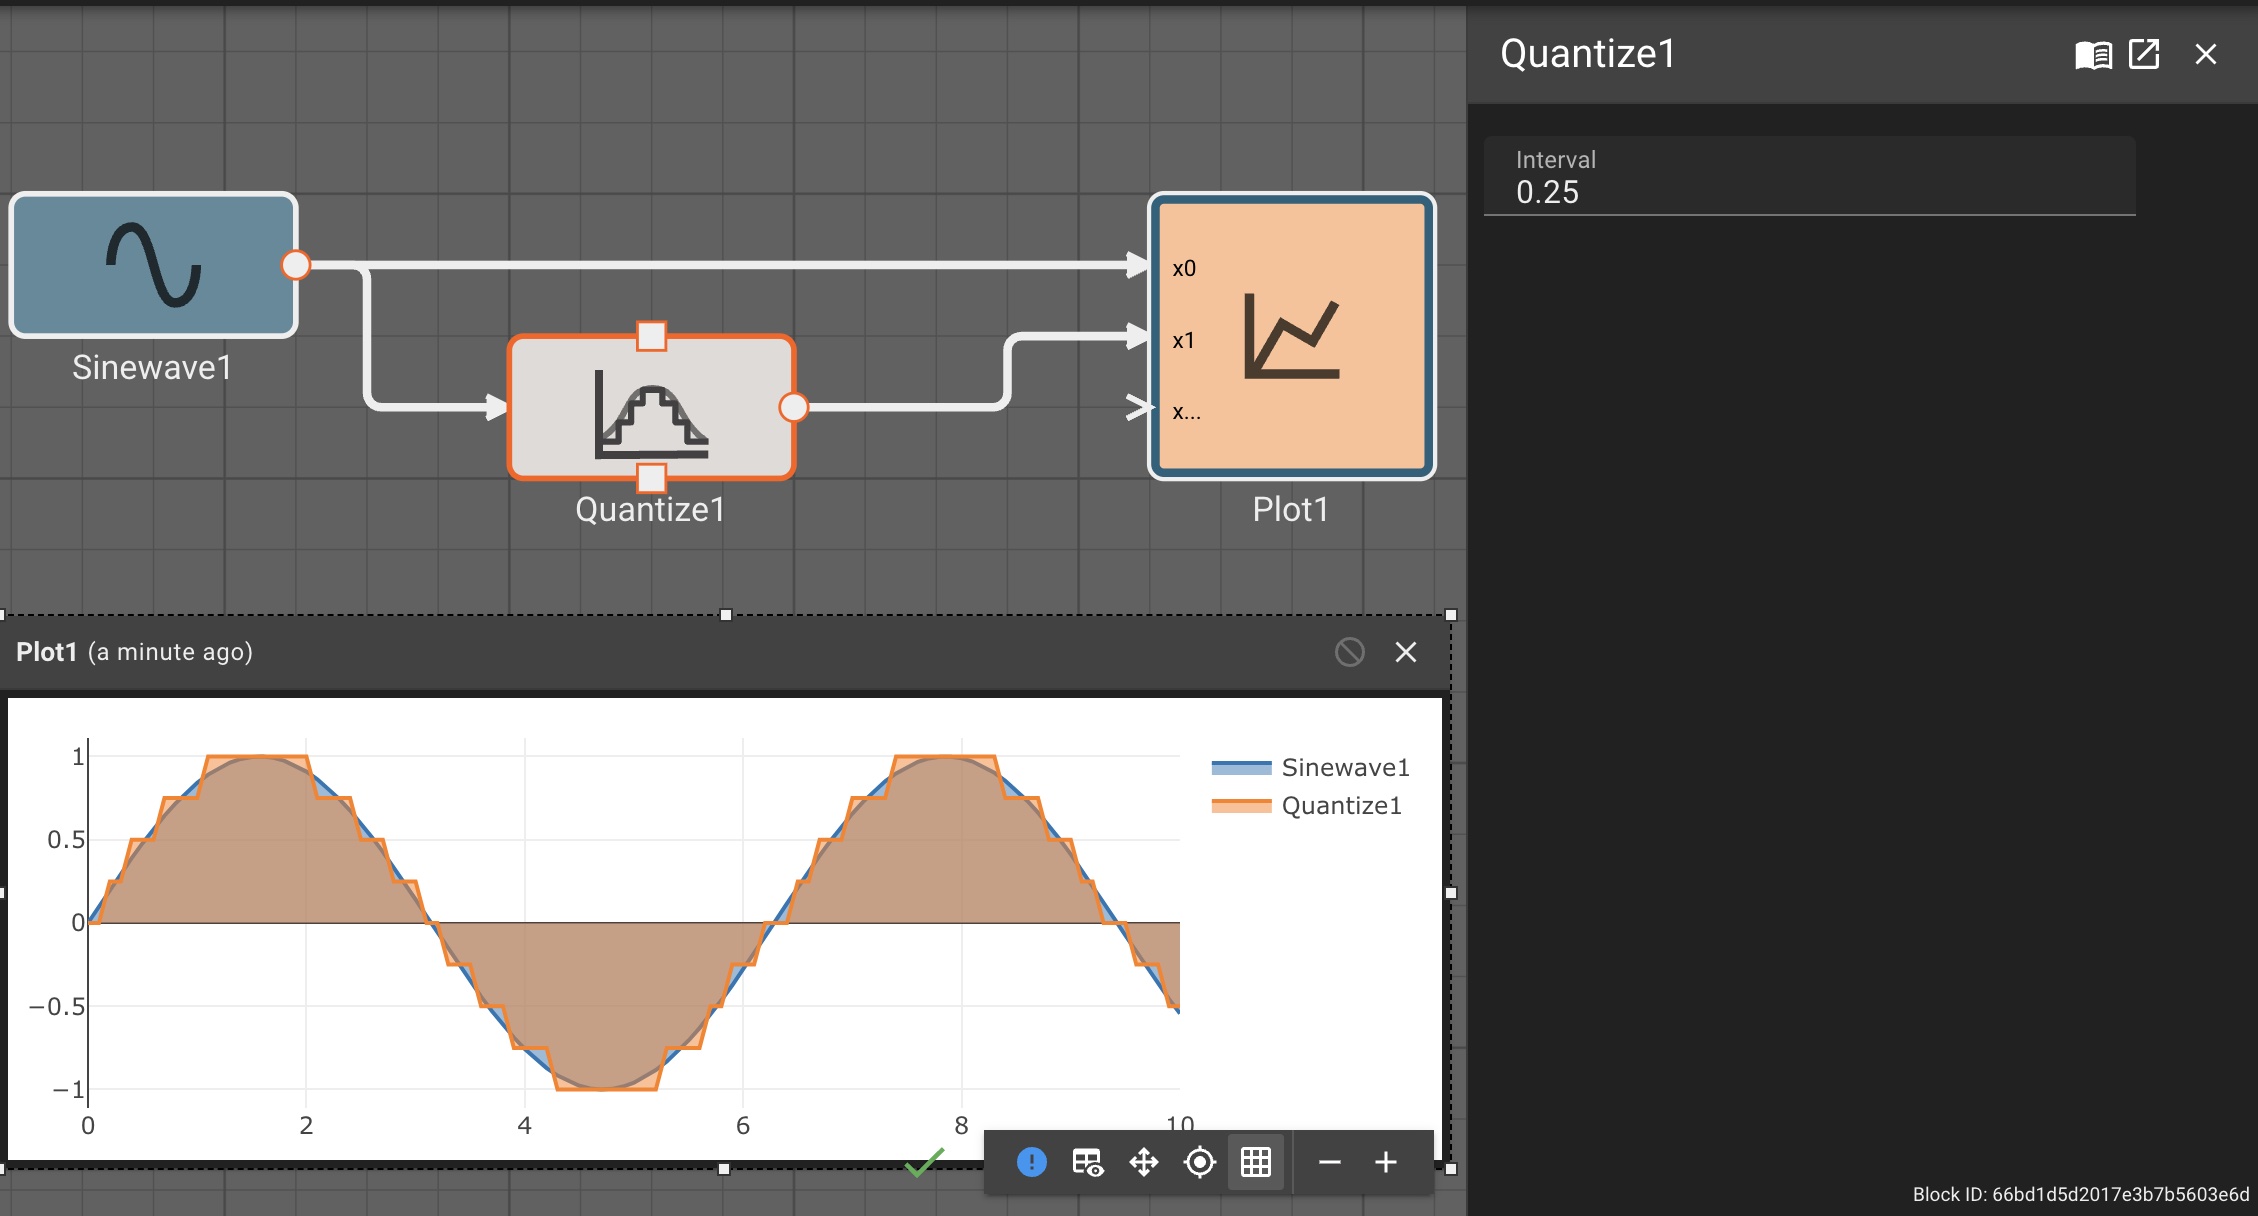
Ramp Block

The Ramp block emits a signal which linearly ramps from zero at Start Time with a slope specified by Rate.
Parameters
- Rate (default = 1.0): Specifies the slope/rate of the ramp.
- Start Time (default = 1.0): Specifies when to start the ramp.
Examples
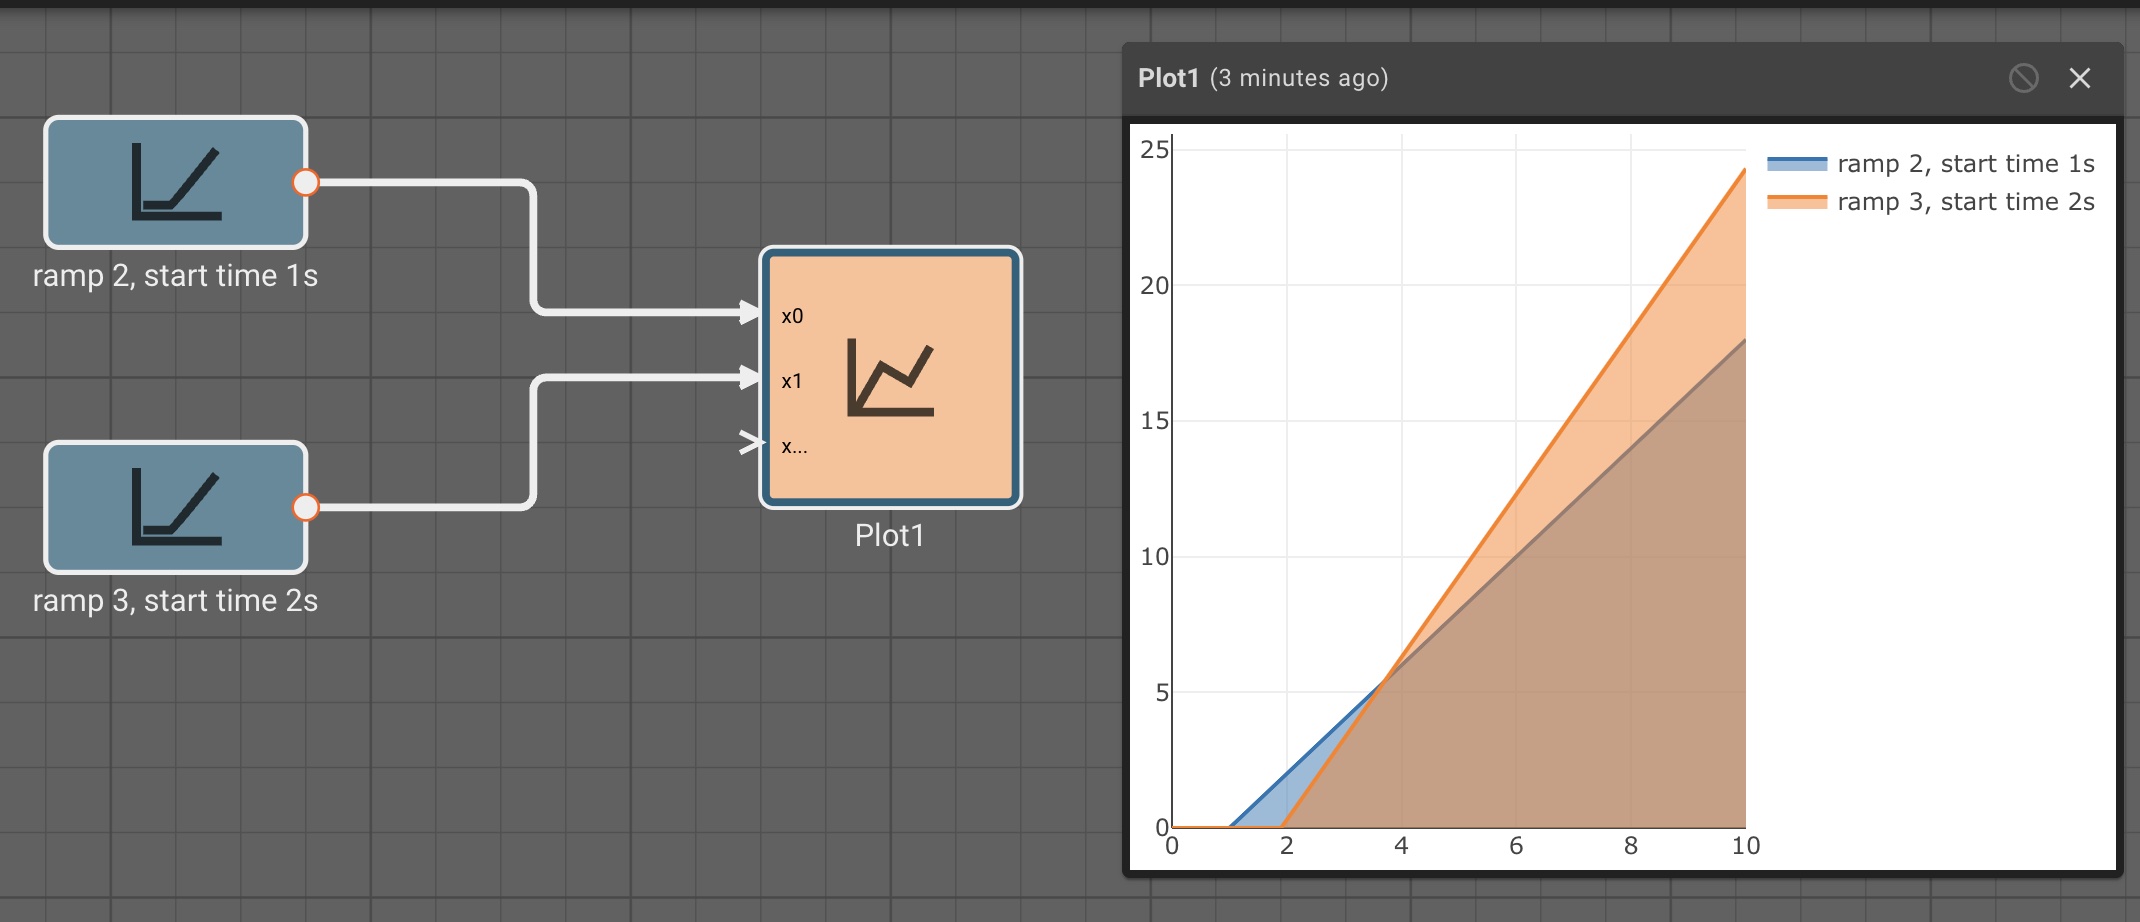
Random Number Block

The Random Number block emits pseudo-random numbers, representing a normal distribution defined by its Mean and Std2 (Standard Deviation, squared).
More details on the definition of normal distributions.
This pseudo-random number generator is often used to model the noise present in a sensor measurement.
The psuedo-random number generator (PRNG) used by this block is the SmallRng from the rand crate. Currently, the PRNG will always be seeded with the number 0. This PRNG does not produce randomness suitable for cryptographic purposes.
Parameters
- Mean (default = 0.0): The average value around which the distribution is centered.
- STD2 (default = 1.0): The square of the standard deviation of the distribution.
Examples
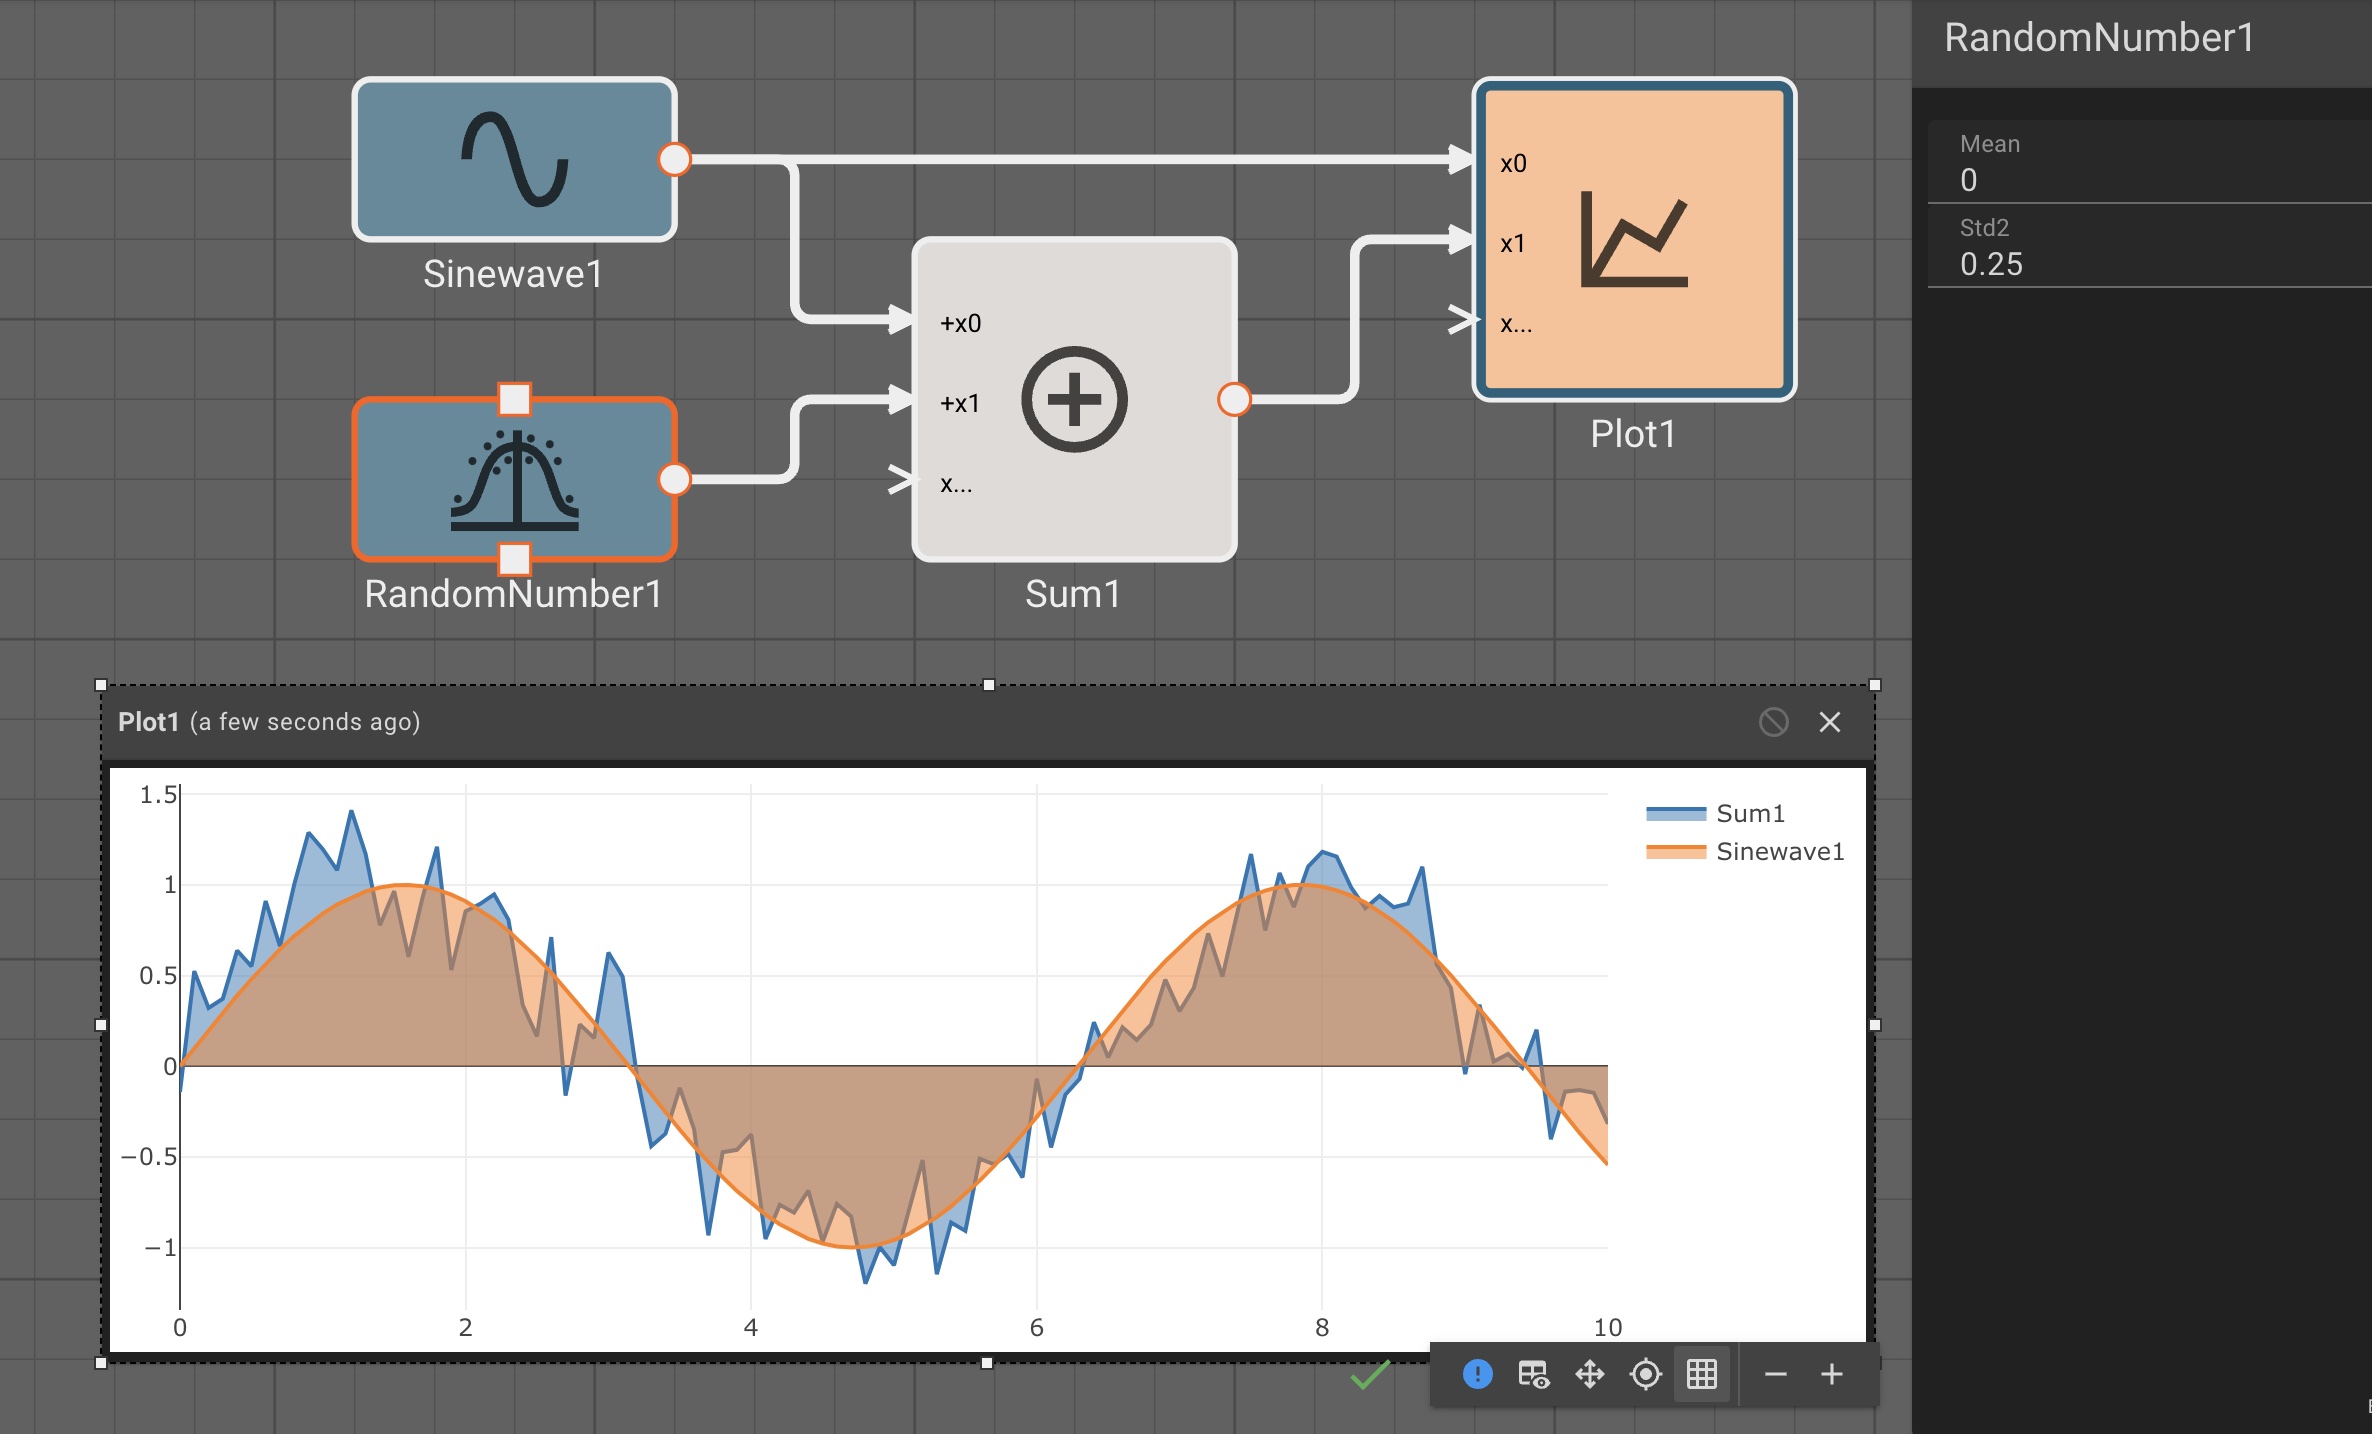
Rate Limit Block

The Rate Limit block will emit the input signal, but constraining the rate of change of the signal as specified by the Rising and Falling rates.
Parameters
- Rising Rate (default = 1.0) The block's output cannot increase by more than this value per second.
- Falling Rate (default = -1.0) The block's output cannot decrease by more than this value per second.
Examples
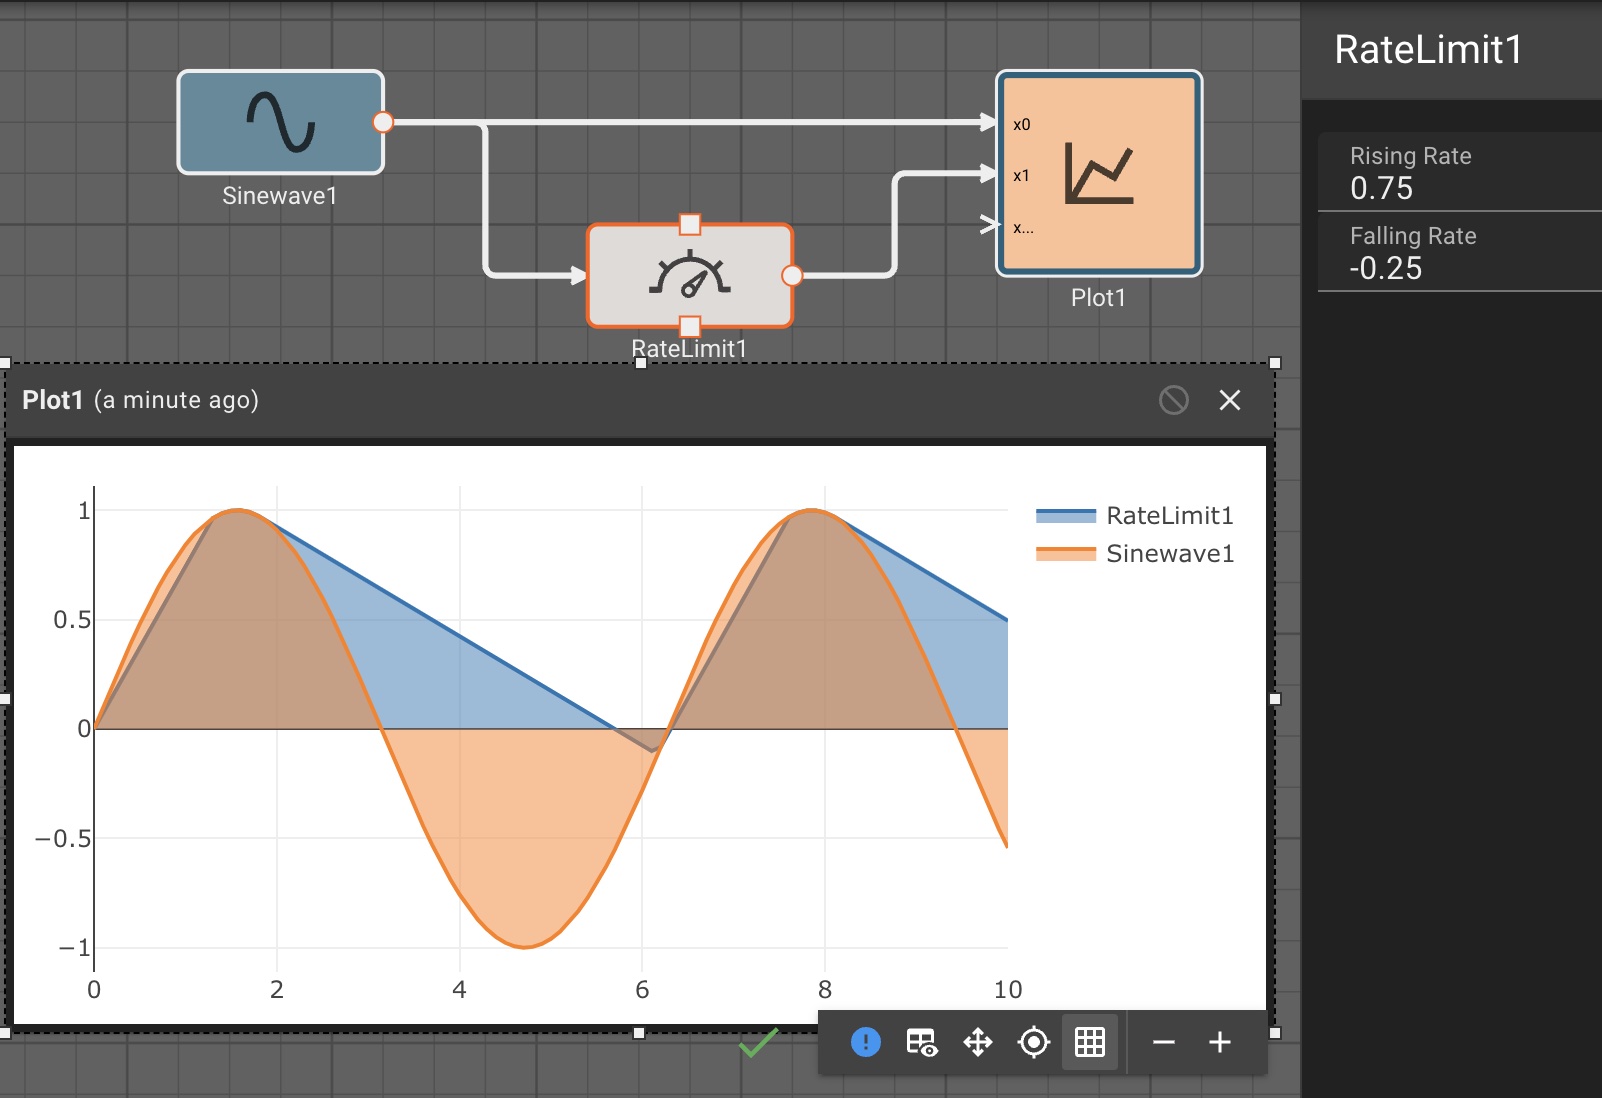
Rust Code Block
The Rust Code block allows users to inject small Rust functions into their Pictorus app.
The syntax is currently pretty brittle, and only allows native functions (no imported crates). Eventually we'll support more a robust crate system. In the mean time, this is a great way to introduce a quick for loop, or similar need that may be tricky to diagram with the existing block set.
Examples
Example implementation of the Collatz Conjecture using a Rust Code block:
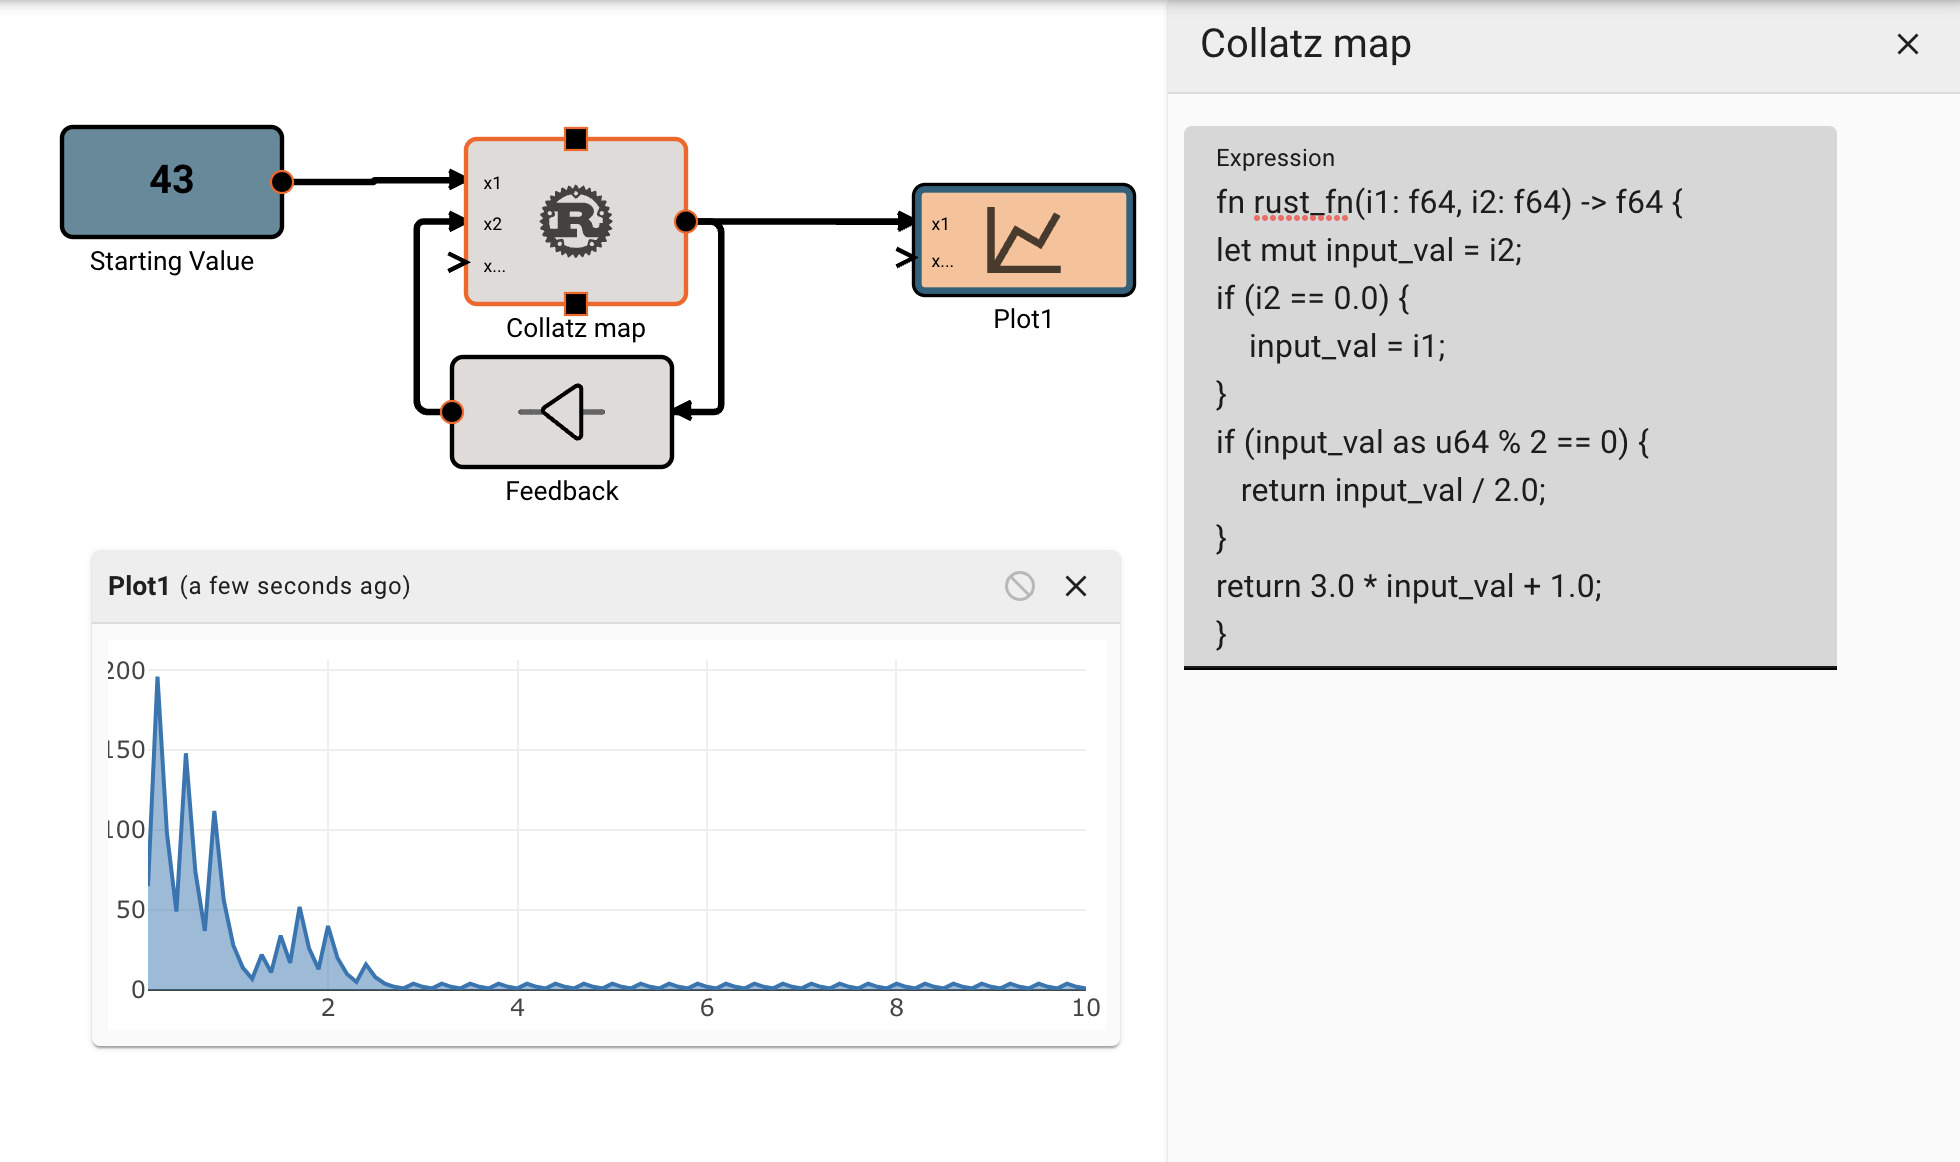
Sawtoothwave Block

The Sawtoothwave block emits a sawtoothwave, defined by its amplitude, bias, frequency, and phase.
Parameters
- Amplitude (default = 1): Defines the peak magnitude of the sawtoothwave from zero.
- Bias (default = 0): Defines a vertical bias to apply to all values.
- Frequency [rad/s] (default = 1): Defines the number of oscillations each second. Defined in radians per second, where each full cycle is 2π.
- Phase [rad] : (default = 0): Defines (in radians) where in its cycle the oscillation is at t = 0.
Examples
Scatter Plot Block

The Scatter Plot block renders a plot of two signals along two axes, with the first signal mapping to the x (horizontal) axis, and the second signal mapping to the y (vertical) axis.
Parameters
None
Examples
Serial Receive Block
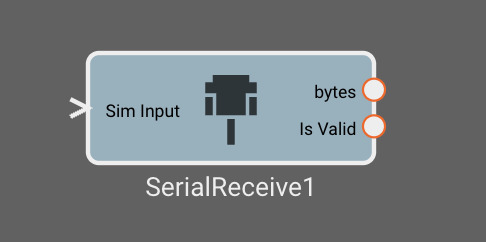
The Serial Receive block reads data from the specified serial port. It will continue to output the last received value until new data is read.
Inputs
- Sim Input: Optional bytes data that will be passed through in simulation mode
Outputs
- bytes: bytes received from the port.
- Is Valid: A boolean representing whether the data is valid as determined by the
Stale Age (ms)param
Parameters
- Baud Rate (default = 9600): Baud rate to use
- Port (default = "/dev/ttyUSB0"): Port to connect to
- Start Delimiter (default = "$"): String or bytes that indicate the start of a message. For a bytes literal, escape the characters using
\x(i.e.\x20for the unicode ' ' corresponding to the hexadecimal value 0x20). - End Delimiter (default = "\r\n"): String or bytes that indicate the end of a message.
- Read Fixed Bytes (default = 0): Fixed number of bytes to read after
Start Delimiter. If this is set to a non-zero value it will take precedence overEnd Delimiter - Stale Age (ms) (default = 1000): Age from last valid data received when the block will output
Is ValidasFalse
Serial Transmit Block
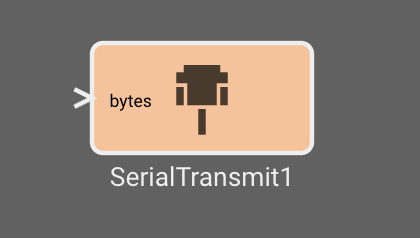
The Serial Transmit block publishes data to the specified serial port.
Inputs
- bytes: bytes that will be published to the destination port.
Parameters
- Port (default = "/dev/ttyUSB0"): Port to connect to
- Baud Rate (default = 9600): Baud rate to use
- Start Delimiter (default = "$"): String or bytes that will prefix each message. For a bytes literal, escape the characters using
\x(i.e.\x20for the unicode ' ' corresponding to the hexadecimal value 0x20). - End Delimiter (default = "\r\n"): String or bytes that will suffix each message.
Sinewave Block

The Sinewave block emits a sinusoidal curve, defined by its amplitude, bias, frequency, and phase.
Parameters
- Amplitude (default = 1): Defines the peak magnitude of the sinewave from zero.
- Bias (default = 0): Defines a vertical bias to apply to all values.
- Frequency [rad/s] (default = 1): Defines the number of oscillations each second.
- Phase: (default = 0): Defines (in radians) where in its cycle the oscillation is at t = 0.
Examples
Sliding Window Block
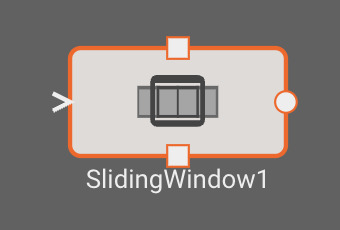
The Sliding Window block emits a list of the last N samples of the input signal. Vectors and matrices are concatenated.
Parameters
- Samples (default = 3): Magnitude of the squarewave's oscillation.
Examples
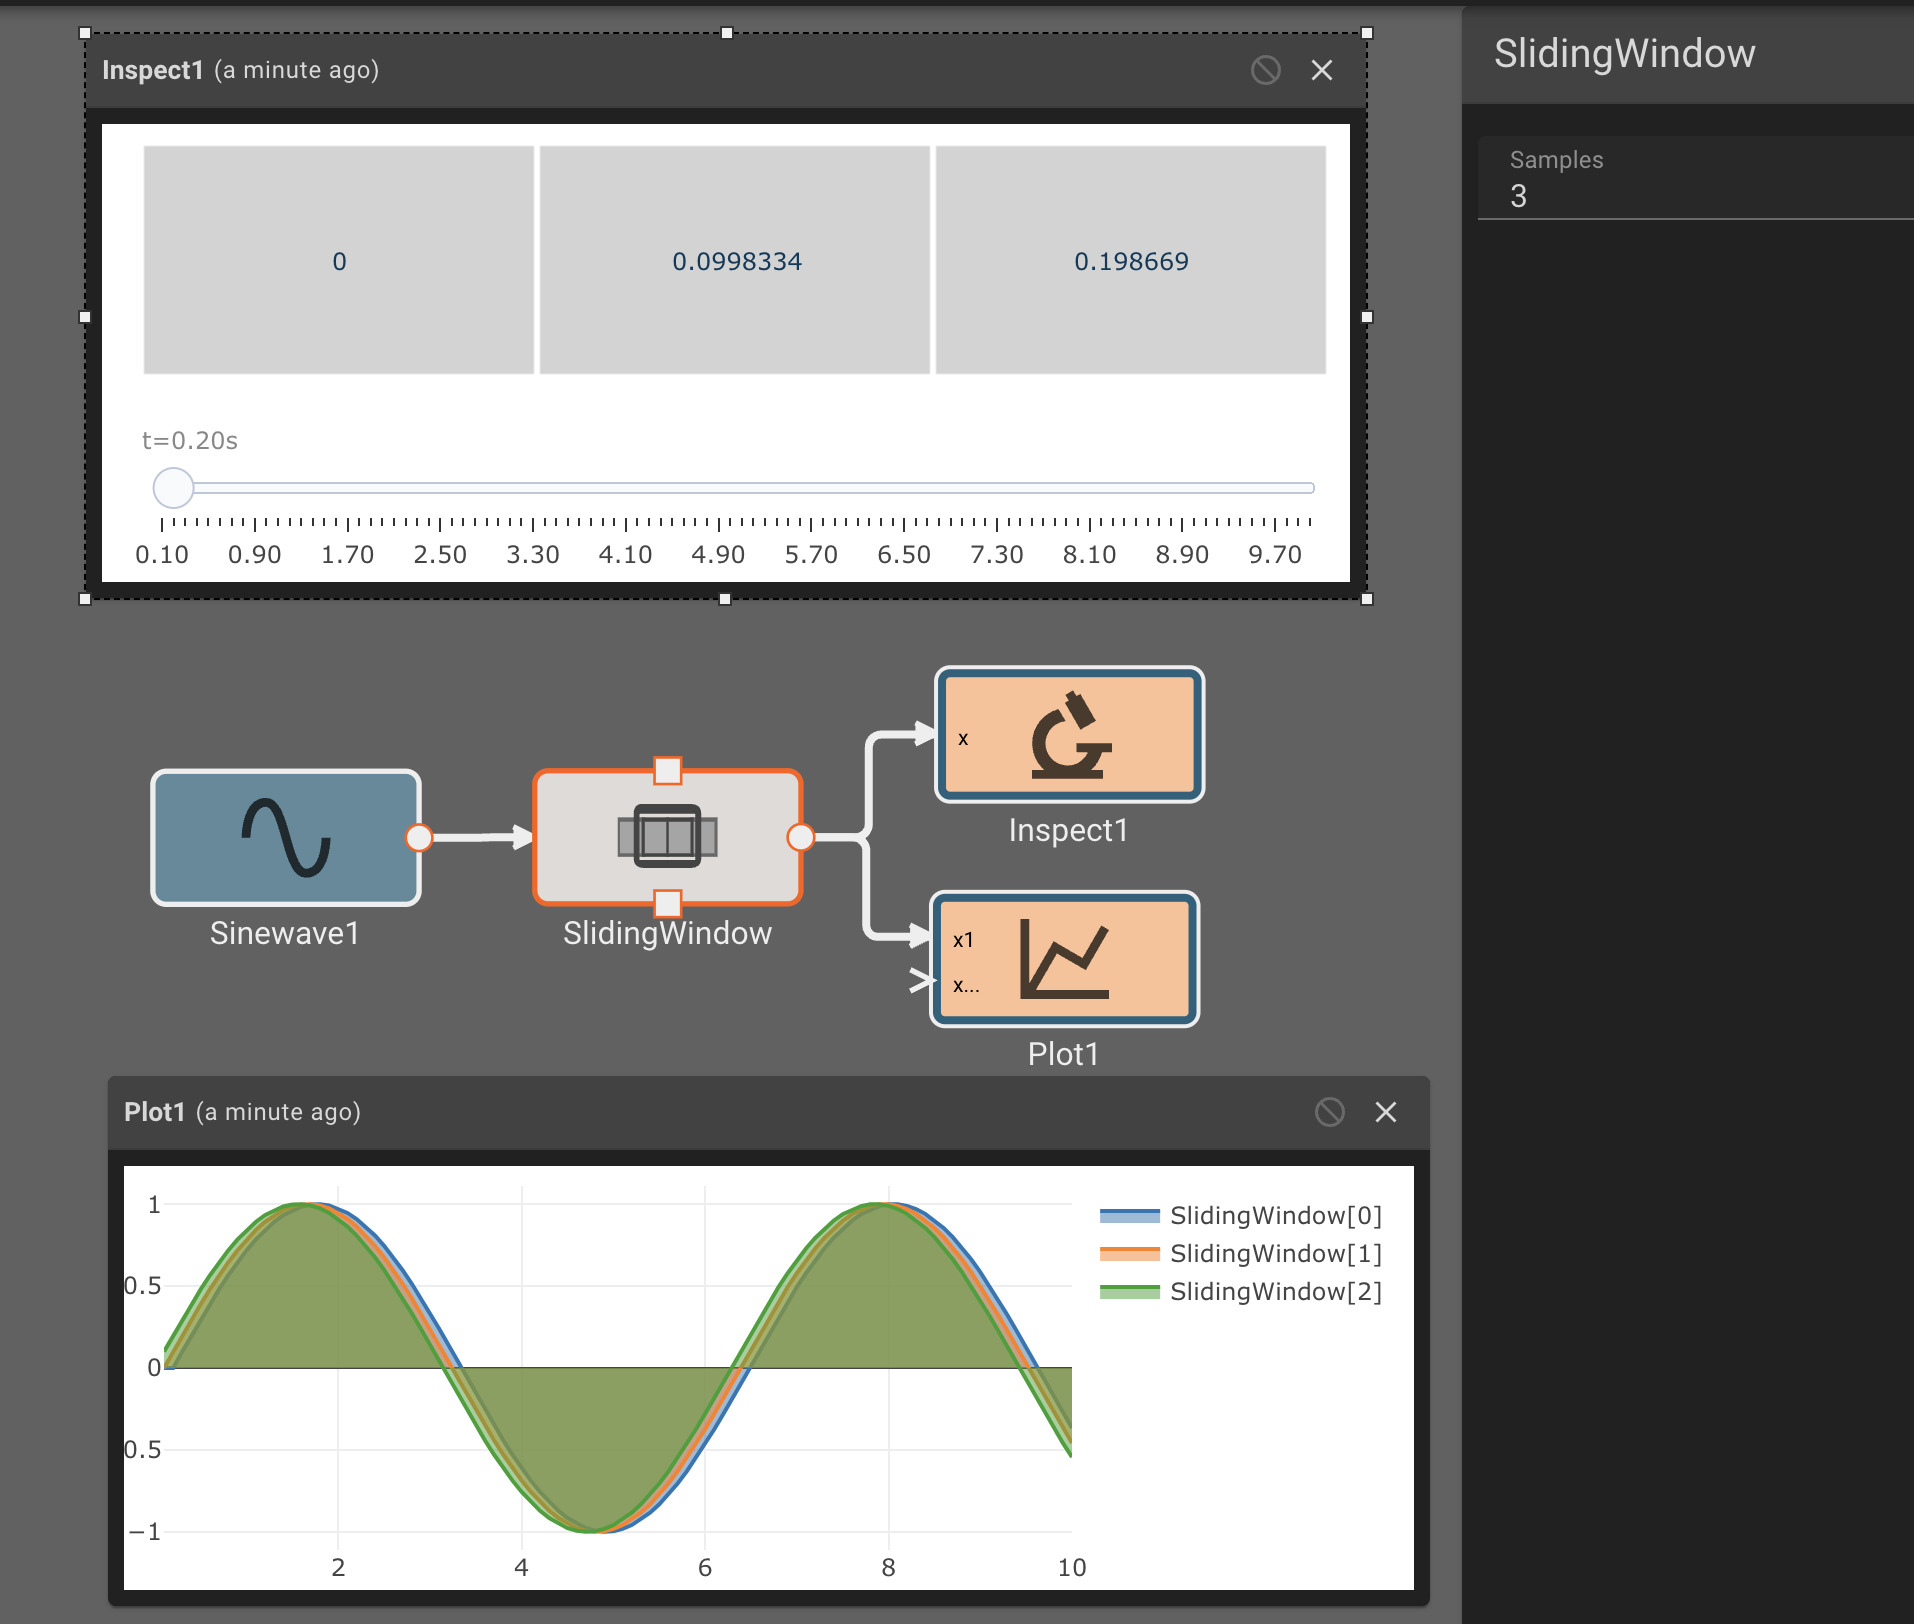
SPI Receive Block
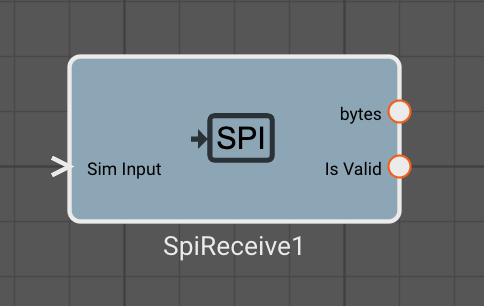
The SPI Receive Block reads 8 or 16 bit data from an SPI device. Currently each SPI bus can control one SPI peripheral each. The SPI Receive Block will de-assert the Chip Select pin at the end of the read operation.
Inputs
- Sim Input - An array of bytes used for simulating data from a peripheral
Parameters (STM32)
- Spi (default = SPI1): SPI device to transmit data on
- Sck (default = PA5): Pin used for the SPI clock
- Mosi (default = PA7): Pin used for master out, slave in
- Miso (default = PA6): Pin used for master in, slave out
- Cs (default = PA0): Pin used for Chip Select
Parameters (Linux)
- Port (default = /dev/spidev0.0): SPI device
- Cs Pin (default = 0): Pin used for Chip Select
Parameters (common)
- Mode (default = 0): The configuration of the SPI device. These dictate the phase and polarity of the clock in relation to the data. See here for more details. Mode 0, 1 , 2, 3 have been implemented on Linux and STM32 devices.
- Bit Order (default = "MSB First"): Determines the BIT order of the data. Most Significant Bit First and Least Significant Bit First are available.
- Bits per Transfer (default = 8): Determines the number of bits that are written per transfer.
- Read Fixed Bytes (default = 1): The number of bytes to read from the SPI bus, must be less than the buffer size of 256 bytes
- Stale Age (default = 1000): Flag used to indicate the time before the buffer is marked stale, if so the "Is Valid" pin is low.
SPI Transmit Block
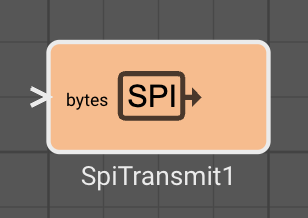
The SPI Transmit Block writes 8 or 16 bit data to an SPI device. Currently each SPI bus can control one SPI peripheral each. The SPI Transmit Block will de-assert the Chip Select pin at the end of the state if not done so by the SPI Receive Block.
Inputs
- bytes - Bytes to be transmitted as a byte array.
Parameters (STM32)
- Spi (default = SPI1): SPI device to transmit data on
- Sck (default = PA5): Pin used for the SPI clock
- Mosi (default = PA7): Pin used for master out, slave in
- Miso (default = PA6): Pin used for master in, slave out
- Cs (default = PA0): Pin used for Chip Select
Parameters (Linux)
- Port (default = /dev/spidev0.0): SPI device
- Cs Pin (default = 0): Pin used for Chip Select
Parameters (common)
- Mode (default = 0): The configuration of the SPI device. These dictate the phase and polarity of the clock in relation to the data. See here for more details. Mode 0, 1 , 2, 3 have been implemented on Linux and STM32 devices.
- Bit Order (default = "MSB First"): Determines the BIT order of the data. Most Significant Bit First and Least Significant Bit First are available.
- Bits per Transfer (default = 8): Determines the number of bits that are written per transfer.
Square Wave Block
The Square Wave block emits a signal forming a squarewave. The squarewave will alternate between the Amplitude and the Bias specified. Duration parameters dictate how long the signal will remain high or low.
Parameters
- Amplitude (default = 1): Magnitude of the squarewave's oscillation.
- On Duration (default = 1): Specifies (in seconds) how long to maintain the "high" value.
- Off Duration (default = 1): Specifies (in seconds) how long to maintain the "low" value.
- Phase (default = 0): Specifies the phase offset of the squarewave in seconds.
- Bias (default = 0): Specifies the "low" value for the wave.
Examples
State Transition Block
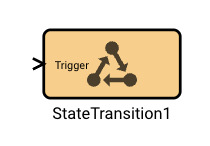
The State Transition block triggers the app to transition from one State to another based on whether the input signal is "True". This block is only available at the top level of a diagram.
State Transition blocks are added automatically to a diagram when new connections between States are drawn at the top level of that diagram. Alternatively, you can place a transition block directly within a diagram to create a transition to another state.
Parameters
- State Name: Selected state (from list of potential states) to transition to if the input trigger is True.
Examples
String Format Block
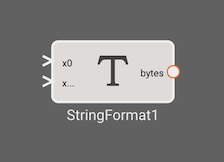
The String Format block emits bytes constructed by formatting its input values through a Format String parameter.
Parameters
- Format String (default = "Hello, {}!"): Format string to use for constructing the output bytes. The format string must contain one or more
{}placeholders, which will be replaced by the input values in the order they are passed in. The number of inputs must exactly match the number of placeholders. Formatting strings are specified using the Rust String formatting syntax.
Examples
Sum Block

The Sum block emits the summation of all input signals. Signals can optionally be subtracted, by specifying so in parameters.
Examples
Switch Block
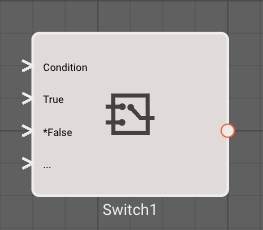
The Switch block emits one of several potential output signals, depending on the Condition (first) input and the cases specified in block settings. If the Conditional input does not match any of the cases, the last case is defaulted to.
This is currently the primary block for "if/else" style logic in Pictorus. Worth noting however, that the Switch block does not gate execution of upstream blocks. Meaning, all input signals will be computed prior to checking the conditional. If it is important that one of the signals is only computed when the condition matches, then you should use Conditional Execution.
Examples
System Time Block
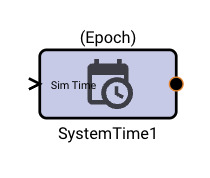
The System Time block emits time as defined by the host computer operating system. There are many options to choose from, depending on what exactly you're hoping to do with system time.
Parameters
- Method [Epoch | Second | Minute | Hour | DayLunar | DayOrdinal | Month | Year]
- Epoch: Emits seconds since the Unix Epoch
- Second: Emits the second value of the current minute.
- Minute: Emits the minute value of the current hour.
- Hour: Emits the hour value of the current day.
- DayLunar: Emits the day value of the current month.
- DayOrdinal: Emits the day value of the current year.
- Month: Emits the month value of the current year.
- Year: Emits the value of the current year.
Examples
Timer Block
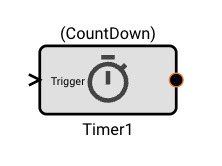
The Timer block allows timekeeping around discrete events - either by Stopwatch mode or Countdown mode.
The input signal serves as the trigger to start the timer. Any input which is "True" will commence the timer. If the Interruptible option is enabled, the timer will reset every iteration where the input is True. Otherwise, the timer will commence on the first True value. It will then either count down and reset at zero, or count up without ever restarting.
This block is useful for tracking how much time has passed since an event for logical conditions.
Parameters
- Countdown Time S: (default = 10s): Specifies where to begin the CountDown timer, if selected.
- Interruptible: (default = True): Specifies whether the timer will restart with subsequent True trigger input.
- Method [CountDown | StopWatch]
- CountDown: Once initiated, the timer will emit a countdown, starting from the Countdown Time S parameter, which will reach zero and then reset.
- StopWatch: Once initiated, the timer will emit the seconds since it began. It will count forever, unless Interruptible.
Examples
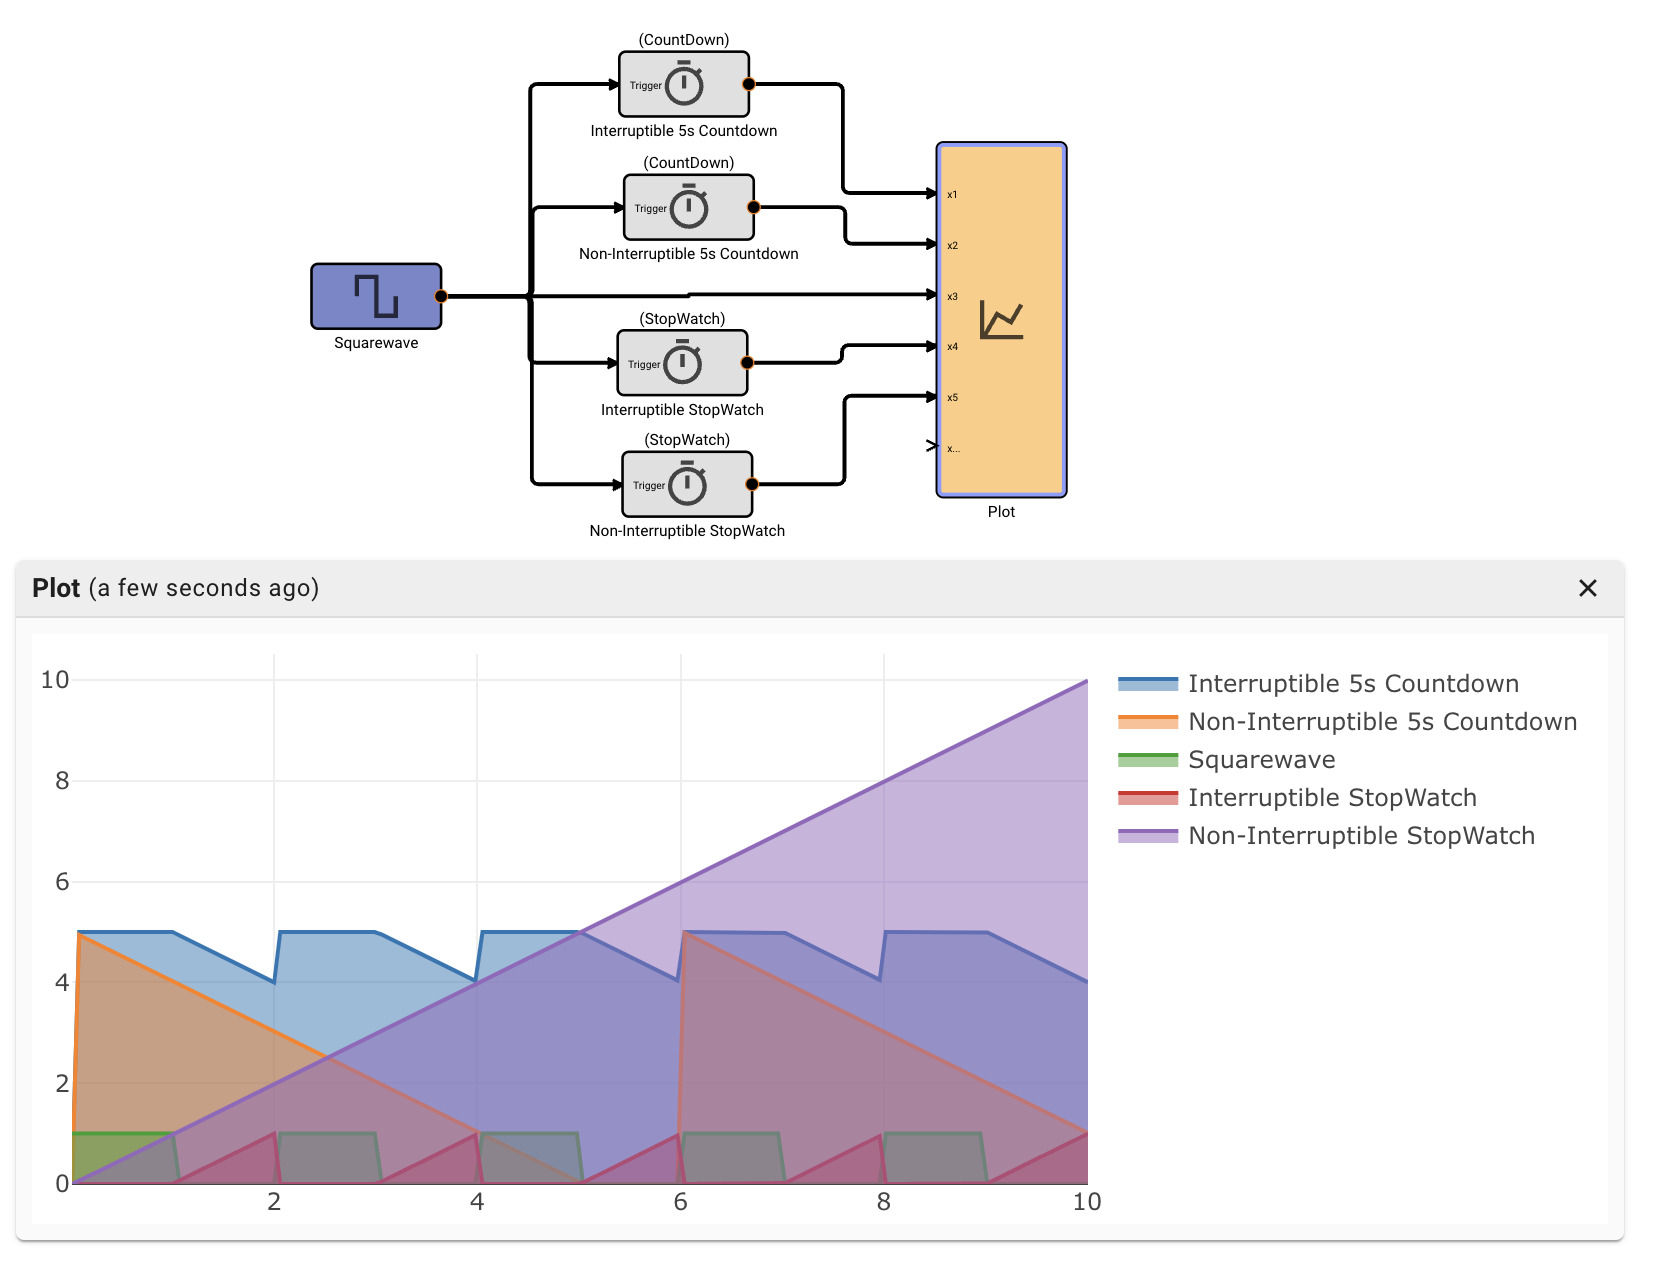
Transfer Function Block
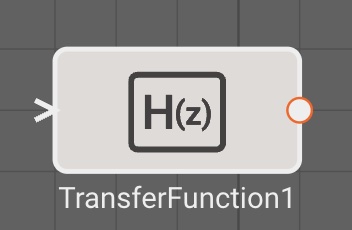
This block is experimental at this time
The Transfer Function block emits the discrete Transfer Function of the input signal, determined by numerator and denominator coefficients specified in block parameters.
A transfer function is defined as H(z) = Y(z) / X(z) and the numerator and denominator coefficients are used to compute the output of the block:
y[n] = b[0] * x[n] + b[1] * x[n-1] + ... + b[n] * x[n-N] - a[1] * y[n-1] - a[2] * y[n-2] + ... - a[n] * y[n-N].
Where the b[...] are the numerator coefficients and a[...] are the denominator coefficients. Care must be taken when choosing denominator coefficients to avoid unstable systems. The Transfer function is fundamentally the ratio between the output and the input signals. As such, the default numerator and denominator coefficients of 1.0 will simply emit the input signal by default.
A transfer function that represents a decay of 1/2 each time step can be represented as:
H(z) = Y(z) / X(z) = z / (z - 0.5).
The numerator would be [1] and the denominator would be [1, -0.5].
The numerator and denominator must have dimensions of at least 1 and the 0th value of the denominator will be skipped (but must be present), as it represents the coefficient for y[n], the current output.
Parameters
- Denominators (default = [1])
- Numerators (default = [1])
Examples
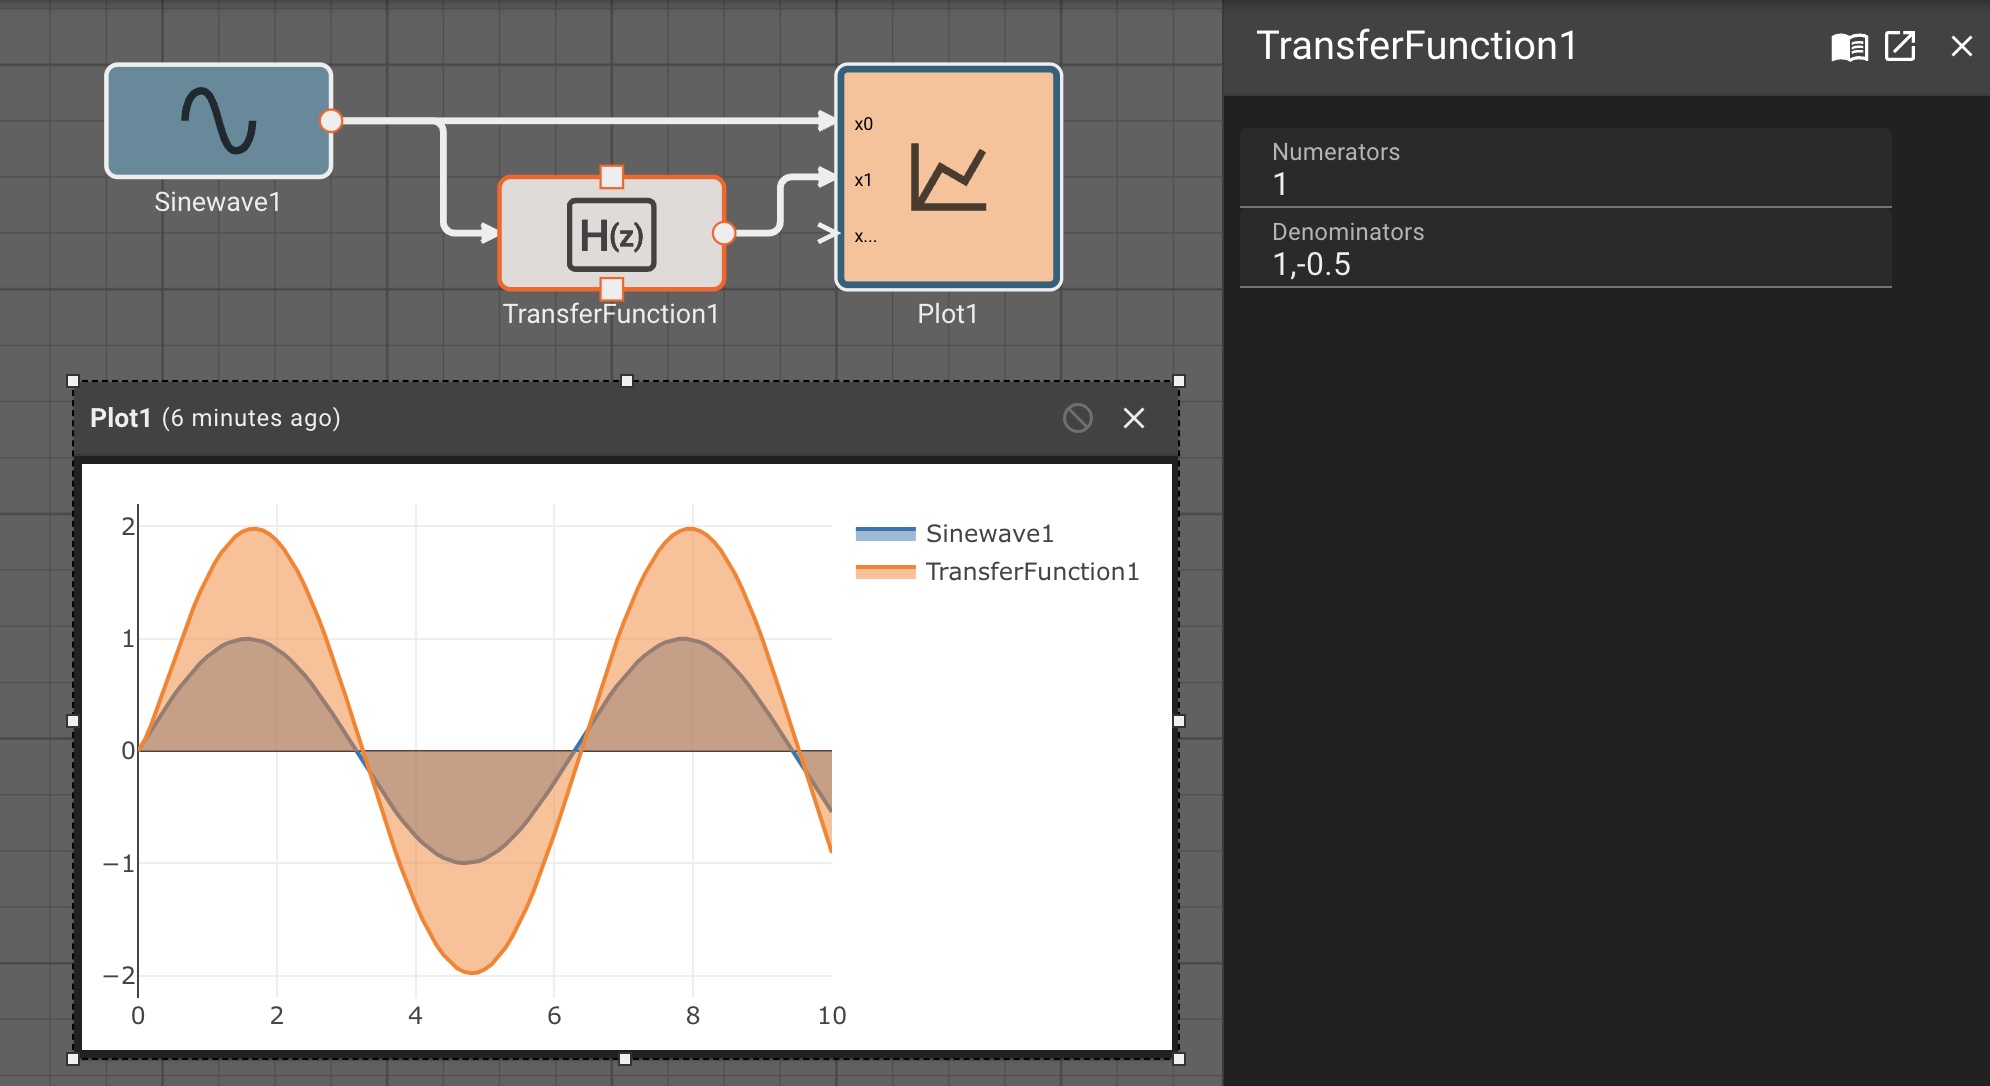
Transpose Block
The Transpose block emits the vector transposition of an input vector, essentially swapping rows and columns.
Examples
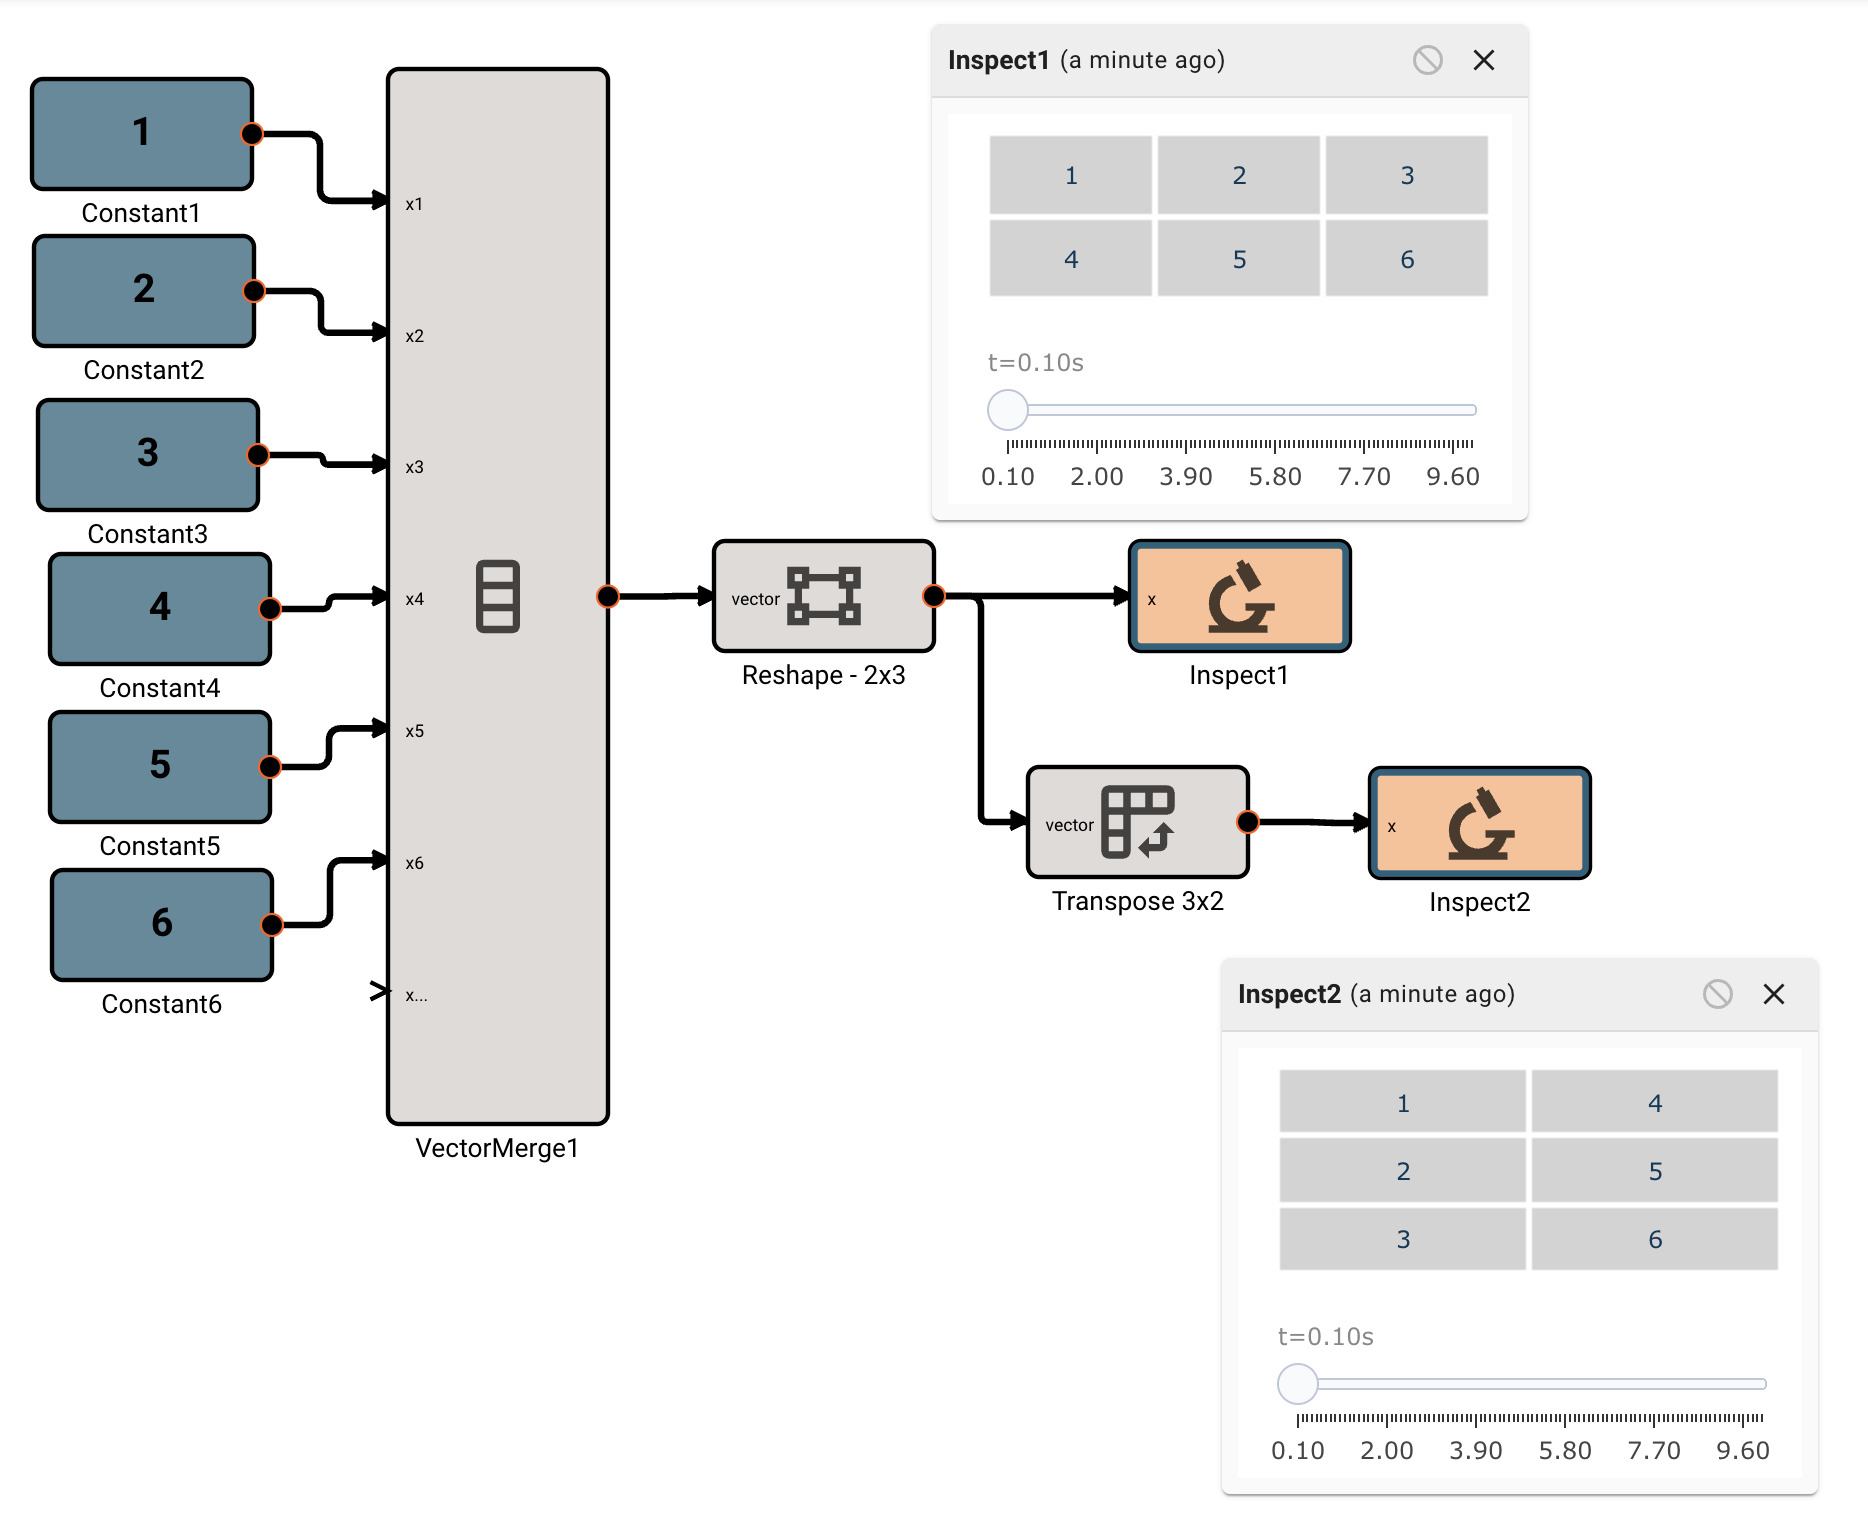
Trianglewave Block
The Trianglewave block emits a triangle wave, defined by its amplitude, bias, frequency, and phase.
Parameters
- Amplitude (default = 1): Defines the peak magnitude of the triangle wave from zero.
- Bias (default = 0): Defines a vertical bias to apply to all values.
- Frequency [rad/s] (default = 1): Defines the number of oscillations each second. Defined in radians per second, where each full cycle is 2π.
- Phase: (default = 0): Defines (in radians) where in its cycle the oscillation is at t = 0.
Examples
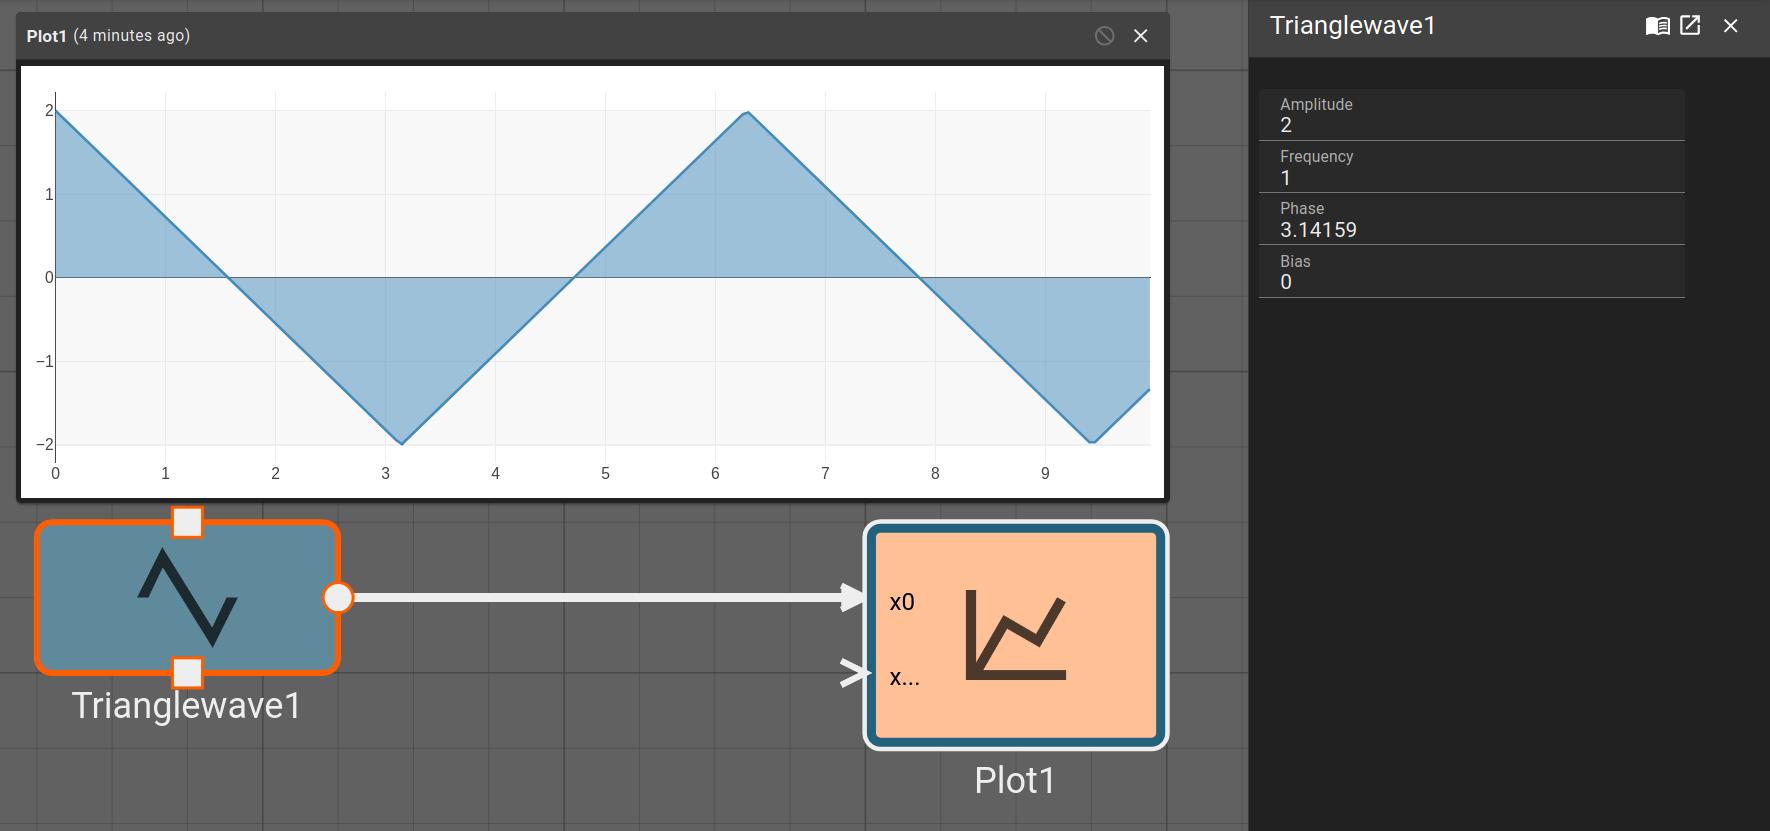
Trigonometry Block
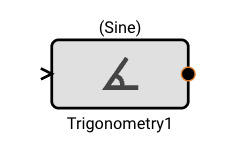
The Trigonometry block emits simple trigonometric operations on the input signal.
Parameters
- Method [Sine | Cosine | Tangent]
- Sine: Emits the sine (in radians) of the input signal.
- Cosine: Emits the cosine (in radians) of the input signal.
- Tangent: Emits the tangent (in radians) of the input signal.
- Arcsine: Emits the arcsine (in radians) of the input signal.
- Arccosine: Emits the arccosine (in radians) of the input signal.
- Arctangent: Emits the arctangent (in radians) of the input signal.
- SineHyperbolic: Emits the hyperbolic sine (in radians) of the input signal.
- CosineHyperbolic: Emits the hyperbolic cosine (in radians) of the input signal.
- TangentHyperbolic: Emits the hyperbolic tangent (in radians) of the input signal.
- ArcSineHyperbolic: Emits the hyperbolic arcsine (in radians) of the input signal.
- ArcCosineHyperbolic: Emits the hyperbolic arccosine (in radians) of the input signal.
- ArcTangentHyperbolic: Emits the hyperbolic arctangent (in radians) of the input signal.
Examples
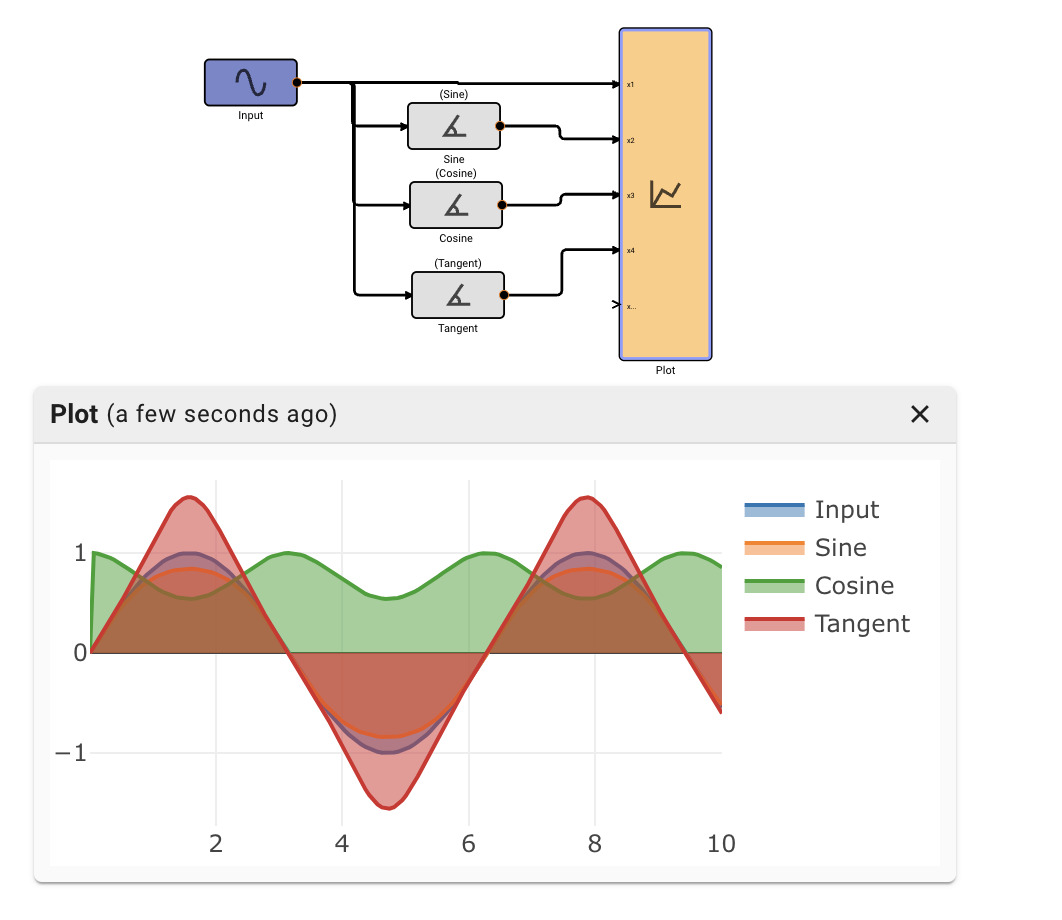
UDP Receive Block
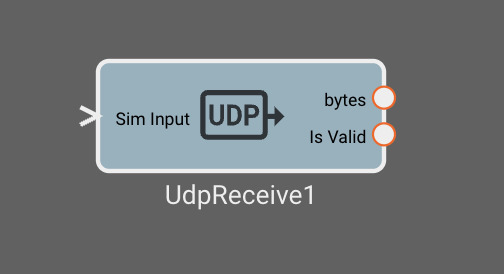
The UDP Receive block reads data from the specified port. It will continue to output the last received value until new data is read.
Inputs
- Sim Input: Optional bytes data that will be passed through in simulation mode
Outputs
- bytes: bytes received from the socket.
- Is Valid: A boolean representing whether the data is valid as determined by the
Stale Age (ms)param
Parameters
- Address (default = "127.0.0.1:34254"): The IP and port to bind to for receiving data.
- Stale Age (ms) (default = 1000): Age from last valid data received when the block will output
Is ValidasFalse
UDP Transmit Block
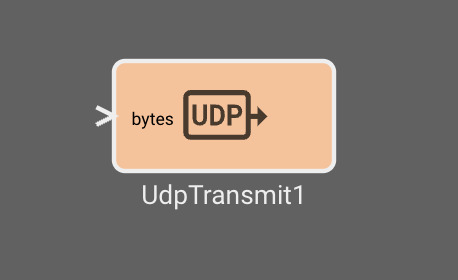
The UDP Transmit block publishes data to the specified address.
Inputs
- bytes: bytes that will be published to the destination address.
Parameters
- Destination (default = "127.0.0.1:34254"): The IP and port to publish data to.
uORB Input Block
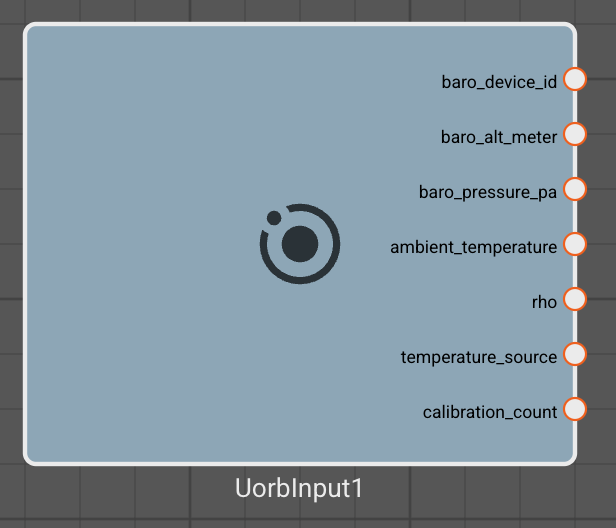
The uORB Input block subscribes to a uORB topic and outputs the message data. The output ports and data types depend on the selected topic, which can be chosen from the block's parameter settings.
Note: This block is only available for PX4 platforms.
Outputs
- dynamic: The data from the subscribed uORB topic. The output type depends on the selected topic.
Parameters
- Message: The uORB message topic to subscribe to.
uORB Output Block

The uORB Output block publishes data to a uORB topic. The input ports and data types depend on the selected topic, which can be chosen from the block's parameter settings.
Note: This block is only available for PX4 platforms.
Inputs
- dynamic: The data to be published to the uORB topic. The input type depends on the selected topic.
Parameters
- Message: The uORB message topic to publish to.
Vector Index Block
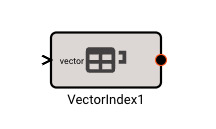
The Vector Index block emits individual elements of its input vector. Users add indices of interest from the parameters panel to include in the subset output. Linear (flat) indices are used, so 2d vectors of row/cols must be specified in the linear index equivalent of col_of_element * num_rows + row_of_element. col_of_element and row_of_element are 0-indexed, not 1-indexed.
Indices are parsed from a String type into a usize. Strings ("abc", "-1", "0.123") that can't be parsed to a usize will panic at runtime. Indices outside the bounds of the matrix will return 0. For example, if the matrix is 3x3 and the index is 10, the output will be 0.
Examples
 |
|---|
| To index the 2nd row, 2nd column value in a 2 by 2 matrix (4), we specify the linear index 3. Multiple indices can be specified. |
Vector Merge Block
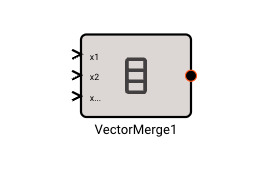
The Vector Merge block emits a combined vector of its inputs. It will flatten multi-dimensional input vectors and always emit a 1D vector. It accepts both vector and scalar inputs
Examples
 |
|---|
| Scalars can be merged into a vector. |
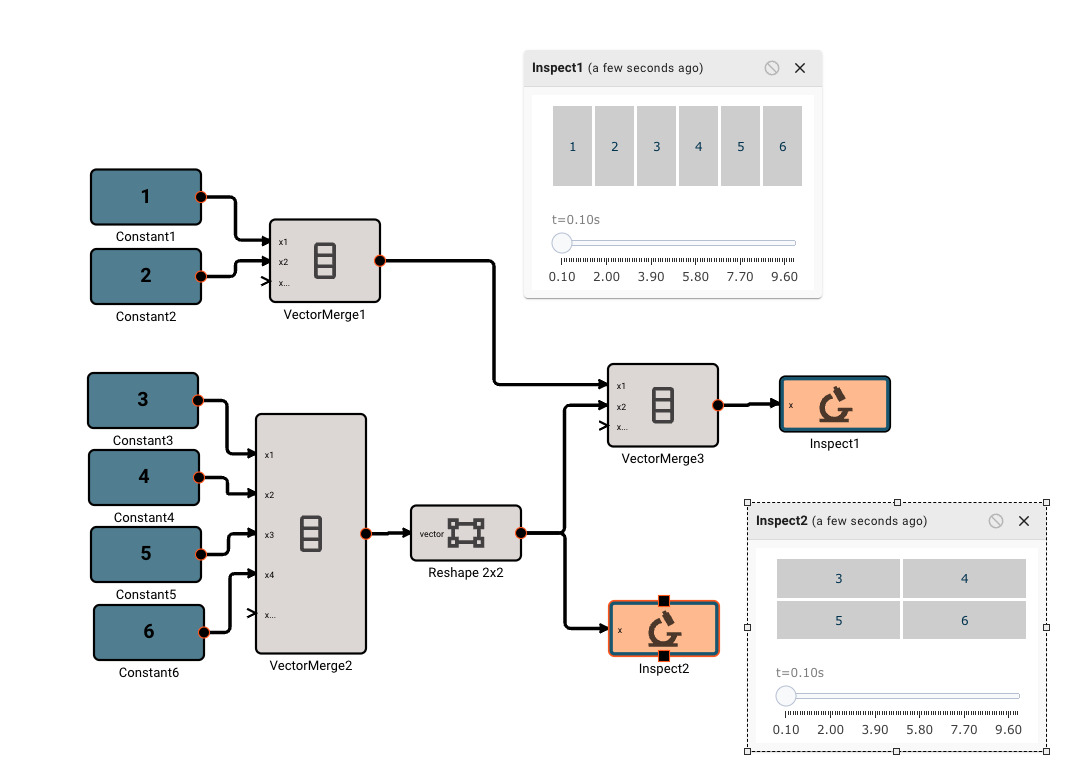 |
|---|
| Vectors of various dimensions can be merged into a new, flat vector. |
Vector Norm Block
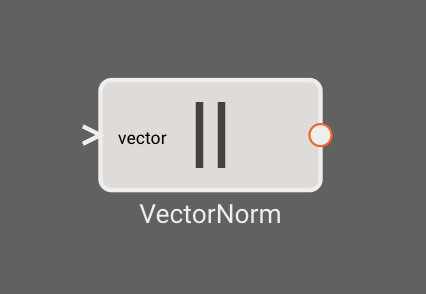
The Vector Norm block emits a norm (scalar magnitude) of the input vector. More specifically, it computes the Frobenius norm of a matrix, which is a generalization of the Euclidean norm for matrices.
Examples
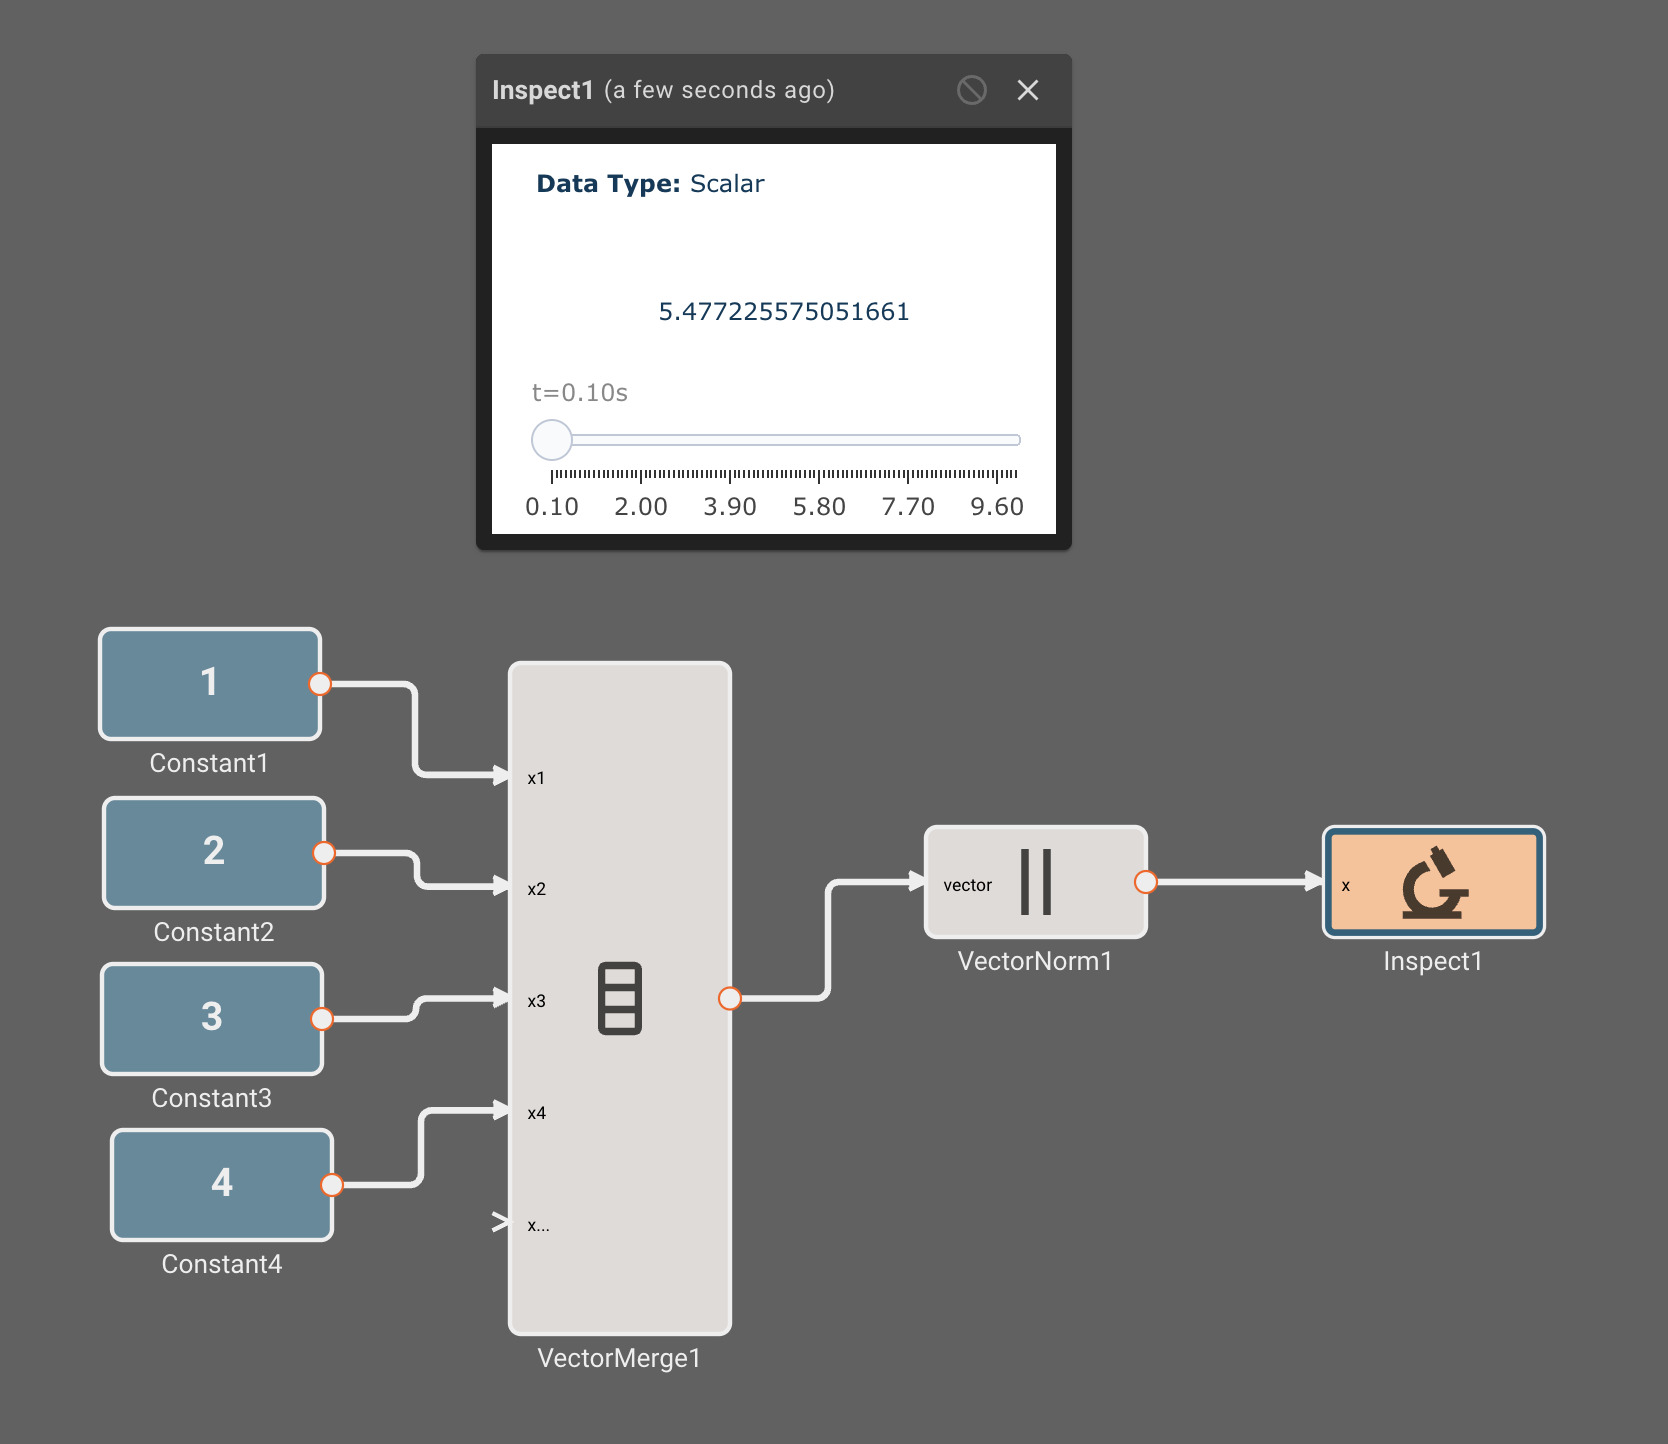
Vector Reshape Block
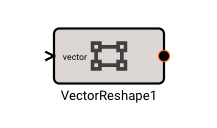
The Vector Reshape block emits a reshaped version of the input vector. Order of elements will be maintained, and the reshaped dimensions must result in the same number of elements as the original input vector.
Parameters
- Shape (default = [2,2]): Specifies the output shape (rows, cols)
Examples
Vector Slice Block

The Vector Slice block outputs an arbitrary sub-vector from within a larger vector, given a starting row, column position and output shape (rows,columns).
Parameters
- Row0 (default = 0): Starting row in input vector.
- Col0 (default = 0): Starting column in input vector.
- Shape (default = [1,2]): Shape of output in row,column format.
Examples
Vector Sort Block
The Vector Sort block outputs a sorted version of the input vector.
Parameters
- Method [Ascending | Ascending | Descending]
- Ascending: Sorts ascending.
- Descending: Sorts descending.
Examples

Features
This section covers an overview of the more customizable features available in the Pictorus platform - including scripting and source control. Some of these features are still in alpha testing, so you may need to contact us to get access to them.
Exporting Applications from Pictorus
Pictorus allows users to export their applications manually instead of using the built in device manager as described in Getting Started with Devices.
This feature is accessed from the "Export App" tab on the left pane of the Pictorus interface. There you may select the "Platform", "Target", and "Output" desired for exporting.
After selecting your desired options you can press "Build" and Pictorus will build your desired output and then offer a link to download the output using the "Download Binary" link.
Additionally, there is a link "Download Source" that provides a zip file of the Rust source code for the application. This functionality is currently in beta and subject to change. For this reason it is restricted to select customers that we have been able to work with directly. If you would like to be included in this beta please reach out to us.
Target
Currently, "Target" can be Linux or Stm32. Support for additional targets is in the works, feel free to reach out if you don't see a target you need and we can discuss what it would take to add support.
Platform
For the Linux target we offer the choice of "LinuxX86" or "LinuxARM". Intel and AMD hardware should use "LinuxX86", while most single board computers and ARM based macs running linux should use "LinuxARM".
Output
All platforms support export as a complete executable or as a static library with C bindings. The LinuxX86 platform additionally supports exporting as a dynamic library with C bindings.
Executable Output
In the case of Linux targets this will output an executable elf file that can be directly run on the target device. For Stm32 targets this will output a binary file that can be flashed to the target device. These are the same binaries that would be deployed to the device using the Pictorus device manager.
Library Output
Currently all static and dynamic library outputs are included with the source code for the application and as such is subject to the same beta restrictions as the source code download. After successful compilation the zip file available at the "Download Source" link will additionally include the compiled .a (static) or .so (dynamic) library artifact, a C header file defining its interface and finally a simple example C program that demonstrates usage of the library.
The header file is defined as below:
typedef struct AppInterface AppInterface;


#ifdef __cplusplus
extern "C" {
#endif // __cplusplus

AppInterface *app_interface_new(void);

void app_interface_free(struct AppInterface *app);

void app_interface_update(struct AppInterface *app, double app_time_s);

#ifdef __cplusplus
} // extern "C"
#endif // __cplusplus
It defines a simple interface to the pictorus application. The app_interface_new function creates a new instance of the application, app_interface_free frees the instance, and app_interface_update updates the application state. The app_time_s parameter is defined as the time in seconds since the application started.
The included exemplar .c file also has a comment at the top that provides an example command to compile and link the library with the example program.
You can see a complete example of working with FFI in the Interfacing with Existing Code section of the documentation.
Custom Scripts
Pictorus currently supports in-app Python scripting that executes prior to device deploys or simulation runs. This pre-compile scripting feature allows advanced engineering analysis and variable declaration, which is then passed along to the Rust compiler.
This feature is particularly useful for declaring app variables before compiling the core simulation or on-device code. Users can leverage Python libraries such as NumPy or Pandas to handle pre-compile functions.
For instance, here we are utilizing a Python script to tune Kalman filter matrices that are then run in a position-estimator app:
Additional Notes
It's important to recognize that Python scripts are not executed at runtime. All Pictorus apps are 100% compiled Rust.
Currently, plotting and other visualizations are not enabled. Post-processing scripts which will include visualizations are currently in development.
Custom Blocks
Pictorus allows users to create custom blocks written in Rust. These blocks can then be included in diagrams just like core blocks. This is useful for adding functionality that doesn't yet exist in Pictorus, or for adding custom hardware drivers. Custom blocks can pull in external Rust crates, so many complex use cases can be handled simply by creating a thin wrapper around an existing library.
Creating a Custom Block
To create a custom block, click on the "Custom Blocks" tab in the left sidebar. Then click the "Create Block" button. This will open a new block editor window that will ask you to input some basic details about your block, such as name, inputs/outputs, and any crates you want to import. Once you've finished with the "Block Definition" tab, you can switch to the "Code" tab. Here you will need to implement the required BlockDef trait used to define block behavior. At this point you can run "Save & Check", which will save your block as a draft and attempt to validate it. Once checks have passed, you will see an option to "Add Block". Clicking this will make the draft live and add the new custom block to your block palette.
Editing a Custom Block
Blocks can be edited after they've been published to your library. To edit a block, click on the "Custom Blocks" tab in the left sidebar. Then click on the block you want to edit. This will open the code view of your block editor window. You can make any changes you want. You will then need to run "Save & Check" to validate your changes, and then you can click "Update Block" to make the changes live.
Note on editing blocks
Currently only one published version of a block can exist at a time. This means that if you make changes to a block and publish them, any diagrams that use the old version of the block will be updated to use the new version. If your changes are likely to break existing apps, we suggest creating a new block instead of editing the existing one. You can easily fork a block by clicking the three dots on the block card and selecting "Duplicate".
Custom Block Traits and API
Custom blocks are implemented by creating a struct that implements the BlockDef trait which is shown below. Custom blocks are proper Rust structs that can have any number of fields and methods. The BlockDef trait is how Pictorus will interact with your struct but you can add any other methods or traits you want to your struct. For example if you have to do any clean up after the block is done you could implement the Drop trait for your struct.
#![allow(unused)]
fn main() {
// Trait for defining a block
pub trait BlockDef {
    /// Create a new block instance
    ///
    /// This receives the name and parameters of the associated block as specified in the
    /// Pictorus app UI.
    fn new(name: &'static str, params: &dyn Index<&str, Output = BlockParam>) -> Self;

    /// Run a single iteration of this block
    ///
    /// This receives a list of inputs corresponding to upstream blocks passing data into this block
    /// and a list of outputs corresponding to data that will be passed to downstream blocks.
    ///
    /// Each iteration of this block should modify the output data in place to reflect the current state
    fn run(&mut self, inputs: &[&dyn BlockDataRead], outputs: &mut [&mut dyn BlockDataWrite]);
}
}
The new() function takes a name and a map of parameters as input and should return a new instance of the block. The parameter input maps parameter names as &str to an instance of the BlockParam enum:
#![allow(unused)]
fn main() {
/// Param types passed into block constructors
#[derive(Debug, Clone)]
pub enum BlockParam<'a> {
    /// Scalar number value
    Number(f64),
    /// String value
    String(&'a str),
    /// Matrix value as a tuple of (nrows, ncols, `Vec<f64>`)
    Matrix(usize, usize, &'a [f64]),
}

impl BlockParam<'_> {
    pub fn as_number(&self) -> Option<f64> {
        match self {
            BlockParam::Number(n) => Some(*n),
            _ => None,
        }
    }

    pub fn as_string(&self) -> Option<&str> {
        match self {
            BlockParam::String(s) => Some(s),
            _ => None,
        }
    }

    pub fn as_matrix(&self) -> Option<(usize, usize, &[f64])> {
        match self {
            BlockParam::Matrix(nrows, ncols, data) => Some((*nrows, *ncols, data)),
            _ => None,
        }
    }
}
}
The run() function is called once per iteration of the block. It receives an immutable slice of inputs and a mutable slice of outputs. A custom block should modify the output data in place to reflect the results of the block update. The number of Inputs and Outputs it determined by the options set in the "Block Definition" panel of the editor. The "Block Definition" also defines the element order of the slices, as is standard in Rust they are zero indexed. Even if you have only one input or output they will still be provided as slices of length 1 (i.e. they can be accessed as inputs[0] or outputs[0] respectively).
The input slice contains BlockDataRead trait objects. This trait is implemented by the BlockData enum:
#![allow(unused)]
fn main() {
// Traits for setting and retrieving block data
pub trait BlockDataRead {

    /// Retrieve a scalar value
    fn get_scalar(&self) -> f64;

    /// Retrieve a matrix value as a tuple of (nrows, ncols, &[f64])
    /// Data is output in column-major order
    /// For example, the matrix:
    ///     | 1.0 2.0 |
    ///     | 3.0 4.0 |
    ///
    /// will be returned as (2, 2, &[1.0, 3.0, 2.0, 4.0])
    fn get_matrix(&self) -> (usize, usize, &[f64]);
}
}
The mutable output slice contains BlockDataWrite trait objects. This trait is implemented by the BlockData enum:
#![allow(unused)]
fn main() {
pub trait BlockDataWrite {
    /// Set a scalar value
    fn set_scalar_value(&mut self, value: f64);

    /// Set a matrix value
    /// Data is input in column-major order
    /// For example, set_matrix_value(2, 2, &[1.0, 3.0, 2.0, 4.0]) would set the matrixdata to:
    ///    | 1.0 2.0 |
    ///    | 3.0 4.0 |
    fn set_matrix_value(&mut self, nrows: usize, ncols: usize, data: &[f64]);
}
}
The size and shape of the input and output slices will be determined by the block's inputs and outputs as defined in the "Block Definition" tab of the block editor.
Source Control Integration
Source Control Integration is currently in alpha. Please contact us if you'd like to try it out.
Pictorus allows users to integrate with their own source control repositories. This allows you to keep your code in sync with your Pictorus projects, and to use your own CI/CD pipelines to deploy your code to devices. Currently we only support GitHub, and syncing is one-way (from Pictorus to GitHub). Syncing to source control is done by creating a pull request containing the generated code for a specific app version. This allows you to easily see changes between versions, and to review and approve changes before they are merged.
Connecting to GitHub
First, create a new repository in GitHub to store the code for the app you want to sync. You should create a new repository for each app you want to sync, and the repository should be initialized with a README file.
Next, you'll need to install the Pictorus GitHub app on your GitHub account. Navigate to the Pictorus Sync app in GitHub and click the "Install" button. You will be prompted to select which repositories the app can access. Select the repository you created in the previous step. Note the installation ID that is displayed after you've installed the app. You'll need this later. This can also be found by navigating to your GitHub account settings, selecting "Installed GitHub Apps", and then clicking on the Pictorus Sync app. The installation ID is displayed as the last portion of the URL.
Now navigate to your account settings in Pictorus and fill in the "GitHub Settings" section with the following information:
- Owner: The owner of the repository you created in the first step. This is the portion of the repository URL before the repo name. For instance, if your repository URL is
https://github.com/My-Org/pictorus_app, then the owner isMy-Org. - Repository: The name of the repository you created in the first step. This can also be overridden on a per-app basis if you want to sync multiple apps. This can be found in the settings section of apps after initial GitHub setup is complete.
- Main Branch: The branch you want to create pull requests into. This should be the default branch for the repository (usually
main). - Installation ID: The installation ID you noted in the previous step.
Syncing an App
Once you've connected your account to GitHub, you can sync an app by navigating to the "Version History" tab in the left sidebar. Click "Create Version", and check the "Create Pull Request" checkbox. This will create a new version of your app and automatically create a pull request in GitHub.
Static Assets
The Static Assets feature, accessed via the file icon in the left panel menu, currently supports file uploads for CAN message encoding and decoding, as well as FMUs for co-simulation.
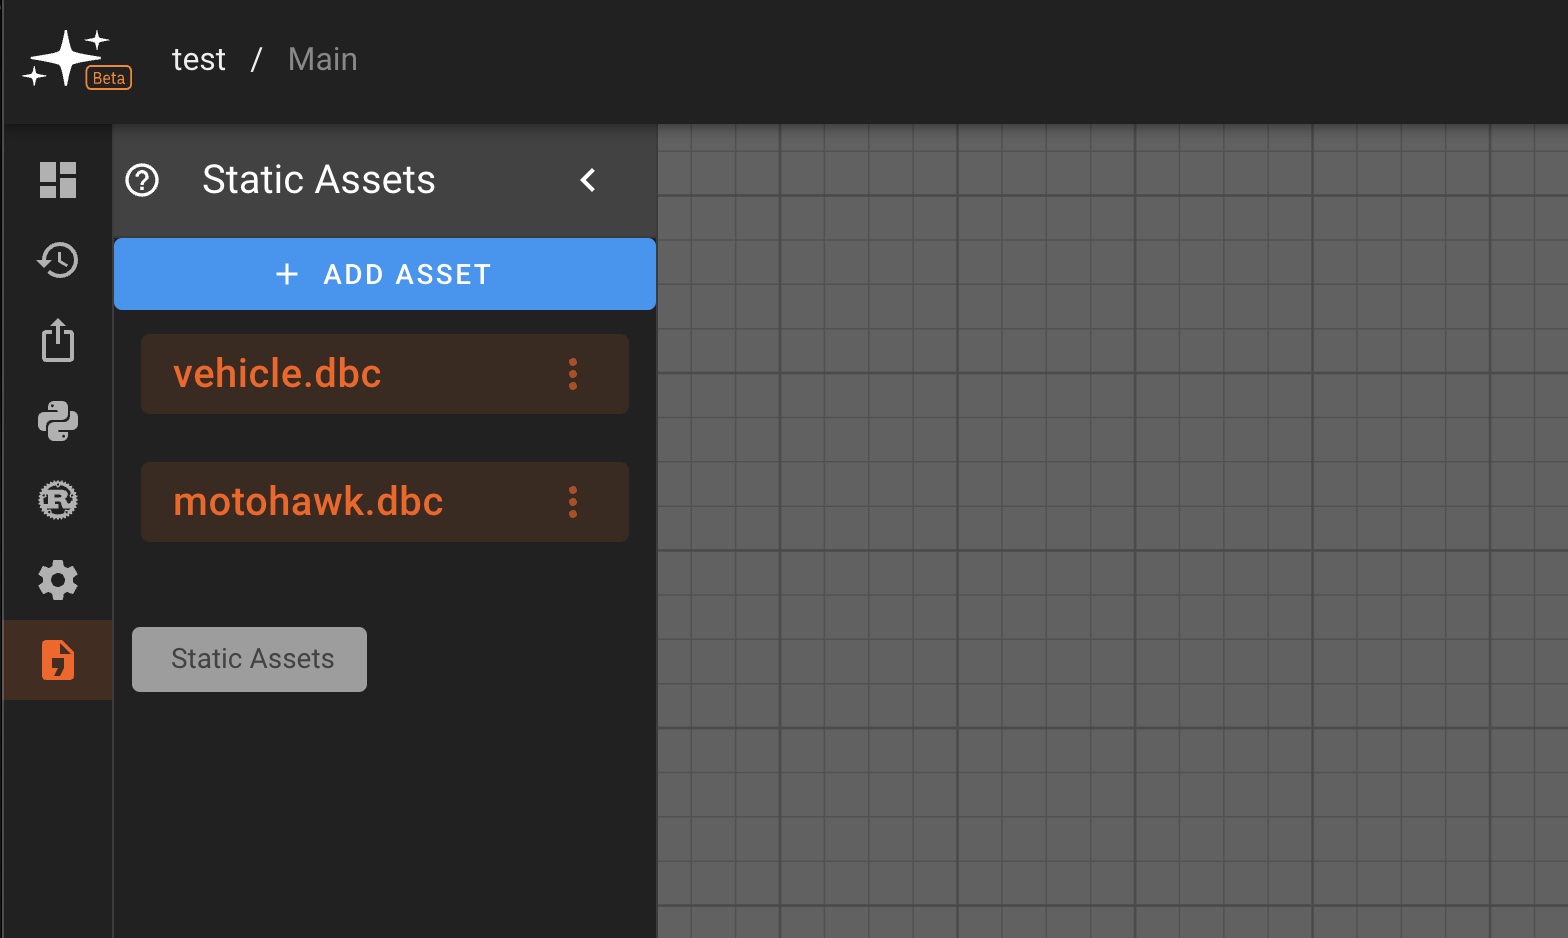
CAN DBC Files
To use CAN transmit and receive functionalities in Pictorus, a known CAN message format must be specified. This can be done by uploading a DBC file to the Static Assets associated with your app.
Multiple DBCs can be uploaded to a single app, and their message formats can all be accessed within the app's scope via CAN Transmit or CAN Receive blocks. To use the same DBC in a different app, the file must be uploaded to that app's Static Assets.
FMU Files
To use an FMU model for co-simulation in Pictorus, an FMU file must be uploaded to the Static Assets associated with your app. Multiple FMUs can be uploaded to a single app, and their models can be accessed within the app's scope via the FMU block. To use the same FMU in a different app, the file must be uploaded to that app's Static Assets.
FMU Requirements
We currently only support FMU 2.0 for Co-Simulation. Uploaded FMUs must include a pre-compiled static library for linux-x86_64 (i.e. the linux64 FMI target). The FMU MUST be statically linked as the simulation runs in a sandboxed environment which may not contain all the shared libraries required for dynamic linking.
Common Issues
Missing Dependencies
If the simulation with the FMU block compiles but fails to run, check the error message for possible missing shared libraries, for example:
[ERROR] - Failed to load and instantiate FMU: FmuLoad(DLOpen(DlOpen { desc: "/tmp/<some_runner_ID>/binaries/linux64/<your_fmu_dynamically_linked_dependency>.so: cannot open shared object file: No such file or directory" }))
or the error contains a message about undefined symbols, usually in the form of:
/mnt/pictorus/output/build/fmu_dynamic_test: symbol lookup error: /tmp/<some_runner_ID>/binaries/linux64/<your_fmu_library>.so: undefined symbol: exp
This likely indicates that the FMU was compiled with dynamic linking. Check the compile settings to ensure all libraries are statically linked, then build and upload the new FMU to Pictorus. Also check the compiled FMU library suffix, if it ends in .so it is a shared (dynamic) library, while a library that ends in .a is a static library.
Interfacing a Pictorus App with an Existing codebase
Pictorus apps can be deployed and run directly as standalone executables on a target device. However, there are times when you may want to interface a Pictorus app with some existing codebase. You can export any Pictorus app as a static or dynamic library with C bindings. This allows you to link and call your Pictorus app from any language that supports C FFI (Foreign Function Interface), including C, C++, Rust, Python, and many others.
Being able to pass data to/from a Pictorus app allows us to handle I/O operations at a high level and offload control logic to Pictorus. Alternatively, you might want to use Pictorus to interface with hardware, and pass those results back to your existing codebase.
Examples
You can see working examples of how to link and call a Pictorus app from C and Rust in this repository: https://github.com/Pictorus-Labs/pictorus_ffi_example
Example application
In this example, we will create a simple Pictorus app that accepts a single value from an external source, multiplies it by a random number, and returns the result back to the caller.
Configure the app to output a library
When creating the new app, set the output type to "Static Lib" by opening the "Advanced" tab and clicking on the "Output" dropdown.
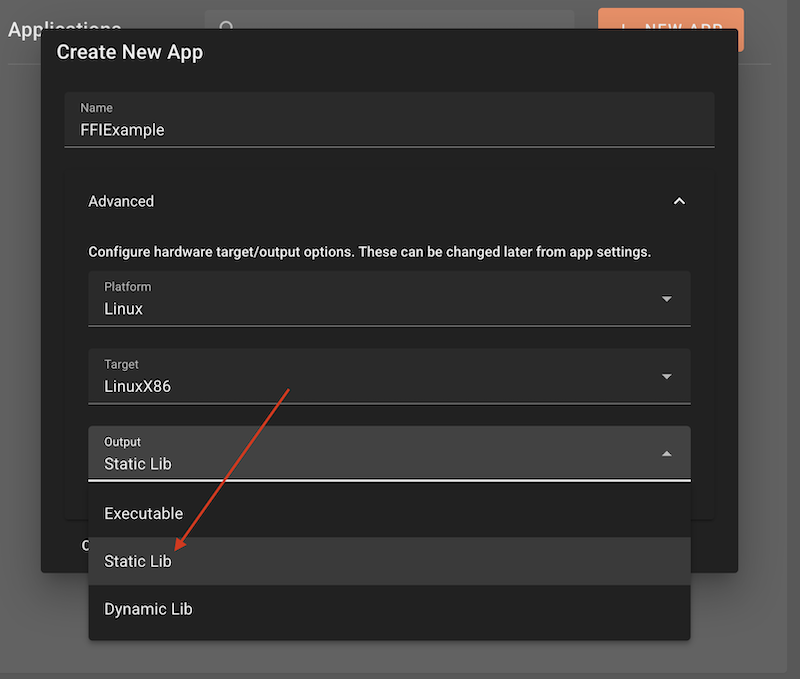
If you have an existing app, you can change the output type by clicking on the "App Settings" tab in the left sidebar, and then clicking the "Output" dropdown.
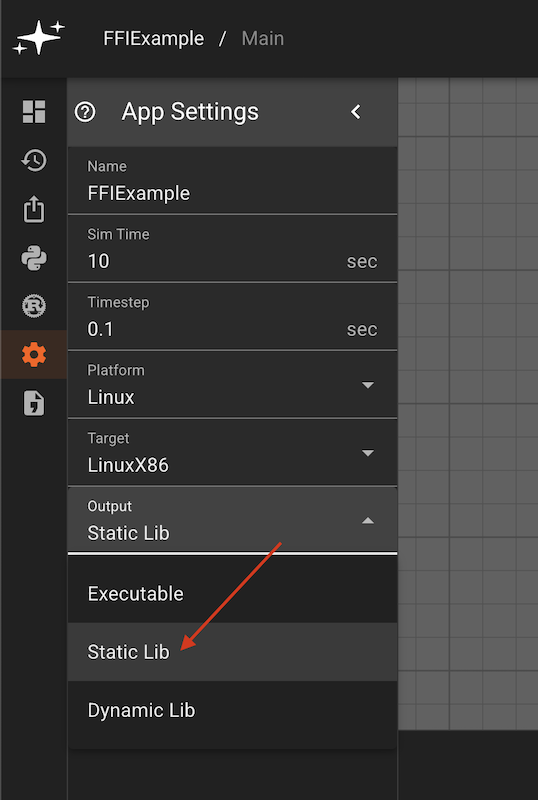 .
.
This same process applies to the "Dynamic Lib" output type for supported targets.
Add FFI Inputs and Outputs
Now that our app is configured to output a dynamic library, we will add the required FFI input and output.
- Navigate to the top-level state view of your app by clicking on the app name in the top toolbar.

- From the top-level state view, right click anywhere on the canvas and click "Settings".
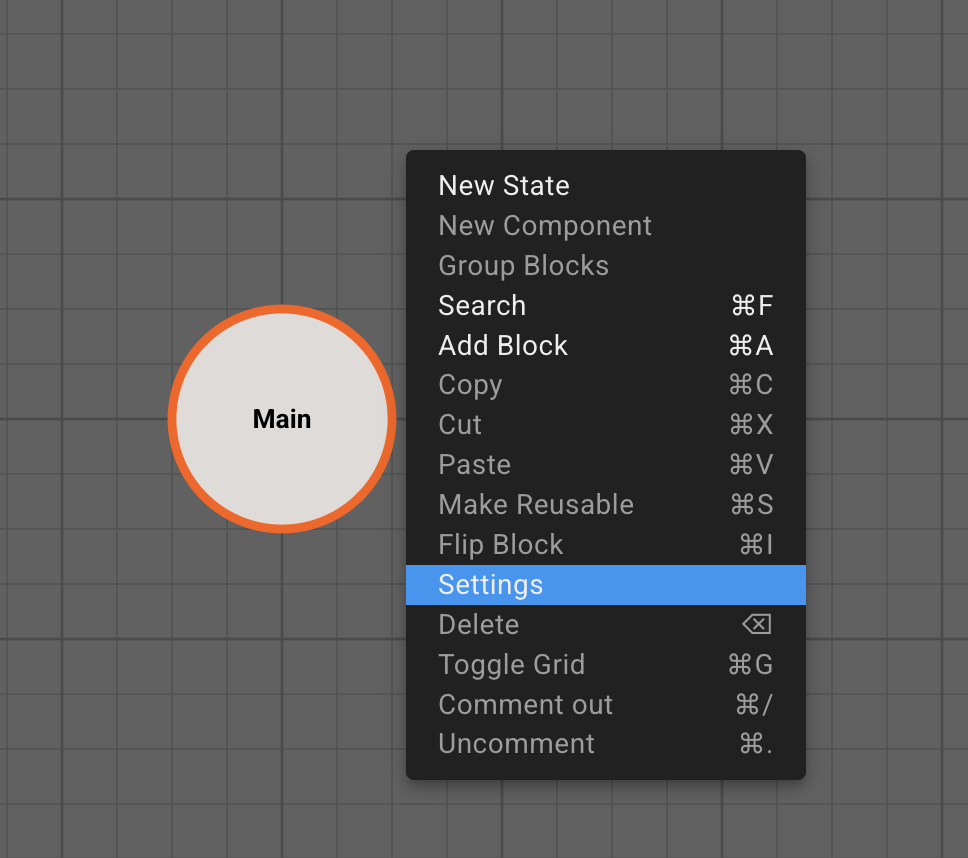
- You will now see a settings tab that includes options to "Add FFI Input" and "Add FFI Output". In our case, we will add a single FFI input called "input" and a single FFI output called "output". The "Default" value controls what the value will be initialized to when the app starts. In our case we can leave them both as 0.
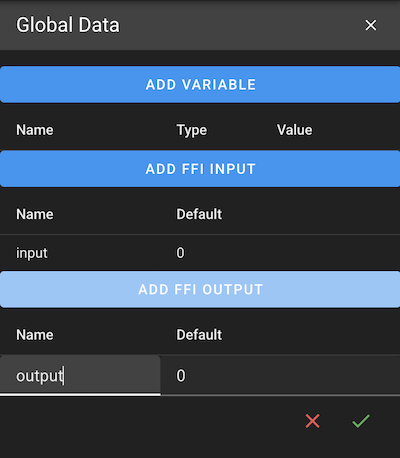
Note: FFI inputs and outputs currently only support scalar values.
Implement an app that reads and writes FFI values
Once FFI values have been configured for your app, they will be exposed to blocks as top-level variables that can be written to and read from using the standard mechanisms for interfacing with variables. In our case we can read the input value using a DataReadBlock.
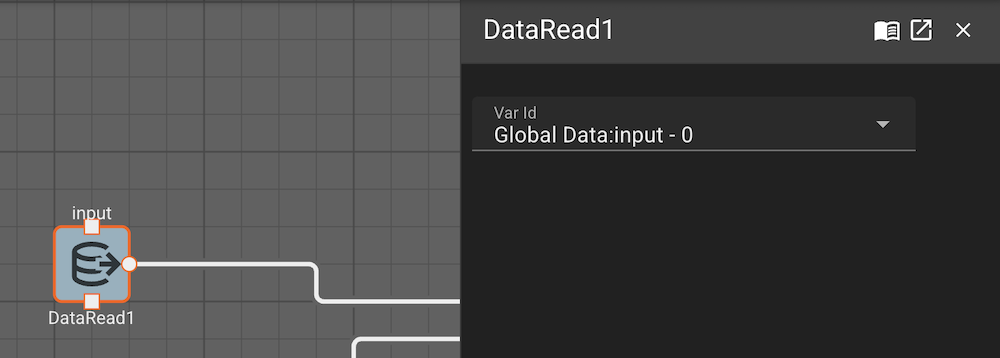
And we can write to the output value result using a DataWriteBlock.
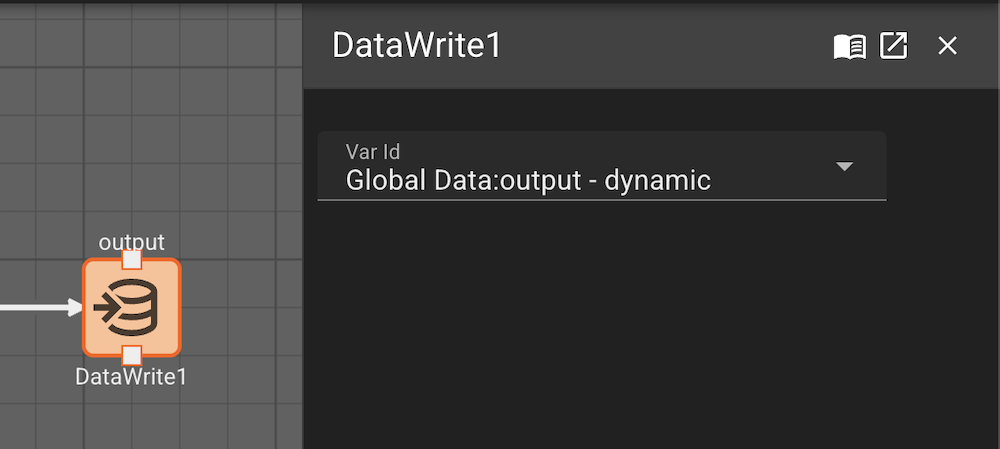
We can implement the remaining logic of our app by adding a RandomNumberBlock, multiplying its output by the input signal originating from the DataReadBlock using a ProductBlock, and feeding the result to the DataWriteBlock connected to the output FFI.
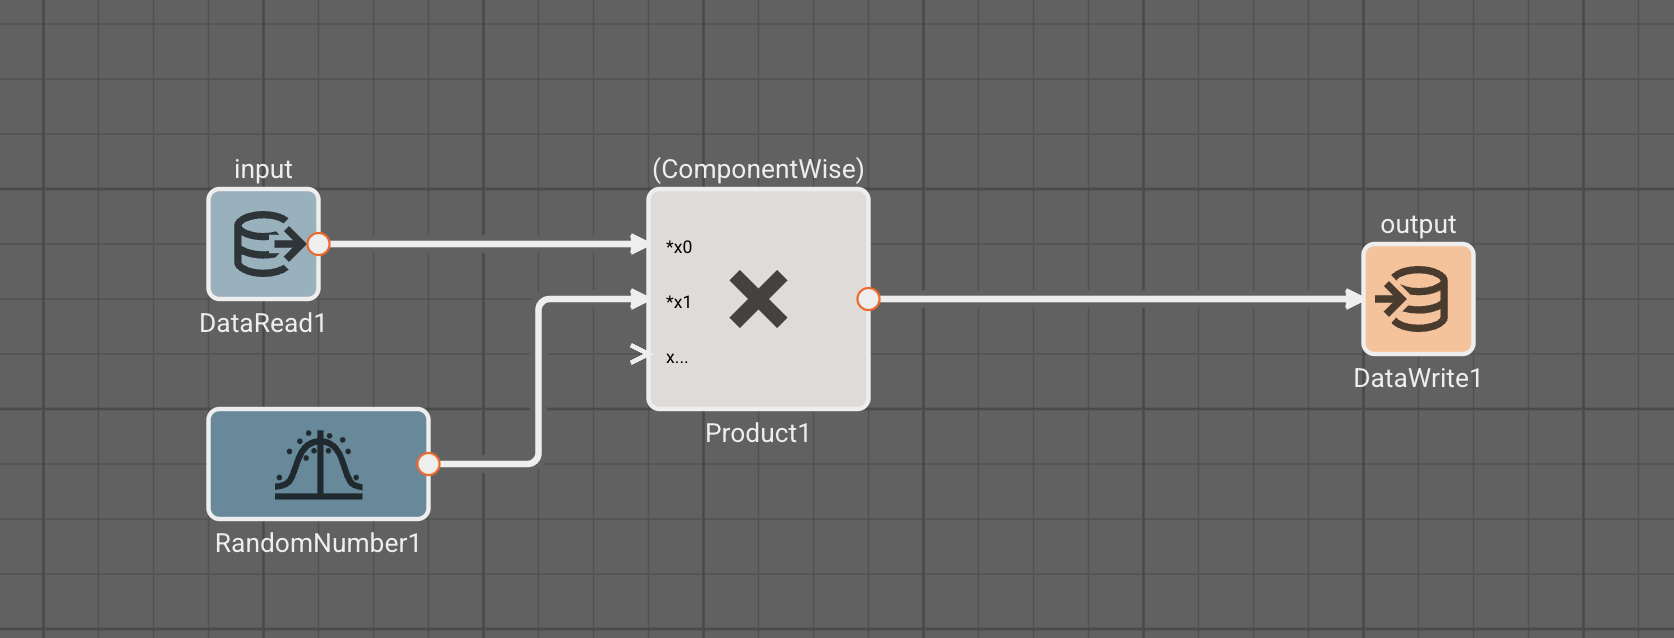
Export the app
Note: Source code exports are only available on paid plans/trials.
Our app is now complete, and ready to be integrated into our codebase. To export the source code and libraries, navigate to the "Export" tab in the left sidebar. Verify your platform, target, and output are correct, and then click "Build". Once the build has completed, click the "Download Source" button to download the source code and libraries.

The source code will include a C header file that looks like the following:
typedef struct AppInterface AppInterface;
// Data structure containing all inputs
typedef struct AppDataInput {
    double input_ffi;
} AppDataInput;

// Data structure containing all outputs
typedef struct AppDataOutput {
    double output_ffi;
} AppDataOutput;


#ifdef __cplusplus
extern "C" {
#endif // __cplusplus

AppInterface *app_interface_new(void);

void app_interface_free(struct AppInterface *app);

AppDataOutput app_interface_update(struct AppInterface *app, double app_time_s, struct AppDataInput *input_data);

#ifdef __cplusplus
} // extern "C"
#endif // __cplusplus
This header file defines the interface to the Pictorus application. The app_interface_new function creates a new instance of the application, app_interface_free releases the instance, and app_interface_update executes one update cycle. The app_time_s parameter is defined as the time in seconds since the application started. The AppDataInput and AppDataOutput structs define the input and output FFI data respectively.
Calling the library from C
To call the library from C, you will need to include the header file in your C source code, and link against the compiled library. The exported code includes a simple C program for reference. We've modified this program slightly to assign a non-zero value to the FFI input during each time step:
// Builds with the following command from crate root:
// gcc src/example_app.c src/libffi_test_67a51701783b3351e863e36e.a -o example_app -lpthread -Wl,--no-as-needed -ldl -lm
#include <stdio.h>
#include <stdint.h>
#include <inttypes.h>

#include "pictorus.h"


void print_data(double app_time_s, AppDataOutput *data) {
    printf("Time: %f, output_ffi: %f\n", app_time_s, data->output_ffi);
}

int main(void) {
    printf("Starting app\n");

    AppInterface *app_iface = app_interface_new();

    AppDataInput input = {
        .input_ffi= 0.0,
    };

    double timestep_s = 0.1;
    double app_time_s = 0.0;
    double max_time_s = 1.0;

    for(double app_time_s=0.0; app_time_s < max_time_s; app_time_s += timestep_s) {
        input.input_ffi = app_time_s;
        AppDataOutput output = app_interface_update(app_iface, app_time_s, &input);
        print_data(app_time_s, &output);
    }

    app_interface_free(app_iface);

    printf("Done running app");
}
We can compile and run this program using the command referenced in the top of the example file:
# Note the name of the .a file in your downloaded source code, it will be different than the one below
gcc src/example_app.c src/libffi_test_67a51701783b3351e863e36e.a -o example_app -lpthread -Wl,--no-as-needed -ldl -lm
./example_app
This program outputs the following:
Starting app
Time: 0.000000, output_ffi: -0.000000
Time: 0.100000, output_ffi: -0.025728
Time: 0.200000, output_ffi: 0.509879
Time: 0.300000, output_ffi: -0.036878
Time: 0.400000, output_ffi: 0.678048
Time: 0.500000, output_ffi: 0.713464
Time: 0.600000, output_ffi: 0.087214
Time: 0.700000, output_ffi: -0.078597
Time: 0.800000, output_ffi: -0.115386
Time: 0.900000, output_ffi: 0.571152
Time: 1.000000, output_ffi: -0.771117
Calling the library from Rust
To call the app from rust, you will need to include the generated library in your project via a build script, and also create Rust wrapper bindings around the C interface.
To link the header and library files in your build process, add the following to your build.rs file:
#![allow(unused)]
fn main() {
// Tell cargo to look for shared libraries in the specified directory
println!("cargo:rustc-link-search=/path/to/your/library_dir");

// Tell cargo to tell rustc to link the generated library
// The library name will be the same as the .a file with the 'lib' prefix and '.a' suffix removed
println!("cargo:rustc-link-lib=ffi_test_67a51701783b3351e863e36e");
}
You can then create and include the Rust bindings in your project by writing them manually, or by using a tool like bindgen to create them via CLI or automatically generate them as part of the build. Here's an example of what our Rust bindings might look like:
#![allow(unused)]
fn main() {
#[repr(C)]
#[derive(Debug, Copy, Clone)]
pub struct AppInterface {
    _unused: [u8; 0],
}
#[repr(C)]
#[derive(Debug, Copy, Clone)]
pub struct AppDataInput {
    pub input_ffi: f64,
}
#[repr(C)]
#[derive(Debug, Copy, Clone)]
pub struct AppDataOutput {
    pub output_ffi: f64,
}
unsafe extern "C" {
    pub fn app_interface_new() -> *mut AppInterface;
}
unsafe extern "C" {
    pub fn app_interface_free(app: *mut AppInterface);
}
unsafe extern "C" {
    pub fn app_interface_update(
        app: *mut AppInterface,
        app_time_s: f64,
        input_data: *mut AppDataInput,
    ) -> AppDataOutput;
}
}
We can then call the library from Rust using a similar pattern to the C example:
mod bindings;
use bindings::*;

fn print_data(app_time_s: f64, output: &AppDataOutput) {
    println!(
        "app_time_s: {:.1}, output_ffi: {:.3}",
        app_time_s, output.output_ffi
    );
}

fn main() {
    println!("Starting app");
    let app_iface = unsafe { app_interface_new() };
    let mut input = AppDataInput { input_ffi: 0.0 };
    let timestep_s = 0.1;
    let max_time_s = 1.0;

    for app_time_s in (0..(max_time_s / timestep_s) as i32).map(|i| i as f64 * timestep_s) {
        input.input_ffi = app_time_s;
        let input_ptr = &mut input as *mut AppDataInput;
        let output = unsafe { app_interface_update(app_iface, app_time_s, input_ptr) };
        print_data(app_time_s, &output);
    }

    unsafe {
        app_interface_free(app_iface);
    }

    println!("Done running app");
}
The app can then be built and run using cargo run, which outputs the result:
Starting app
app_time_s: 0.0, output_ffi: -0.000
app_time_s: 0.1, output_ffi: -0.026
app_time_s: 0.2, output_ffi: 0.510
app_time_s: 0.3, output_ffi: -0.037
app_time_s: 0.4, output_ffi: 0.678
app_time_s: 0.5, output_ffi: 0.713
app_time_s: 0.6, output_ffi: 0.087
app_time_s: 0.7, output_ffi: -0.079
app_time_s: 0.8, output_ffi: -0.115
app_time_s: 0.9, output_ffi: 0.571
app_time_s: 1.0, output_ffi: -0.771
Done running app
A note on Rust FFI
Ideally we would not need to use the intermediate C FFI in order to call a Pictorus app from Rust. However, at this time Pictorus does not generate a publicly accessible Rust interface that an app can pull in. This is a feature that is planned for a future release.
Calling the library from other languages
A large number of languages support interacting with libraries via a C FFI. If you need to call a Pictorus app from some language other than C/Rust, you can do so by following the relevant C FFI documentation for that language. Generally this will be a similar process of linking against the generated library/header and providing the appropriate bindings.
Working with Teams
Teams allow you to easily collaborate with other users on projects. Team admins can add and remove members, change their roles to limit what resources they can access, and edit team settings. All new Pictorus accounts are assigned to their own team by default, and you can join additional teams by having a team admin send you an invitation.
Accessing Team Settings
To edit team settings, add/remove members, or change their roles. First navigate to the settings page by clicking the avatar icon in the top right corner of the screen and selecting "Settings". Then click the "Teams" tab in the left sidebar.
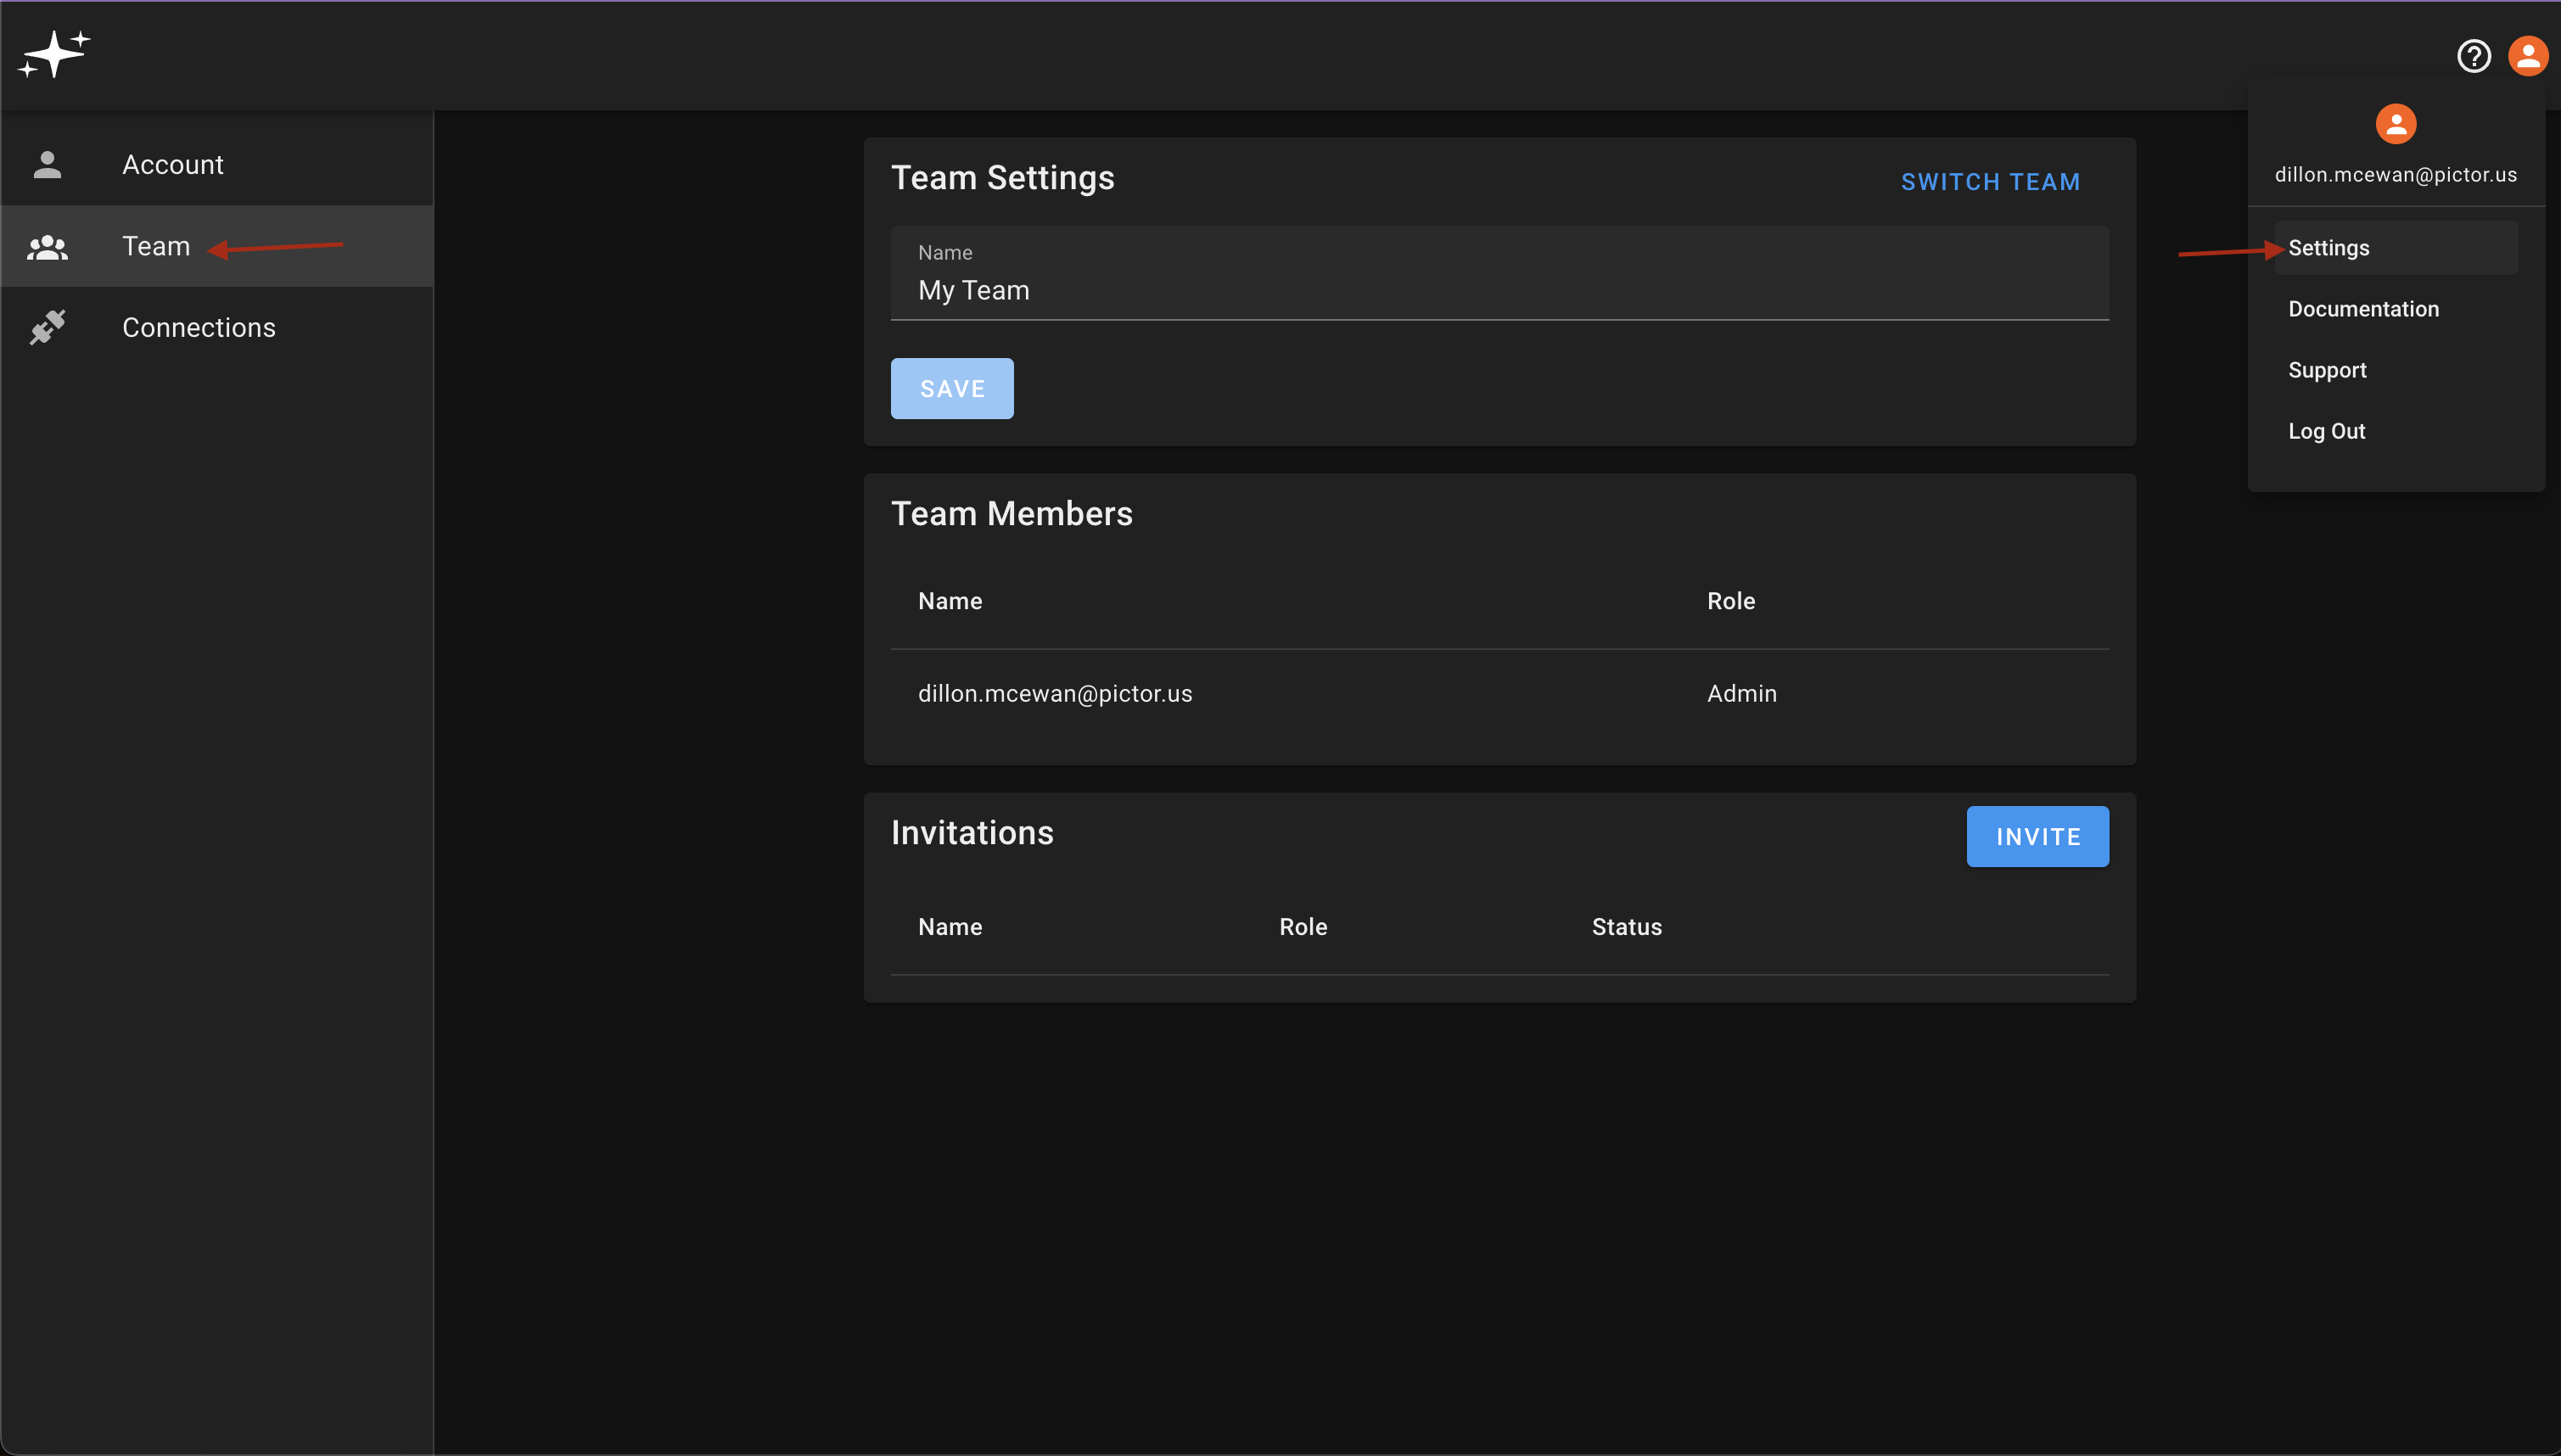
Switching Teams
If you are a member of multiple teams, you can switch between them by navigating to the team settings page as described above, and clicking the "Switch Team" button in the top right corner of the "Team Settings" panel. This will display a list of all teams you are a member of, and you can click on a team to switch to it.
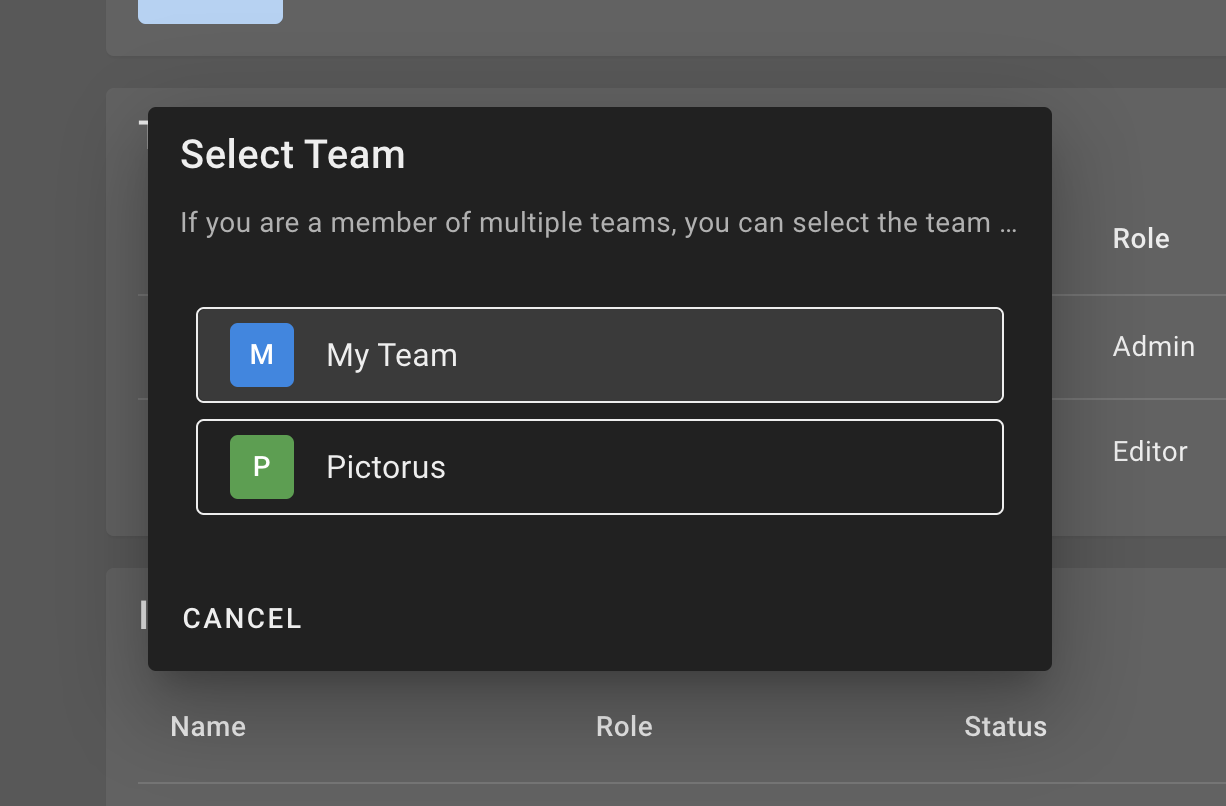
Team Roles
Teams currently support the following roles:
- Admin: Can add and remove members, change roles, and edit team settings. Has full access to all team resources.
- Editor: Can view and edit all team resources, but cannot change any team settings.
Adding Members
First, navigate to the team settings page as described above. Then click the "Invite" button in the "Invitations" panel at the bottom of the page. Enter the email address of the user you want to invite, and select their role. Finally, click the "Invite" button to send the invitation.
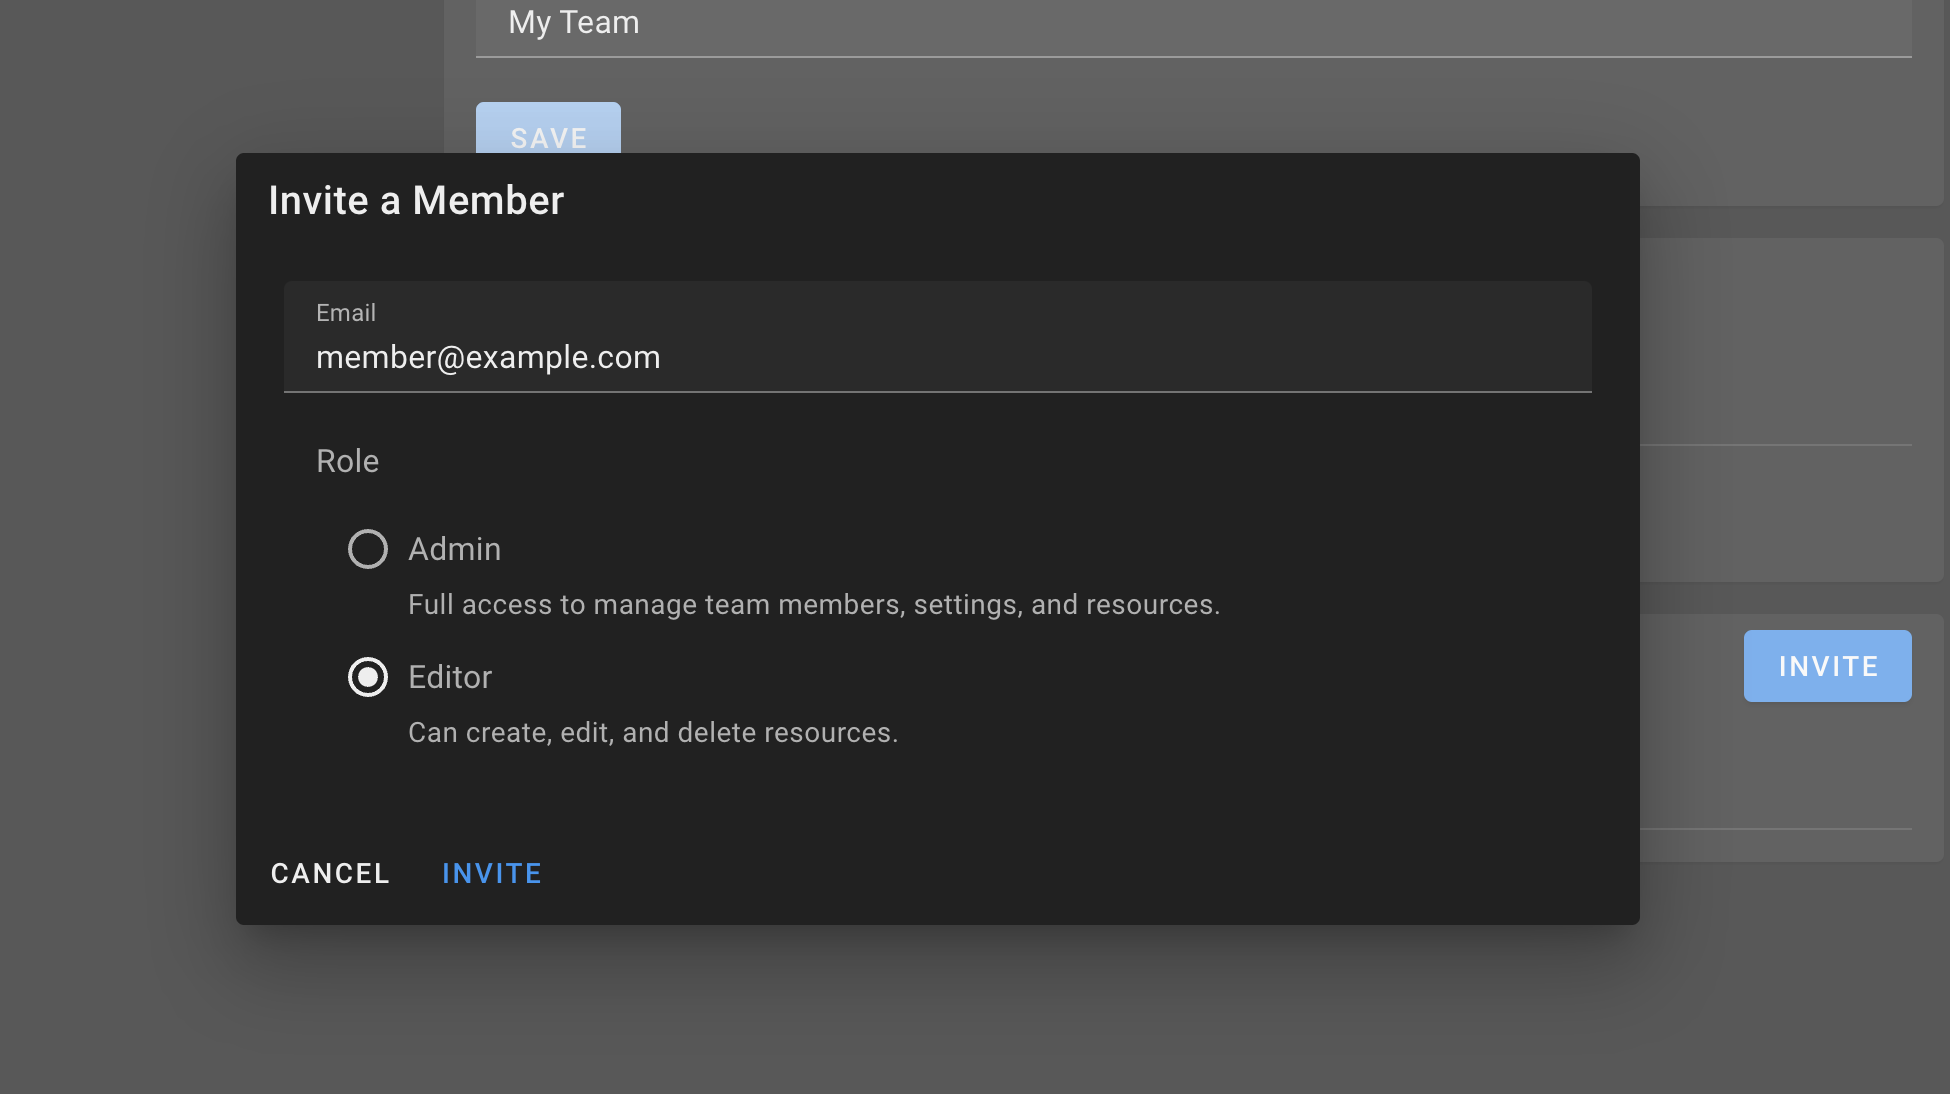
The user will receive an email with a link to join the team. Once they accept the invitation, they will be added to the team with the role you selected. Prior to accepting the invite they will appear in the "Invitations" panel with a "Pending" status.
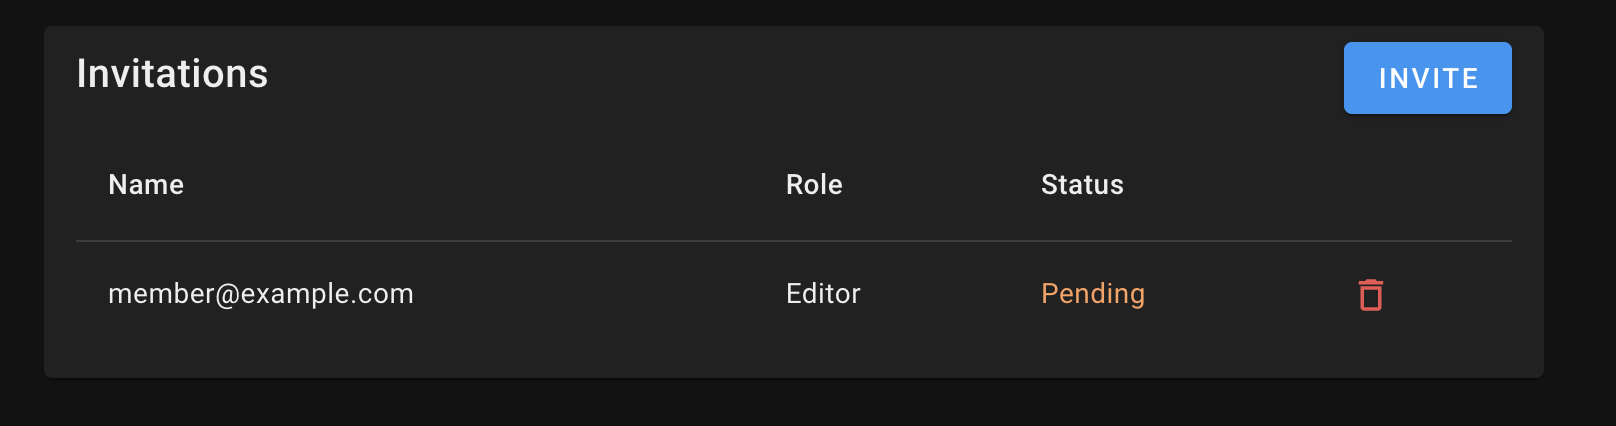
You can cancel the invitation by clicking the red trash can icon next to the corresponding invitation.
Removing Members
To remove a member from the team, navigate to the team settings page, click the 3 dots next to the member you want to remove, and select "Remove". You will be prompted to confirm the removal.
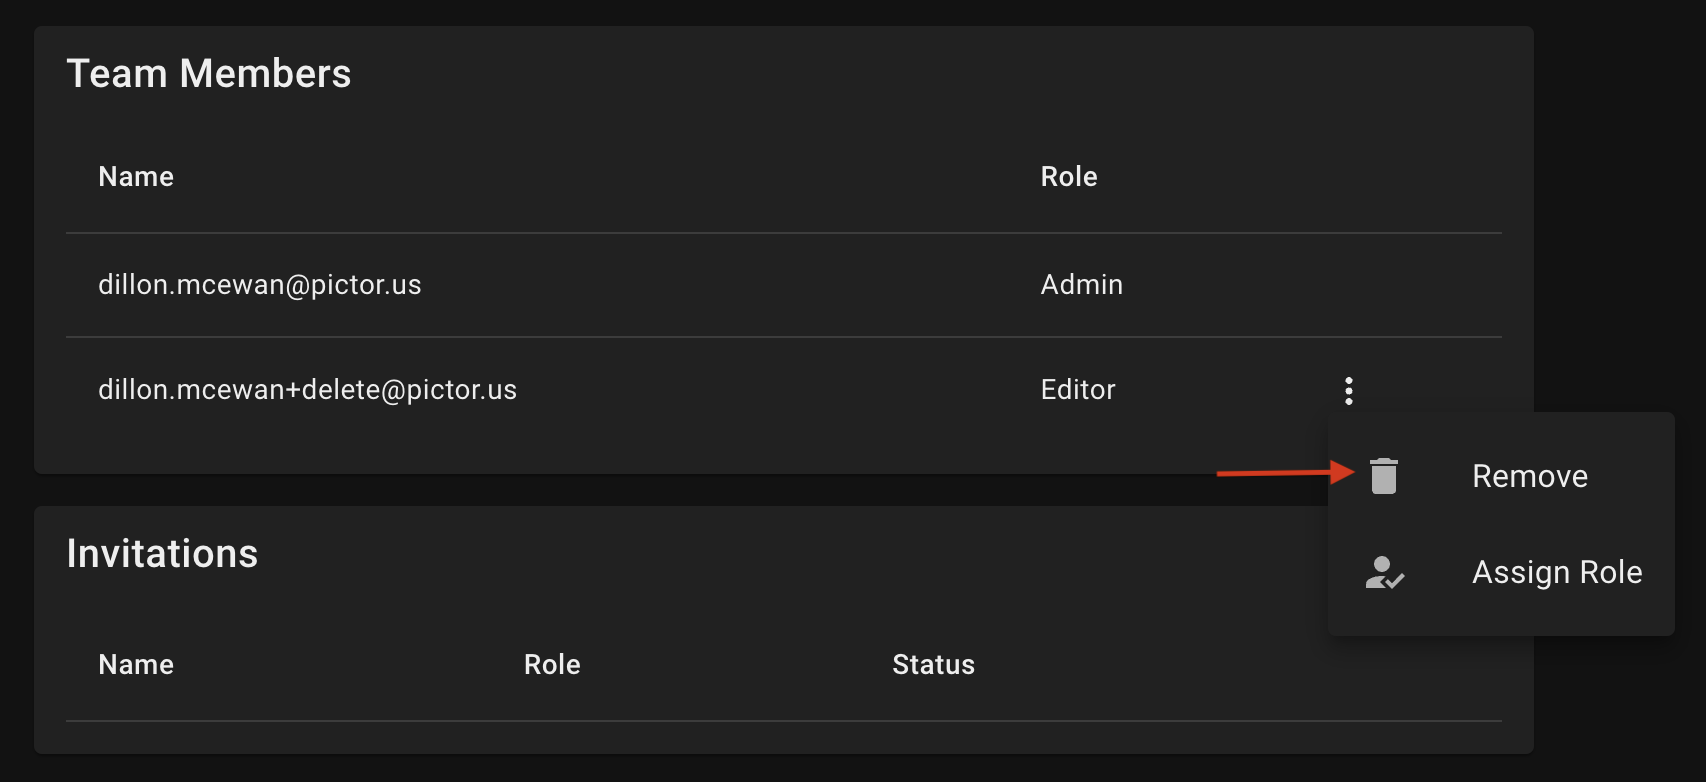
Changing Roles
To change a member's role, navigate to the team settings page, click the 3 dots next to the member you want to change, and select "Assign Role".
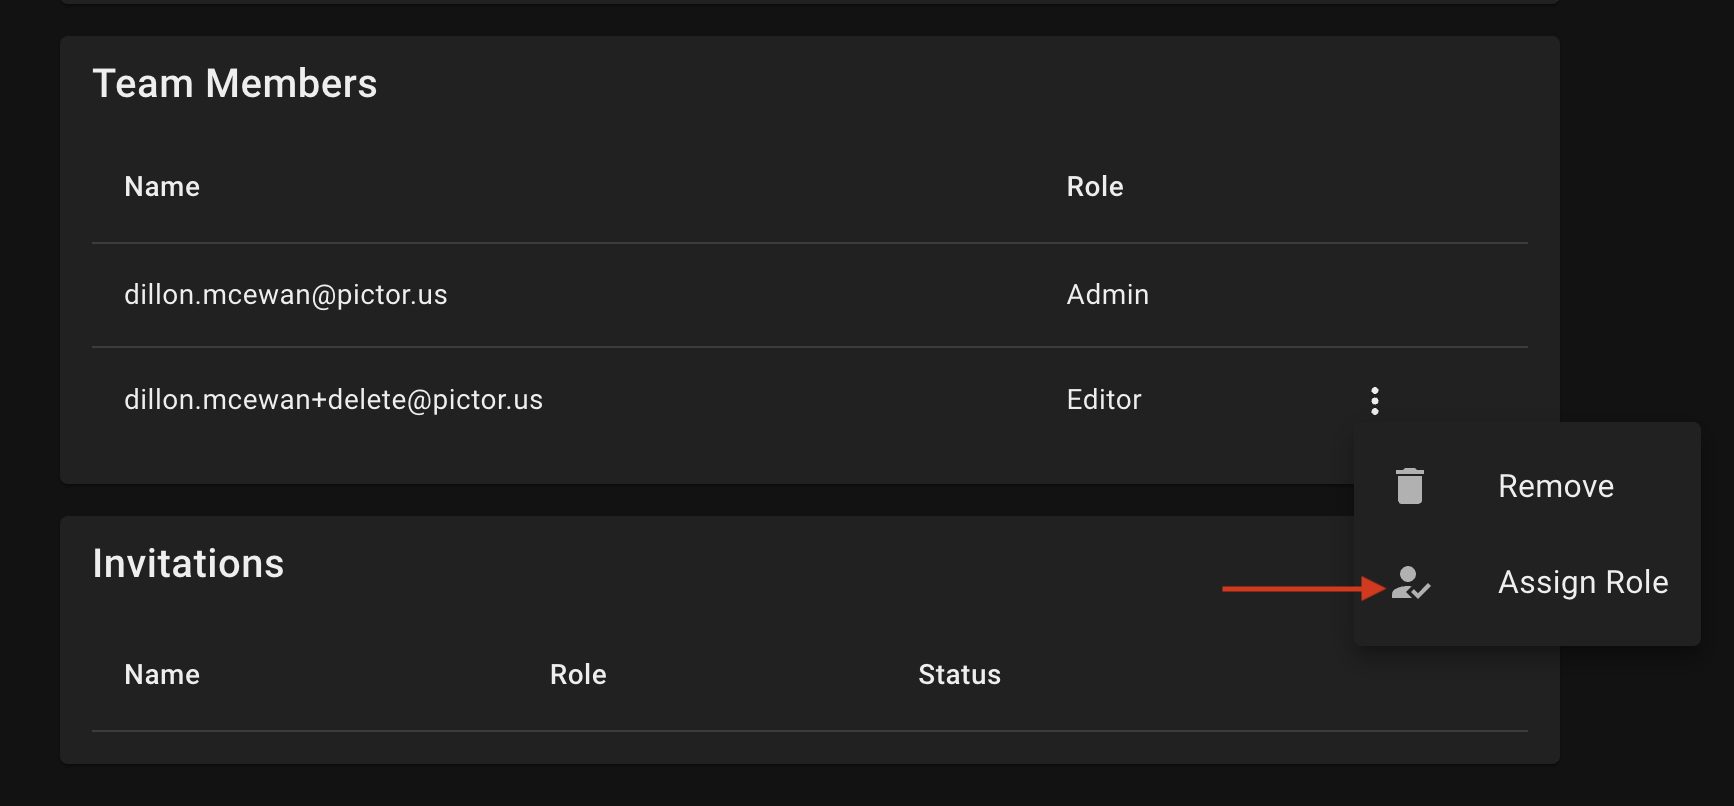
Then select the new role you want to assign to the user and click "Assign".
Working with the API
Pictorus has an API that allows you to work with your devices and projects programmatically. This is a powerful tool for helping you automate tasks, integrate with CI/CD pipelines, and manage resources for your team. The available API endpoints are documented at https://api.pictor.us/public/docs.
Authentication
To use the API, you will need to authenticate using an API key that is linked to a specific user and team.
Creating an API Key
You can create API keys by going to the Connections tab in the settings page. From here, you can create and manage your API keys. To create a new API key, click on the "Create API Key" button, give the new key a name, and click "Save". The new key will be listed in the API Keys section. Click the eye icon to display the key, copy it to your clipboard, and store it in a safe place.
Using the API Key
You can authenticate requests to the API in one of three ways:
- HTTP Header: Include the API key in the
X-API-Keyheader of your request. - Query Parameter: Include the API key in the
api_keyquery parameter of your request. - Cookie: Include the API key in the
X-API-Keycookie of your request.
Example Request
To get a list of devices, you can use the following curl command, replacing <API_KEY> with the key you created in the previous step:
curl -L https://api.pictor.us/public/v1/devices -H "X-API-Key: <API_KEY>" -H 'Accept: application/json'
Examples
Take a look at our example Google Colab notebook that demonstrates how to use the API, along with a simple Python client, to build, simulate, deploy, and run apps on a device.
PX4 Integration
Pictorus now offers the ability to integrate a Pictorus model as a PX4 module that can run on the PX4 platform - both in the Gazebo simulator and on physical hardware.
Getting Started
A fully working Pictorus PX4 integration will require a PX4 development environment, which typically involves setting up a Linux environment with the necessary tools and dependencies for building PX4 firmware. You can follow the official PX4 setup guide to set up a local environment.
The following examples were built using a Debian based Linux. The examples also uses a PlayStation controller to provide manual control inputs to the PX4 simulation and physical hardware.
Create a PX4 Model in Pictorus
Pictorus PX4 modules use Rust bindings to subscribe to and publish uORB messages. uOrb is PX4's native communication protocol for inter-module communication. It is a pub-sub system, where "topics" are used to advertise and receive specific message types . We are building a simple model that subscribes to the Sensor Gyro and Manual Control Setpoint uORB topics. These subscriptions bring data into the model, where it is modified and converted to PWM timing values. Finally, those values are published to the Actuator Motors uORB topic, this exports data from the model, back into the the broader PX4 system.
- Create a new model in Pictorus.
- Open the
App Settingsfrom the left sidebar and change thePlatformtoPX4_Linux. This will change the defaultInputandOutputblock set to PX4 compatible blocks. - Drag and drop a
uORB Inputblock from the left sidebar into the model. Double click on the block to open the block parameters and selectSensor Gyrofrom theMessagedropdown. This will configure the block to subscribe to theSensor GyrouORB topic. - Drag and drop another
uORB Inputblock into the model. Double click on the block and selectManual Control Setpointfrom theMessagedropdown. This will configure the block to subscribe to theManual Control SetpointuORB topic. - Drag and drop a
uORB Outputblock into the model. Double click on the block and selectActuator Motorsfrom theMessagedropdown. This will configure the block to publish to theActuator MotorsuORB topic. - Build out the rest of the model to process the input data and generate PWM duty cycles. Below is an example of basic model that can be used as a starting point. PX4 documentation discusses existing models and control strategies that can also be used in Pictorus.
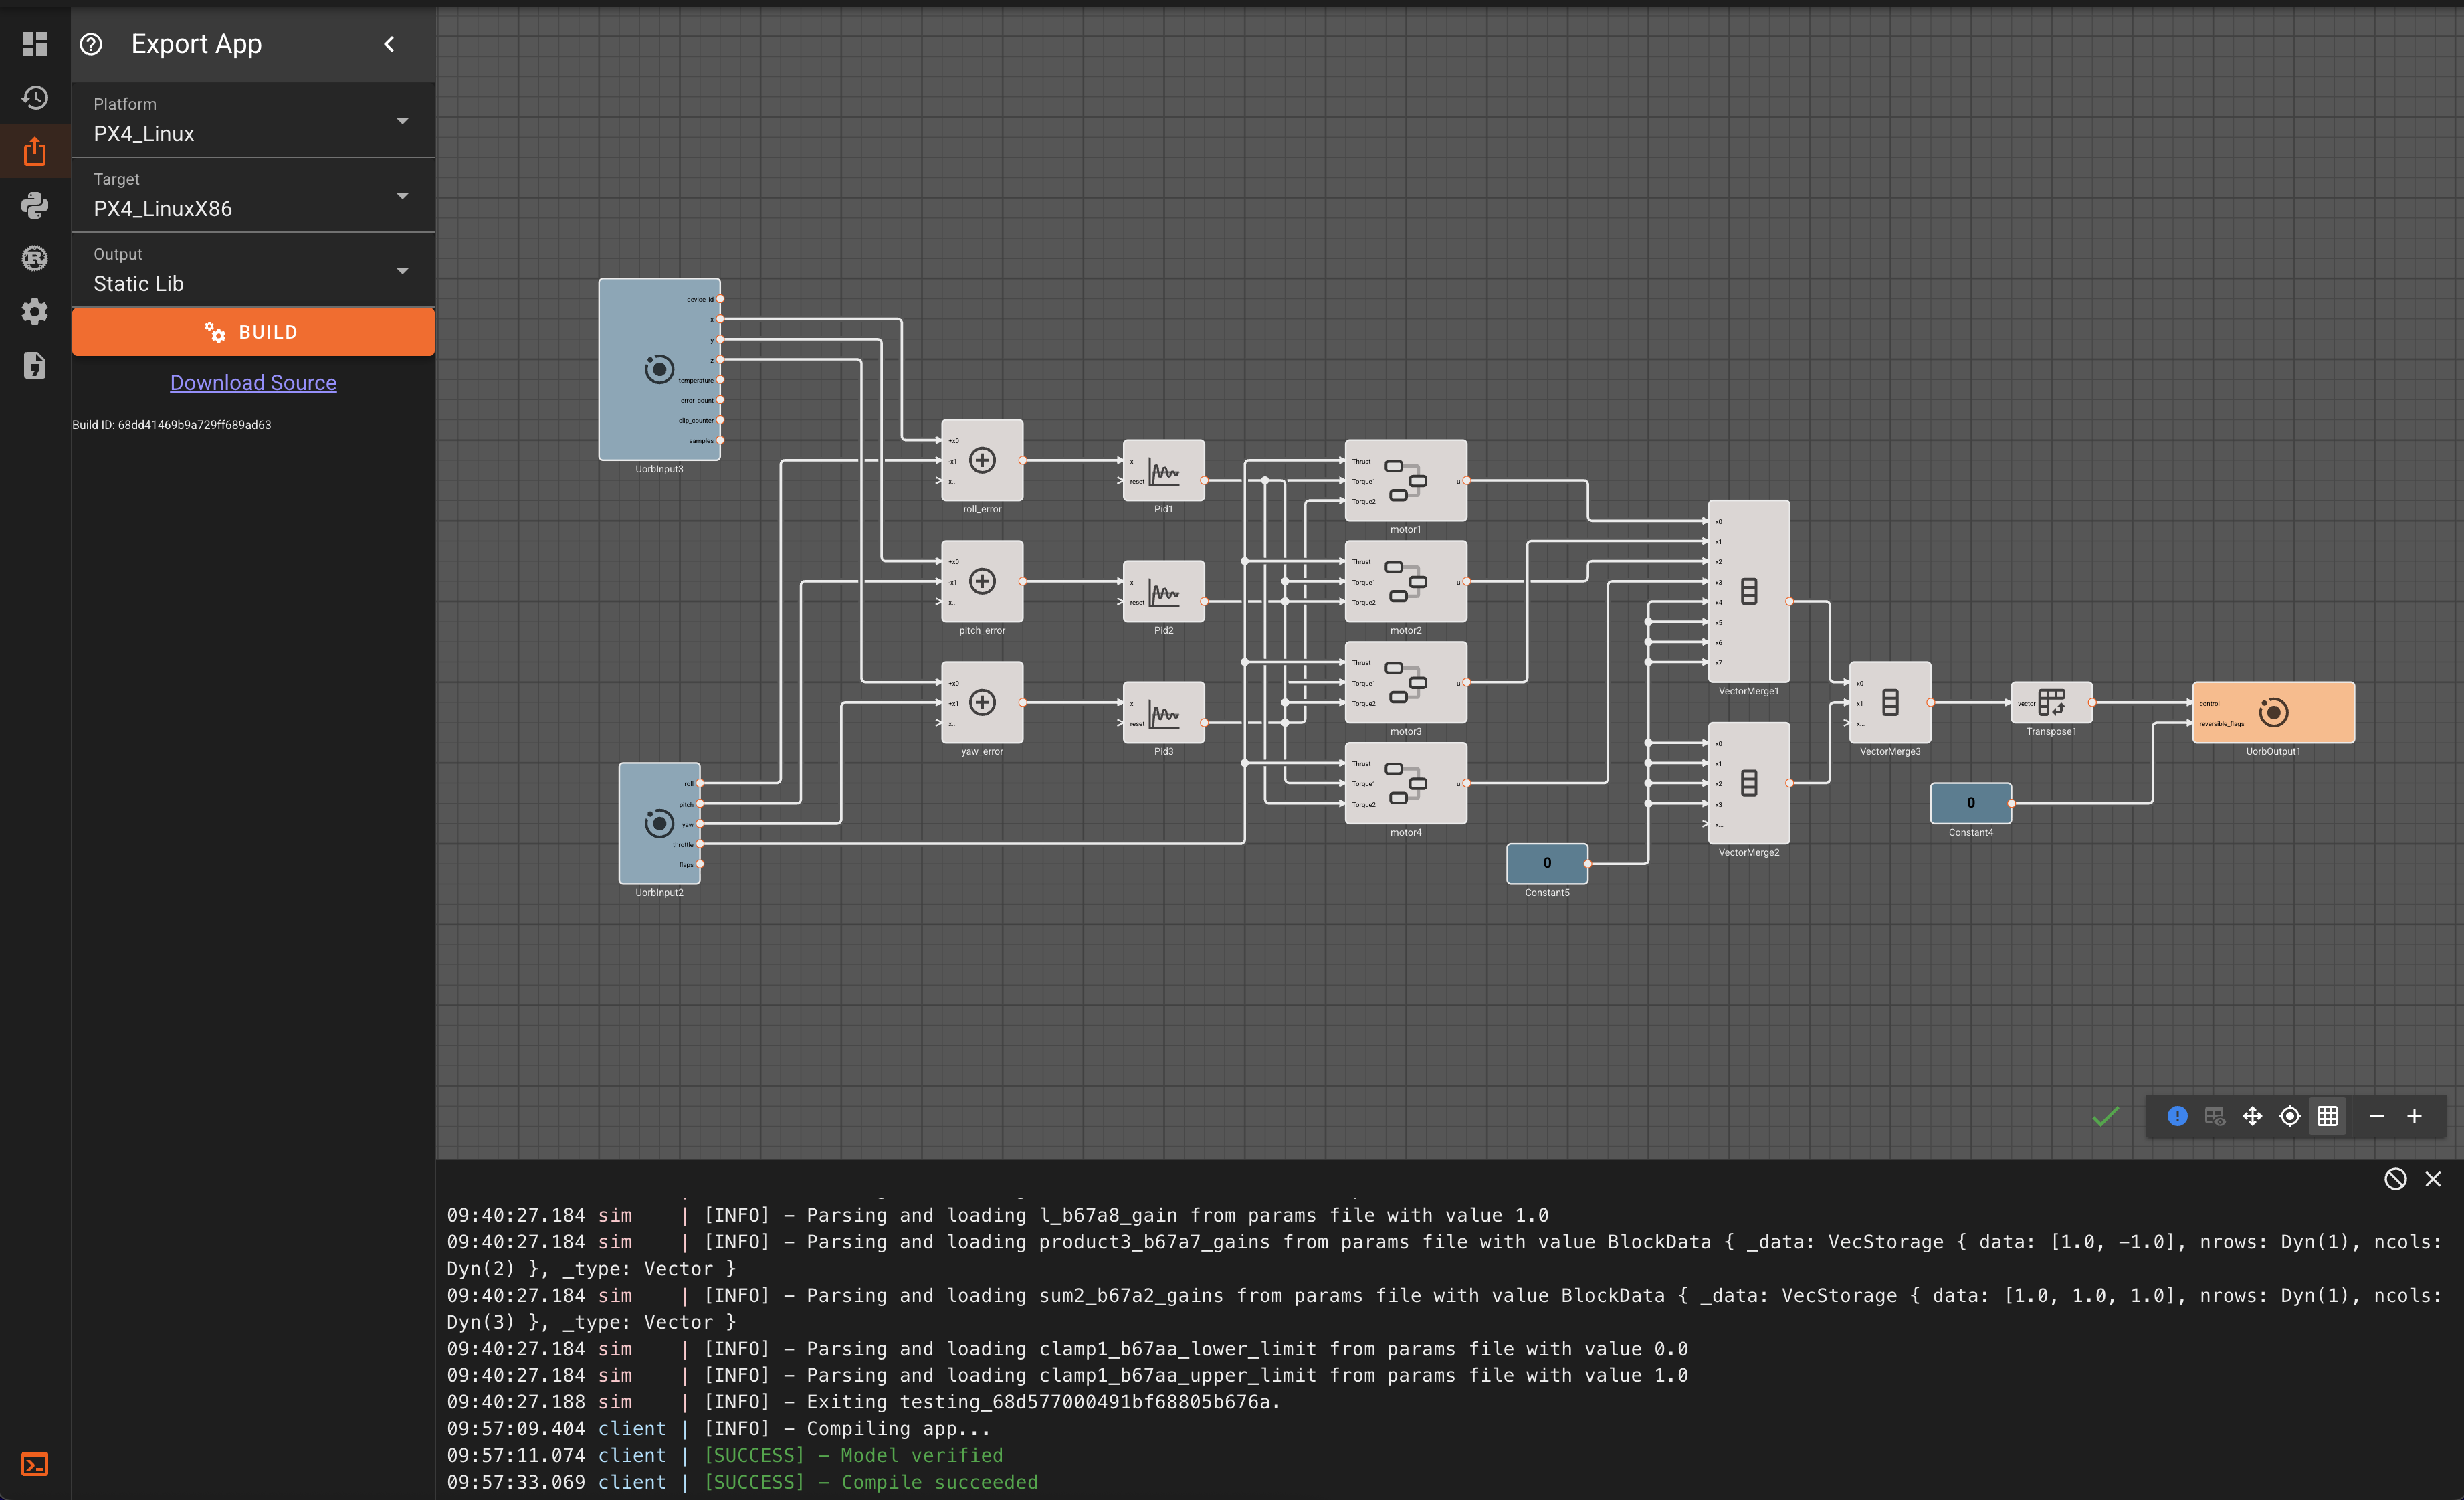
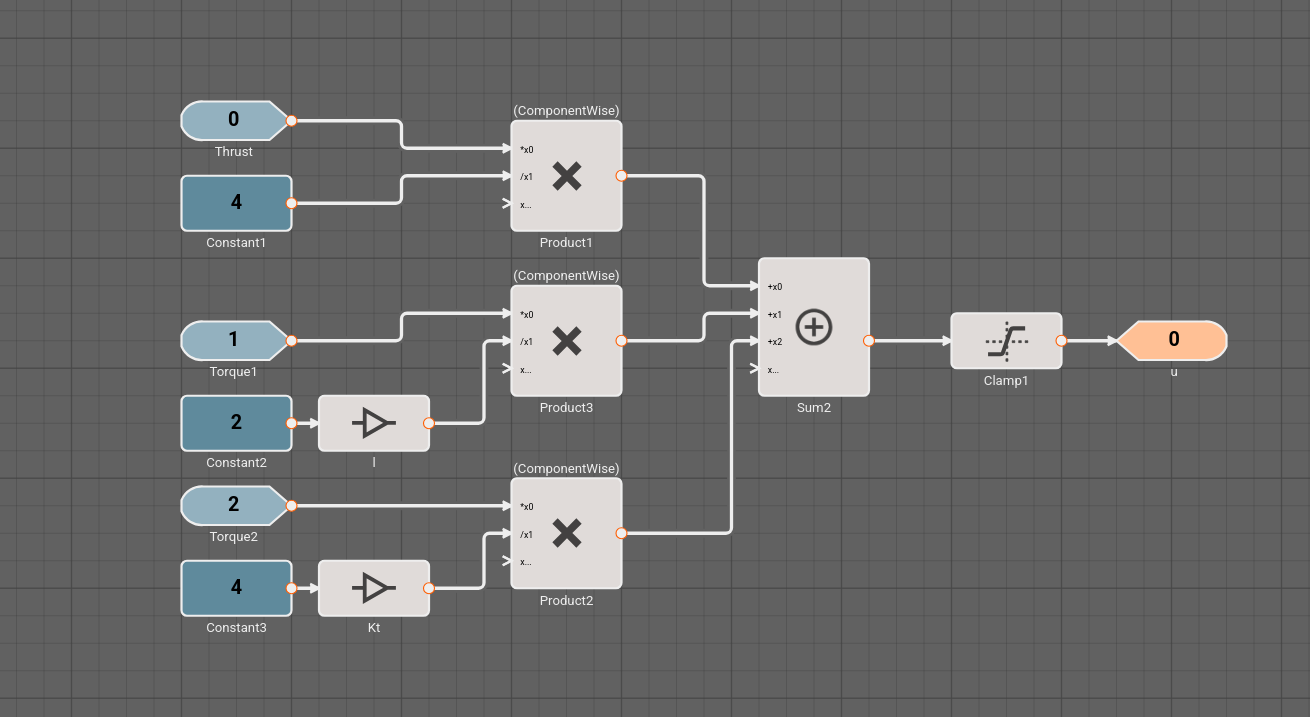
Note:
- The
Actuator MotorsuORB topic expects a 12x1 array of floating point motor PWM values. We use aVector Mergeblock to merge the 4 motor commands with 8 zeros to create a 1x12 array and transpose it to a 12x1 array using aMatrix Transposeblock. - The order of the motors should match the order expected by PX4. You can run
QGroundControlbefore proceeding to the next section which will show the motor order. This is why component outputs 2 and 3 are swapped going into theVector Mergeblock. This image shows the motor order for the x500 simulation drone.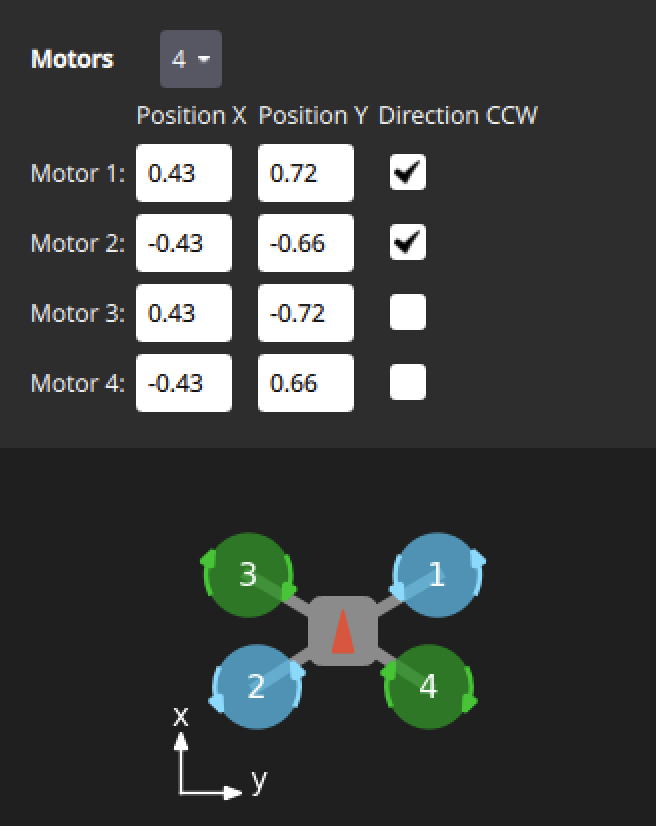
Testing a Pictorus Model using Simulation in the Loop (SITL)
Once you have created your PX4 model in Pictorus, you can export it as a static library that can be linked into the PX4 framework. Pictorus compiles the model to Rust and provides C Foreign Function Interface (FFI) bindings and PX4 model shim code to make it easy to link the generated library into PX4 as a module.
Additional Requirements
- QGroundControl: Provides additional tools for interacting with the simulated drone, such as mapping control inputs from a controller to the simulation environment.
- PlayStation Controller: This example uses a PlayStation controller for manual control inputs. Other controllers may work, but additional configuration may be needed.
Configure QGroundControl to use the PlayStation Controller
- If you have a controller connected, go to
Vehicle Configuration->Joystick->Active Joystickand select your controller from the dropdown menu.
Export the PX4 Model for testing in the Gazebo simulation environment
- From the Pictorus web UI, open
Export Appfrom the left sidebar. - Select
PX4_Linuxplatform. - Select
PX4_LinuxX86as the target if the Linux computer running PX4 and Gazebo is x86 based. SelectPX4_LinuxARMif the Linux computer is ARM based. - Select
Static Libas the output type. - Click
Buildand wait for the build to complete. - Once the build is complete, click
Download Sourceto download the generated source code in a zip file. The PX4 zip file contains:
lib.rs: The Rust model codelib<model_name>_<app_id>.a: The compiled static librarymodule_shimfolder: Contains the C FFI bindings and PX4 wrapper code to link the static library into PX4.
- Create a new folder in your
PX4-Autopilotrepository, for this example we will createPX4-Autopilot/pictorus_x86and extract the contents of the zip file into this folder. - Open a terminal in the
PX4-Autopilotfolder and run:make px4_sitl gz_x500 EXTERNAL_MODULES_LOCATION=./pictorus_x86/module_shim. This will build PX4 with the Pictorus module included and launch Gazebo populated with an x500 drone model. This terminal will also act as the PX4 console for the simulation for subsequent steps in this section.
Note: The
EXTERNAL_MODULES_LOCATIONdoes not need to be at./pictorus_x86/module_shim, it just needs to point to themodule_shimfolder.
- Stop the built in PX4 multi-copter controllers by running the following commands in the PX4 console:
mc_rate_control stop: Disables the multi-copter rate controllermc_att_control stop: Disables the multi-copter attitude controllermc_pos_control stop: Disables the multi-copter position controller
These modules are also trying to publish to the Actuator Motors uORB topic and will conflict with the Pictorus module.
- Arm the drone by running
commander arm.
Optional: To prevent from having to disable the mc_*_control modules every time, you can modify the Simulation startup script located at PX4-Autopilot/build/px4_sitl_default/rootfs/etc/init.d-posix/rcS and add the following lines at the end of the file:
mc_rate_control stop
mc_att_control stop
mc_pos_control stop
commander arm
This should disable the multi-copter controllers and arm the drone automatically when the simulation starts.
- Start the Pictorus module by running
pictorus_module startwhich runs the Pictorus module, launching the model and publishing motor commands to theActuator MotorsuORB topic. - Gently provide some throttle using the PlayStation controller to see the motors spin up and observe the motors when changing the roll, pitch, and yaw inputs.
- To stop the Pictorus module, run
pictorus_module stop.
Deploy the Model to PX4 Hardware
Once you have tested your PX4 model in the Gazebo simulator, you can bundle the Pictorus model into deployable PX4 firmware to run on physical hardware.
Additional Requirements
- Physical Hardware: This example uses a Holybro Pixhawk 6X-RT flight controller.
- QGroundControl: Can be used for uploading firmware to the flight controller and interacting with the PX4 shell on the hardware.
mavlink_shell.pyscript: This script can be used to connect to the PX4 shell over MAVLink and is an alternative to using theQGroundControlconsole.- Logic Analyzer (Optional): A logic analyzer can be helpful for debugging PWM outputs to motors.
Deploy the Model to PX4 Hardware
- Open the model from the previous section in Pictorus.
- Open
Export Appfrom the left sidebar. - Select
PX4_STM32platform. - Select the appropriate target for your hardware. For the Pixhawk 6X-RT, select
PX4_STM32H7.
Note: We are reworking this to be more intuitive. The 6X-RT uses a Cortex-M7 processor, which is why we select the PX4_STM32H7 target. The PX4 library does not interact with any chip specific peripherals, the processor name is a stand-in for the chip architecture and instruction set when compiling the static library.
- Select
Static Libas the output type. - Compile the model by clicking
Buildand wait for the build to complete. - Once the build is complete, click
Download Sourceto download the generated source code as a zip file. The folder structure is the same as the previous section. - Create a new folder in your
PX4-Autopilotrepository, for this example we will createPX4-Autopilot/pictorus_armand extract the contents of the zip file into this folder.
QGroundControl Firmware Upload
QGroundControl can be used to upload the generated firmware to the flight controller and interact with the PX4 shell on the hardware.
- Open a terminal in the
PX4-Autopilotfolder and run:make px4_fmu-v6x EXTERNAL_MODULES_LOCATION=./pictorus_arm/module_shim. This will build the PX4 firmware with the Pictorus module included and generate apx4_fmu-v6xrt_default.px4firmware file in thePX4-Autopilot/build/px4_fmu-v6x_defaultfolder. - Open
QGroundControland navigate to theFirmwaretab underVehicle Configuration. - Unplug and re-plug in the flight controller to enter the bootloader mode.
- Check the
Advanced Settingsbox and selectCustom Firmware Filefrom a now visible drop down menu and navigate to thepx4_fmu-v6xrt_default.px4firmware file generated above. ClickUpdate Firmwareto upload the firmware to the flight controller.
- After the firmware is uploaded and the flight controller reboots, go to
Analyze Toolsand select theMavlink Consoletab.
Console Firmware Upload
Alternatively, you can use the make file upload command and mavlink_shell.py script to upload and interact with the flight controller. The PlayStation controller probably won't work with this method without additional configuration settings and input mapping not covered in this document.
- Ensure the flight controller is connected and open a terminal in the
PX4-Autopilotfolder and run:make px4_fmu-v6x EXTERNAL_MODULES_LOCATION=./pictorus_arm/module_shim upload. This will build the PX4 firmware and attempt to upload it to the connected flight controller. - Once the upload is complete, you can use the
mavlink_shell.pyby running./Tools/mavlink_shell/mavlink_shell.py <flight_controller_serial_port>, replacing<flight_controller_serial_port>with the serial port of your flight controller (i.e./dev/ttyACM0) from thePX4-Autopilotfolder. This will open a PX4 shell connected to the flight controller over MAVLink.
Starting the Pictorus Module on PX4 Hardware
Once the firmware with the Pictorus module is uploaded to the flight controller, you can start the module from the PX4 shell.
WARNING: Running a new flight model on physical hardware can be dangerous and unpredictable while the model is under development and being tuned. Ensure the vehicle is restrained and cannot take off or cause harm to people or property. Always have a way to cut power to the motors in case of unexpected behavior.
- Stop the built in PX4 multi-copter controllers by running the following commands in the PX4 console:
mc_rate_control stop: Disables the multi-copter rate controllermc_att_control stop: Disables the multi-copter attitude controllermc_pos_control stop: Disables the multi-copter position controller
Optional: To prevent from having to disable the mc_*_control modules every time, you can add a file to the flight controller's SD card called /etc/rc.txt and add:
mc_rate_control stop
mc_att_control stop
mc_pos_control stop
commander mode manual
This script will run commands in the rc.txt file at boot and put the vehicle in manual mode, which makes it easier to visualize the motor outputs through subsequent firmware updates. commander mode manual puts the vehicle in manual mode, which is useful for testing motor outputs, but may not be safe for flight or the surrounding environment.
Optional: Hook up a logic analyzer to the PWM pins that have been configured as motor outputs to visualize the PWM signals being sent to the motors before testing with motors connected.
- Arm the drone by running
commander arm, you may need to pull back on the controller throttle as directed byQGroundControl. - Start the Pictorus module by running
pictorus_module start. This will start the Pictorus module, running the model and publishing motor commands to theActuator MotorsuORB topic.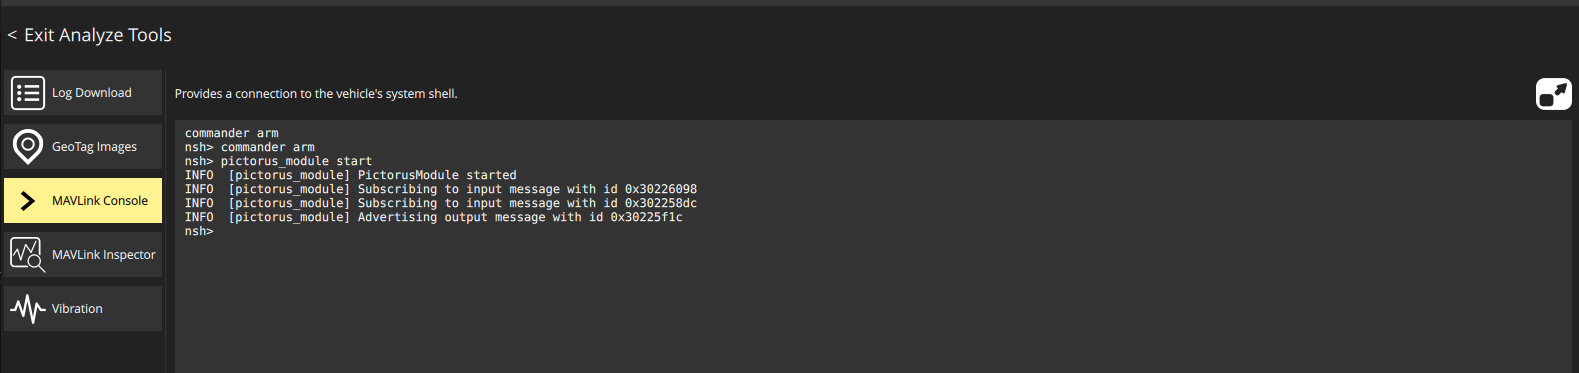
- Gently provide some throttle to see the motors spin up and observe the motors when changing the roll, pitch, and yaw inputs. The movie below shows the logic analyzer software acquiring the PWM signals from the Pixhawk 6X-RT running the Pictorus module.
- To stop the Pictorus module, run
pictorus_module stop.
FAQs
- What exactly is Pictorus?
- Who is the target audience?
- Why is it called Pictorus?
- Will Pictorus continue to be free?
- Will Pictorus be Open Source?
- What do I need to get started?
- Can I deploy my app to an embedded device?
- Why is the code generator in Rust?
- How many devices can I register?
- What devices are supported?
- What protocols are supported?
What exactly is Pictorus?
Pictorus is a cloud-native software development platform for control systems, which generates and deploys Rust-language code to connected devices directly from your browser.
You can connect Single Board Computers (like a Raspberry Pi or Jetson Nano) to our cloud, and then use our in-browser visual flow and hand code editors to program the logic you’d like your hardware to run. We then automatically compile your application for you and deploy it to your hardware.
You can also connect to STM32 embedded processors as well, and use Pictorus as a firmware flashing tool for those boards. More on that here.
Pictorus is meant for engineers trying to develop new hardware products. We strive to seamlessly integrate both visual programming and hand coding so engineers can develop however they please. We also strive to create a compelling rapid iteration experience, where compilation and deployment to your devices takes seconds. It should be fun and easy to do software for hardware, finally.
Who is the target audience?
Our ideal users are engineers who are comfortable with electronics, and are looking for a powerful way to develop and deploy software to their devices. These are typically controls, electrical, aerospace, mechanical, or software engineers. Often they come with Matlab/Simulink backgrounds. But anyone who is comfortable with soldering, following wiring diagrams and a spec sheet, understands basic programming concepts, and can do a few simple linux terminal commands should be able to jump right in!
Why is it called Pictorus?
“Pictorus” is a constellation in the southern sky - Latin for “the painter” and fitting for a product that lets you draw algorithms like flow charts, while code literally writes itself in the background.
Will Pictorus continue to be free?
We absolutely will continue to provide a compelling free tier of our product as part of our general release. We believe strongly that one of the big problems with our sector is the inaccessibility of this kind of tooling for small teams and individuals. Paying customers will be those who have enterprise-level needs, or require more data/connectivity/device management than is feasible to support for free. But we will always provide our core product for free.
Will Pictorus be Open Source?
Eventually, mostly. We don’t want the core components to be mysterious black boxes. In fact, a big part of our long term vision is to allow modifying block functionality, tailored to a user's specific needs. By our general release (later this year), the goal is to have all block source code visible to the public and open for pull requests. The secret sauce we will keep proprietary (for now) is our code generator, which analyzes the diagram you draw in the browser and converts it into an application composed of those open source blocks. We believe strongly in the open source ethos, so as the product evolves, we’ll continue to explore ways in which a sustainable business (which covers the cost of free tier users) can thrive if we sought to open source more of the platform.
What do I need to get started?
Technically you don’t need anything except a web browser. You can build algorithms and simulations in the cloud to experiment with signal processing, controls theory, or really any linear algebra or programming logic.
But Pictorus really shines when you sync a remote device. There’s a good chance any linux-based computer (Raspberry Pi, Jetson, Odroid, Beaglebone) with a relatively recent OS will be able to run Pictorus apps. This includes a Linux laptop. But for now we’re only officially supporting the RaspberryPi series and the Jetson series computers, since device protocols are often hardware specific, and will require more time to fully support.
And of course, you’ll probably want some sensors and actuators to connect to your device and control from your browser!
Can I deploy my app to an embedded device?
We currently support a selection of STM32 microcontrollers, with plans to add support for more in the near future. If you're interested in supporting a particular board, please reach out to us.
Why is the code generator in Rust?
For a long time, most code generators for hardware applications have been C or C++. But one of our core beliefs at Pictorus is in Rust, a newer systems programming language with a lot of advantages over C/C++. Rust is gaining a lot of momentum within the Linux, embedded, and mission-critical software communities, and is poised to replace C/C++ as the language of choice for hardware control in the next decade. Check out our blog for more of our thoughts on the transition away from Matlab and C.
The TLDR; is our code generator can guarantee software safety in a way that is nearly impossible with traditional C/C++ code generators. Additionally, advances in incremental compilation in Rust allow us to rapidly rebuild and redeploy your apps within seconds. Lastly, the open source crate ecosystem for Rust is vast (and growing), making it easy to extend our block library in the future to include a lot of very powerful functionality for our users.
How many devices can I register?
For our free tier, we limit the number of devices you can concurrently pair with to 5. If you have a specific use case right now that could use an increased device limit, please reach out and we’d be happy to work with you. You can find our pricing options here https://www.pictor.us/pricing.
What protocols are supported?
For hardware protocols, we currently support GPIO, UART, I2C, PWM, SPI, and CAN protocols. We'll continue to add more protocols along the way.
For software protocols, we support UDP. We plan to support TCP and gRPC soon.
What devices are supported?
In addition to STM32 embedded processors, we currently also support most modern RaspberryPi SBCs (Pi3, Pi4, PiZero), and are in the process of supporting Jetson series SBCs as well. Other common platforms, such as Odroids, Beaglebones, etc, haven't been tested and certain hardware protocols in particular may not work. Software protocols should all work. You can even deploy to your Linux laptop, if you're just running a pure software app or simulation.
Last updated: 1/23/2025
This Terms of Service (this "Agreement" or “Terms”) is a legal agreement between you and Pictorus, Inc. ("Pictorus"). By clicking "I AGREE" at the end of these Terms, registering as a user, or using the Services (as defined below) you acknowledge and agree that you have reviewed, understand, and accept this Agreement. If you are agreeing to this Agreement as an individual, then the term "you" refers to you individually. If you are agreeing to these Terms as a representative of an entity, then you represent that you have the authority to bind that entity and the term "you" refers to that entity. Your access to and use of the Services and all the content made available on and through the Services is subject to this Agreement and all applicable laws.
DEFINITIONS. The following term will have the following meaning: "Services" means the proprietary software application known as Pictorus and any related documentation, products, or services made available to you by Pictorus.
INTELLECTUAL PROPERTY RIGHTS. Subject to the terms of this Agreement, Pictorus hereby grants to you a limited, revocable, non-exclusive, non-transferable, non-assignable right and license to access and use the Services. Pictorus may terminate this license at any time for any reason or no reason. By making available any user generated content through the Services, you hereby grant to Pictorus a worldwide, irrevocable, perpetual, non-exclusive, transferable, royalty-free license, with the right to sublicense, to use, access, view, copy and otherwise exploit such user generated content on, through or by means of the Services.
RESTRICTIONS. The license granted to you under this Agreement is granted solely to you and not, by implication or otherwise, to any parent, subsidiary or affiliate of yours. You may not assign, sell, rent, lease, sublicense, lend, transfer, resell or distribute the Services to any third party or use the Services on behalf of any third party unless otherwise agreed to in advance in writing by Pictorus in its sole discretion. You agree not to copy the Services, in whole or in part. You agree not to modify, obscure or delete any intellectual property or proprietary rights notices included in or on the Services or documentation and you agree to include all such notices on all copies. You may not modify the Services, make derivative works based on the Services, or merge the Services into any other computer programs. You may not reverse engineer, disassemble or decompile the Services, in whole or in part, or otherwise attempt to derive its source code, object code or underlying structure, ideas, know-how or algorithms. You agree to use the Services in compliance with all applicable laws and regulations, including, without limitation, applicable export control laws and regulations of the United States and other jurisdictions. You agree not to do any of the following: (a) use the Services, directly or indirectly, in conjunction with any dangerous machines, equipment, or systems that may pose a risk to life, property, or the environment, or (b) engage in any hazardous activities or utilize the Services for purposes that could potentially cause harm, injury, death, or damage or risk to persons or property.
YOUR OBLIGATIONS. All feedback, comments, input, and suggestions for improvements for the Services that you provide to Pictorus are referred to collectively as "Feedback." You acknowledge that the Services may automatically record certain information about how you use the Services ("Log Data"). Log Data may include information such as your device Internet Protocol (IP) address, and other user engagement and interaction metrics and other statistics. Pictorus may use and analyze Log Data to administer, improve, customize and enhance the
Services. You acknowledge that Pictorus has full, unrestricted rights to use and analyze and exploit the Feedback and Log Data and incorporate into any software, technology and/or other offered services of Pictorus any and all Feedback and Log Data. You hereby assign to Pictorus any and all proprietary interest in and to any and all such Feedback without further compensation. Feedback is provided on a non-confidential basis. Pictorus has no obligation to use Feedback.
TITLE. Title and full ownership in and to the Services and all trade secret, copyright and patent rights and all other intellectual property and proprietary rights in and to the Services (including without limitation, any third-party software incorporated therein) remain with Pictorus and its licensors. You are granted the limited license rights to use the Services as described in this Agreement. Pictorus expressly reserves all intellectual property and proprietary rights not expressly granted under this Agreement. There are no implied rights.
TERM. This Agreement continues until earlier terminated in accordance with this Agreement. Pictorus may immediately terminate this Agreement upon written notice if you fail to comply with any term of this Agreement. Upon termination of this Agreement, you agree to stop using the Services immediately and to destroy any related documentation together with all copies in any form. Those provisions of this Agreement that by their terms should survive any termination or expiration of this Agreement will be deemed to survive and remain in full force and effect.
DISCLAIMER. THE SERVICES ARE PROVIDED ON AN “AS IS” BASIS WITHOUT WARRANTIES OR CONDITIONS OF ANY KIND, EITHER EXPRESS OR IMPLIED, INCLUDING, BUT NOT LIMITED TO, WARRANTIES OR CONDITIONS OF MERCHANTABILITY, FITNESS FOR A PARTICULAR PURPOSE, AND NON-INFRINGEMENT. PICTORUS MAKES NO WARRANTIES OR REPRESENTATIONS ABOUT THE ACCURACY OR COMPLETENESS OF THE CONTENT PROVIDED THROUGH THE SERVICES OR THE CONTENT OF ANY SITES LINKED TO THE SERVICES AND ASSUMES NO LIABILITY OR RESPONSIBILITY IN CONTRACT, WARRANTY OR IN TORT FOR ANY (I) ERRORS, MISTAKES, OR INACCURACIES OF CONTENT, (II) PERSONAL INJURY OR PROPERTY DAMAGE, OF ANY NATURE WHATSOEVER, RESULTING FROM YOUR ACCESS TO AND USE OF THE SERVICES, (III) ANY ACCESS TO OR USE OF OUR SECURE SERVERS AND/OR ANY AND ALL PERSONAL INFORMATION AND/OR FINANCIAL INFORMATION STORED THEREIN; AND (IV) EVENTS BEYOND OUR REASONABLE CONTROL.
INDEMNITIES. You agree to indemnify and hold harmless Pictorus from and against any and all liabilities, losses, penalties, fines, costs, damages and expenses (including reasonable attorneys' fees and legal costs, which shall be reimbursed as incurred) arising from or relating to or based on any of the following: (a) your use of the Services or (b) any material breach of this Agreement by you.
LIMITATION OF LIABILITY. TO THE MAXIMUM EXTENT PERMITTED BY APPLICABLE LAW, IN NO EVENT SHALL PICTORUS BE LIABLE TO YOU FOR ANY INDIRECT, SPECIAL, INCIDENTAL, PUNITIVE, OR CONSEQUENTIAL DAMAGES (INCLUDING FOR THE INDIRECT LOSS OF PROFIT, REVENUE OR DATA) ARISING OUT OF OR IN CONNECTION WITH THIS AGREEMENT, HOWEVER CAUSED AND UNDER WHATEVER CAUSE OF ACTION OR THEORY OF LIABILITY BROUGHT (INCLUDING UNDER ANY CONTRACT, NEGLIGENCE OR OTHER TORT THEORY OF LIABILITY) EVEN IF ADVISED OF THE POSSIBILITY OF SUCH DAMAGES AND NOTWITHSTANDING ANY FAILURE OF THE
ESSENTIAL PURPOSE OF THIS AGREEMENT OR ANY LIMITED REMEDY HEREUNDER. IN NO EVENT SHALL PICTORUS’ LIABILITY EXCEED THE AMOUNT PAID BY YOU TO PICTORUS UNDER THIS AGREEMENT OR FIFTY DOLLARS (USD $50), WHICHEVER IS GREATER.
INJUNCTIVE RELIEF. You agree that in the event of a material breach of this Agreement by you, Pictorus shall be entitled to seek immediate injunctive relief in any court of competent jurisdiction, without limiting its other rights and remedies and without the need to post bond or prove no adequate remedy at law.
CONFIDENTIALITY.
CONFIDENTIAL INFORMATION. You will (and will ensure that your employees, subcontractors and agents will) maintain the strict confidentiality of the Services and all information and materials contained in or available through the Services and all information and materials conveyed by Pictorus to you hereunder, including but not limited to, financial records, marketing information and the Services’ features and modes of operation, inventions (whether or not patentable), techniques, processes, algorithms, schematics, testing procedures, software design and architecture, computer code, internal documentation, design and function specifications, analysis and performance information, user documentation and other technical information, plans and data (collectively, the "Pictorus Proprietary Information").
NON-DISCLOSURE. You will not permit anyone other than your employees with a bona fide need to know to access or use the Pictorus Proprietary Information. You will not disclose the Pictorus Proprietary Information to any third party and will not use the Pictorus Proprietary Information other than to perform testing of the Services as provided in this Agreement as expressly authorized hereunder.
GOVERNING LAW AND JURISDICTION. This Agreement will be governed by and interpreted in accordance with the laws of the State of California, without giving effect to any principles of conflict of laws. The parties expressly agree that the United Nations Convention on Contracts for the International Sale of Goods and the Uniform Computer Information Transactions Act will not apply to this Agreement. Any legal action or proceeding arising under this Agreement will be brought exclusively in the federal or state courts located in San Francisco, California and the parties irrevocably consent to the personal jurisdiction and venue therein.
MISCELLANEOUS.
ASSIGNMENT. You may not transfer or assign your rights under this Agreement, in whole or in part, by operation of law or otherwise, without the prior written consent of Pictorus. For purposes of this Section, an assignment includes any change of control of you and any merger or acquisition of you, regardless of whether you are the surviving or disappearing entity. Any attempted assignment without such consent will be null and of no effect. Pictorus may assign or transfer this Agreement without restriction. Subject to the foregoing, this Agreement shall bind and inure to the benefit of the parties, their respective successors and permitted assigns.
SEVERABILITY. In the event that any provision of this Agreement is deemed by a court of competent jurisdiction to be illegal, invalid or unenforceable, the court will modify or reform this Agreement to give as much effect as possible to such provision. Any provision which cannot be
so modified or reformed will be deleted and the remaining provisions of this Agreement will continue in full force and effect.
NOTICES. All notices provided hereunder will be in writing, delivered personally, by e-mail or sent by overnight courier, registered or certified mail to an address as may be specified in writing by notice given in accordance with this Section. All such notices will be deemed to have been given: (a) upon receipt when delivered personally, (b) upon receipt when delivered by e- mail, or (c) in the case of overnight courier, one weekday after delivery to the overnight courier.
WAIVER. Performance of any obligations required by a party hereunder may be waived only by a written waiver signed by an authorized representative of the other party, which waiver will be effective only with respect to the specific obligation described therein. Any waiver or failure to enforce any provision of this Agreement on one occasion will not be deemed a waiver of any other provision or of such provision on any other occasion.
INDEPENDENT CONTRACTORS. You and Pictorus are and will be deemed to be, independent contractors with respect to the subject matter of this Agreement and nothing contained in this Agreement will be deemed or construed in any manner whatsoever as creating any partnership, joint venture, employment, agency, fiduciary or other similar relationship between you and Pictorus.
ENTIRE AGREEMENT. This Agreement constitutes the entire agreement and understanding of the parties with respect to the subject matter of this Agreement and supersedes any and all prior understandings and agreements, whether oral or written, between the parties with respect to the subject matter of this Agreement.
EFFECTIVE DATE: July 6, 2023
This Pictorus, Inc. (“Pictorus”) Privacy Policy (“Policy”) describes how Pictorus collects, uses, discloses, and otherwise processes the personal information described in this Policy, as well as the rights and choices individuals have regarding such personal information.
For information about the privacy choices, you have regarding your personal information, review Section 7. Your Privacy Choices below, as well as Section 12. Additional Privacy Information for European Economic Area (EEA) and the United Kingdom (UK) Residents, which includes additional information about privacy rights for residents of the EU and UK.
Your use of our Services (defined below), and any dispute over privacy, is subject to this Policy and our Terms of Use, available at https://www.docs.pictor.us/legal/terms_of_use.html, including their applicable limitations on damages and the resolution of disputes.
1. Scope
Except as otherwise noted below, this Policy applies to the personal information that Pictorus processes as a business related to:
- users of our websites where this Policy is posted, including at https://www.pictor.us/, our SaaS platform, and the services we provide through these, as well as any downloadable software, applications, and other products and services provided by us that display or include a link to this Policy (collectively, the “Services”).
- individuals who register for or participate in our webinars and other events;
- current, former and prospective customers, vendors and partners;
- individuals who are subscribed to receive news, information, and marketing communications from us; and
- individuals that communicate with us or otherwise engage with us related to our Services.
Not In Scope. This Policy does not apply to the personal information that we collect and process about Pictorus employees and personnel or job applicants and candidates.
2. Personal Information Collected
As further described below, we collect personal information directly from individuals, from third parties, and automatically when such data relates to the use of our Services or other interactions with us.
Personal Information Collected Directly. The personal information we collect from you depends upon how you use our Services or otherwise interact or engage with us, but generally includes:
- Registration information. When you register or sign up for our services, we may collect certain personal information from you, such as your name, email address, phone number, and employer.
- Payments and purchases. When you make a purchase or payment through the Services, we collect purchase and payment information in order to process your payment, such as your credit card number and applicable billing address. We also maintain records about your past purchases in connection with the Services we provide.
- Communications and interactions. When you email, call, or otherwise communicate with us and with members of our team, we collect and maintain a record of your contact details, communications, and our responses. We also maintain records communications and information you provide to us related to any customer support requests.
- Events and other requests. We also collect personal information related to your participation in our events as well as other requests that you submit to us related to our Services. For example, if you register for or attend an event or webinar that we host or sponsor, we may collect information related to your registration for and participation in such event. When you complete our “Early Access” form or otherwise request information from us, we collect and maintain records of your requests.
Personal Information from Third Parties. We may collect personal information about you from third party sources, such as public databases, joint marketing partners, social media platforms or other third parties.
- Lead and Prospect Information. We may receive lead and prospect information from third parties about prospective customers that may be interested in our Services. We may also engage with third parties to enhance or update our customer information.
- Third Party Accounts. You may choose to log into the Services through various third-party accounts, such as Google and/or GitHub. When you connect to our services using your third-party account, we may collect or receive personal information about you that you have provided to that account holder.
- Third Party Platforms. If you post information about us or engage with us on third party platforms, we may collect personal information about you from that third party platform or account (e.g., to better understand who is viewing our page and to respond to your communications). These third-party platforms and services control the information they collect and share about you. For information about how they may use and disclose your information, including any information you make public, please consult their respective privacy policies.
Personal Information Collected Automatically. We automatically collect personal information related to your use of our Services and interactions with us and others, including information we collect automatically (e.g., cookies, pixel tags, etc.), as well as information we derive about you and your use of the Services. Such information includes:
- Device and browsing information. We use cookies, log files, pixel tags and other tracking technologies to automatically collect information when users access or use our Services, such as IP address, general location information, domain name, page views, a date/time stamp, browser type, device type, device ID, Internet service provider, referring and exiting URLs, operating system, language, clickstream data, and similar device and usage information. For more information, see Section 6. Cookies, Targeting and Analytics, below.
- Activities and usage. We collect activity information related to your use of the Services, such as information about the links clicked, searches, features used, items viewed, and time spent within the Services.
- Session-Replay. We use session-replay technologies provided by third parties to record your interactions with the Services to help us diagnose problems and to improve our Services. These technologies allow us to watch a visual playback of user sessions on our Services and capture your activities such as clock, mouse movements, scrolls, and keystrokes/key touches when you use of Services.
- Location information. We may collect or derive location information about you, such as through your IP address. Further, with your permission, we may collect geolocation information from your device. You may turn off location data sharing through your device settings.
3. Purposes of Use and Processing
Generally, we collect, use, disclose and otherwise process the personal information we collect for the following purposes:
- Services and support. To provide and operate our Services, communicate with you about your use of the Services, provide troubleshooting and technical support, respond to your inquiries, fulfill your orders and requests, process your payments, communicate with you about the Services, and for similar service and support purposes.
- Analytics and improvement. To better understand how users access and use the Services and for other research and analytical purposes, such as to evaluate and improve our Services and business operations, to develop services and features, and for internal quality control and training purposes.
- Marketing and advertising. For marketing and advertising purposes. For example, to send you information about our Services, such as offers, promotions, newsletters, and other marketing content, as well as any other information that you sign up to receive. We also may use certain information we collect to manage and improve our advertising campaigns so that we can better reach people with relevant content.
- Research and surveys. To administer surveys and questionnaires, such as for market research or member satisfaction purposes.
- Security and protection of rights. To protect the Services and our business operations; to protect our rights or those of our stakeholders; to prevent and detect fraud, unauthorized activities and access, and other misuse; where we believe necessary to investigate, prevent or take action regarding illegal activities, suspected fraud, situations involving potential threats to the safety or legal rights of any person or third party, or violations of our Terms of Use.
- Compliance and legal process. To comply with the law and our legal obligations, to respond to legal process and related to legal proceedings.
- General business and operational support. To consider and implement mergers, acquisitions, reorganizations, bankruptcies, and other business transactions such as financings, and related to the administration of our general business, accounting, auditing, compliance, recordkeeping, and legal functions.
4. Disclosures of Personal Information
We may disclose the personal information that we collect for the purposes described above, in order to provide our Services to you, to respond to and fulfil your orders and requests, as otherwise directed or consented to by you, and as follows:
- Vendors and service providers. We may disclose personal information we collect to our service providers, processors and others who perform functions on our behalf. These may include, for example, IT service providers, help desk, payment processors, analytics providers, consultants, auditors, and legal counsel.
- Our business clients. Any data that we collect and process on behalf of a business client will be disclosed to the business client and otherwise shared as directed by that business client.
- Third party platforms, providers, and networks. We may disclose or make available personal information to third party platforms and providers that we use to provide or make available certain features or portions of the Services, or as necessary to respond to your requests. We may also make certain information that includes personal information available to third parties in support of our marketing, analytics, advertising, and campaign management (see Section 6. Cookies, Targeting and Analytics for more information).
- In support of business transfers. If we are or may be acquired by, merged with, or invested in by another company, or if any of our assets are or may be transferred to another company, whether as part of a bankruptcy or insolvency proceeding or otherwise, we may transfer the information we have collected from you to the other company. We may also share certain personal information as necessary prior to the completion of such a transaction or corporate transactions such as financings or restructurings, to lenders, auditors, and third-party advisors, including attorneys and consultants, as part of due diligence or as necessary to plan for a transaction.
- Compliance and legal obligations. We may also disclose personal information to third parties to comply with our legal and compliance obligations and to respond to legal process. For example, we may disclose information in response to subpoenas, court orders, and other lawful requests by regulators and law enforcement, including responding to national security or law enforcement disclosure requirements. This may include regulators, government entities, and law enforcement as required by law or legal process. In addition, it may include certain disclosures that we are required to make under applicable laws.
- Security and protection of rights. We may disclose personal information where we believe doing so is necessary to protect the Services, our rights and property, or the rights, property, and safety of others. For example, we may disclose personal information in order to (i) prevent, detect, investigate and respond to fraud, unauthorized activities and access, illegal activities, and misuse of the Services, (ii) situations involving potential threats to the health, safety or legal rights of any person or third party, or (iii) enforce, and detect, investigate and take action in response to violations of, our Terms of Use. We may also disclose information, including personal information, related to litigation and other legal claims or proceedings in which we are involved, as well as for our internal accounting, auditing, compliance, recordkeeping, and legal functions.
5. Aggregate Data and Non-identifiable Data
We may also use and disclose aggregate and other non-identifiable data related to our business and the Services for quality control, analytics, research, development, and other purposes. For example, when you connect your device to the Services, we collect the operating system and/or chip architecture the device machine runs on.
6.Cookies, Targeting and Analytics
We and our third-party service providers use cookies, pixels, local storage objects, log files, APIs, and other mechanisms to automatically collect information browsing, activity, device, and similar information within our Services. We use this information to, for example, analyze and understand how users access, use and interact with others through our Services, as well to identify and resolve bugs and errors in our Services and to assess secure, protect, optimize and improve the performance of our Services. You have certain choices about our use of cookies and tracking within the Services, as described in this section. For more information on the types of personal information we collect via cookies and similar mechanisms, please see Section 2. Personal Information Collected.
Cookies. Cookies are alphanumeric identifiers that we transfer to your device’s hard drive through your web browser for record-keeping purposes. Some cookies allow us to make it easier for you to navigate our Services, while others are used to enable a faster log-in process, support the security and performance of the Services, or allow us to track activity and usage data within Service.
Pixel tags. Pixel tags (sometime called web beacons or clear GIFs) are tiny graphics with a unique identifier, similar in function to cookies. While cookies are stored locally on your device, pixel tags are embedded invisibly within web pages and online content. We may use these, in connection with our Services to, among other things, track the activities of users, help us manage content and compile usage statistics. We may also use these in HTML e-mails we send, to help us track e-mail response rates, identify when our e-mails are viewed, and track whether our e-mails are forwarded.
Local storage objects. Local storage is a web storage mechanism that allows us to store data on a browser that persists even after the browser window is closed. Local storage may be used by our web servers to cache certain information in order enable faster loading of pages and content when you return to our websites. You can clear data stored in local storage through your browser. Please consult your browser help menu for more information.
Third-Party Analytics and Tools. We use third party tools, such as Google Analytics, which are operated by third party companies. These third-party analytics companies may collect usage data (using cookies, pixels, and similar tools) about our Services in order to provide us with reports and metrics that help us to evaluate usage of our Services and improve performance and user experiences. You can also download the Google Analytics Opt-out Browser Add-on to prevent their data from being used by Google Analytics at https://tools.google.com/dlpage/gaoptout.
Cross-device Tracking. We and our third-party providers may use the information that we collect about you within our Services and on other third-party sites and services to help us and these third parties to identify other devices that you use (e.g., a mobile phone, tablet, other computer, etc.). This information may be used as set forth in this section and Section 6. Cookies, Targeting and Analytics.
Targeted Advertising. We work with third parties, such as ad networks, channel partners, mobile ad networks, analytics and measurement services and others (“third-party ad companies”) to personalize content, as well as to manage our advertising on third-party sites and mobile apps. We may share certain information with these third-party ad companies, and we and they may use cookies, pixels tags, and other tools to collect usage and browsing information within our Services, as well as on third-party sites, apps., and services, such as IP address, location information, device ID, cookie and advertising IDs, and other identifiers, as well as browsing information. We and these third-party ad companies use this information to provide you more relevant ads and content on third-party sites and apps, and to evaluate the success of such ads and content.
Managing Your Preferences. We make available several ways for you to manage your preferences regarding targeted advertising and cookies within our Services. Many of these are browser and device specific, which means that you need to set the preference for each browser and device you use to access our Services; in addition, if you delete or block cookies, you may need to reapply these preferences. Further, opting out of cookies and advertising as discussed below does not mean that you will no longer receive advertising content from us. You may continue to receive generic or “contextual” ads from us.
- Industry ad choice programs. You can also control how participating third-party ad companies use the information that they collect about your visits to our websites and those of third parties, in order to display more relevant targeted advertising to you. If you are in the U.S., you can obtain more information and opt out of receiving targeted ads from participating third-party ad networks at aboutads.info/choices (Digital Advertising Alliance). You may also download the DAA AppChoices (https://youradchoices.com/appchoices) tool in order to help control interest-based advertising on apps on your mobile device. In addition, users in the EU may obtain more information at the following links:
- EU Users: https://youronlinechoices.eu/ (European Interactive Digital Advertising Alliance)
Please note that opting out of participating ad networks does not opt you out of being served advertising. You may continue to receive generic or ‘contextual’ ads. You may also continue to receive targeted ads on other websites from companies that do not participate in the above programs.
- Browser settings. If you wish to prevent cookies from tracking your activity on our website or visits across multiple websites, you can set your browser to block certain cookies or notify you when a cookie is set; you can also delete cookies. The Help portion of the toolbar on most browsers will tell you how to prevent your device from accepting new cookies, how to have the browser notify you when you receive a new cookie, or how to delete cookies. Visitors to our Services who disable cookies will be able to browse the Site, but some features may not function.
7. Your Privacy Choices
We make available a number of ways that you can manage your privacy choices and submit privacy requests related to your personal information. These include:
- Pictorus Account. You can review and update much of the personal information we maintain about you by logging into your account and updating your information.
- Marketing communications. You can opt out of receive marketing emails from us by using the unsubscribe link in the footer of each marketing email we send to you.
For more information about our privacy practices and your privacy choices, you may contact us as set forth in the ‘Contact Us’ section below.
8. Children/Minors
Our Services are not designed for children, and we do not knowingly collect personal information from children under the age of majority. If we learn that personal information has been collected on the Services from persons under the age of majority, then we will take the appropriate steps to delete this information. If you are a parent or legal guardian and you believe we have collected your child’s information in violation of applicable law, please contact us using the contact information below in Section 11. Contact Us.
9. Security
We have implemented safeguards that are intended to protect the personal information we collect from loss, misuse, and unauthorized access, disclosure, alteration, and destruction. Please be aware that despite our efforts, no data security measures can guarantee security.
10. Changes to this Policy
This Policy is current as of the Effective Date set forth above. We may change this Policy from time to time, so please be sure to check back periodically. We will post any updates to the Policy on our website. If we make material changes to how we collect, use, and disclose the personal information we have previously collected about you, we will endeavor to provide you prior notice, such as by emailing you or posting prominent notice through on our website or within the Services.
11. Contact Us
If you have questions about this Policy or our privacy practices, you may contact us at contact@pictor.us.
12. Additional Privacy Information for European Economic Area (EEA) and the United Kingdom (UK) Residents
This section details the purposes for processing personal information and the legal bases for which we process personal information in accordance with the EEA and UK General Data Protection Regulation (the “GDPR”).
Lawful Basis for Collecting Personal Information. We collect and process personal information under the following legal bases:
- To Perform a Contract with You or to Take Pre-contractual Steps at Your Request. This includes performance of an agreement with you, such as our Terms of Use, or terms and conditions applicable to the Services you use. If you don’t provide your personal information, we won’t be able to provide you with the Services requested.
- To Comply with a Legal Obligation to Which Pictorus is Subject. This includes processing personal information to comply with our legal obligations, such as to retain records of transactions.
- For Our Legitimate Interests. We may process personal information in furtherance of our legitimate interests, where those interests are not overridden by your rights, freedoms, and interests. Our legitimate interests include improving and personalizing the Services, marketing features or products that may be of interest, and promoting safety and security.
- With Your Explicit Consent. We may process personal information about you based on your consent, for example (where required by law) to send you marketing communications, surveys, news, and updates. Where our processing of personal information is based on your consent, you may withdraw consent at any time; please see the section below titled, “Your Rights in Respect of Your Personal Information” for information on how to withdraw your consent.
Purposes and Legal Bases of Use and Processing. We use personal information for the purposes set forth below, and for the legal bases described below:
- Services and Support. To provide and operate our Services, manage your account, communicate with you about your use of the Services, provide troubleshooting and technical support, respond to your inquiries, fulfill your requests, facilitate payment processing, communicate with you about the Services, for similar service and support purposes, and to otherwise run our day-to-day operations. (Legal basis: Performance of our contract with you and your explicit consent.)
- Analytics and Improvement. To better understand how Pictorus’ users access and use the Services, and for other research and analytical purposes, such as to evaluate and improve the Site, our Services, and business operations, including to develop our Services and its features, and for internal quality control and training purposes. (Legal basis: Our legitimate interests in improving our products and Services to expand our business and increase our revenue.)
- Communicate With You. To respond to your inquiries, send you requested materials and newsletters, as well as information and materials regarding our Services and offerings. We also use this information to send administrative information to you, for example, information regarding the Services and changes to our terms, conditions, and policies. (Legal basis: Our legitimate interests in improving our products and Services to expand our business and increase our revenue.)
- Customization and Personalization. To tailor content we send and to otherwise personalize your experiences and offerings. (Legal basis: Our legitimate interests in improving our products and Services to expand our business and increase our revenue.)
- Marketing and Advertising. For marketing, advertising, and promotional purposes. For example, to send you promotional information about our Services, including information about our events, webinars, presentations, and new offerings, as well as any other information that you sign up to receive. (Legal basis: Our legitimate interests in improving our products and Services to expand our business and increase our revenue.)
- Research and Surveys. To administer surveys and questionnaires, such as for market research or user satisfaction purposes. (Legal basis: Our legitimate interests in improving the relevancy of our Services, products, and advertising to improve Services and products and to encourage interactions with us, which allows us to grow our business.)
- Planning and Managing Events. For event planning and other management-related purposes, such as event registration and attendance, connecting you with other event attendees and users, and contacting you about relevant events, presentations, and our Services. (Legal basis: Our legitimate interests in improving the relevancy of our Services, products, and advertising to improve Services and products and to encourage interactions with us, which allows us to grow our business.)
- Security and Protection of Rights. To protect the Services and our business operations, our rights and those of our stakeholders and investors, to prevent and detect fraud, unauthorized activities and access, and other misuse of our website and Services, including where we believe necessary to investigate, prevent or take action regarding illegal activities, suspected fraud, situations involving potential threats to the safety or legal rights of any person or third party, or violations of our Terms and Conditions of Use. (Legal basis: Our legitimate interests in conducting our business in a lawful manner and protecting our rights and interests as well as those of our stakeholders and society at large.)
- Compliance and Legal Process. To comply with applicable legal or regulatory obligations, including as part of a judicial proceeding, to respond to a subpoena, warrant, court order, or other legal process, or as part of an investigation or request, whether formal or informal, from law enforcement or a governmental authority. (Legal basis: To comply with an EEA or UK obligations, or in reliance on our legitimate interests in conducting our business in a lawful manner and protecting our rights and interests as well as those of our stakeholders and society at large where we need to comply with non-EEA or UK law.)
- Auditing, Reporting, and Other Internal Operations. To conduct financial, tax and accounting audits, audits, and assessments of our operations, including our privacy, security, and financial controls, as well as for risk and compliance purposes. We may also use personal information to maintain appropriate business records and enforce our policies and procedures. (Legal basis: Our legitimate interests in running our business efficiently to improve our performance metrics and maintain profitability.)
- General Business and Operational Support. To assess and implement mergers, acquisitions, reorganizations, bankruptcies, and other business transactions such as financings, and to administer our business, accounting, auditing, compliance, recordkeeping, and legal functions. (Legal basis: Our legitimate interests in organizing our business efficiently.)
Your Rights in Respect of Your Personal Information. The GDPR gives you certain rights regarding your personal information that we hold, with some exceptions:
- Access. You have the right to obtain information about our processing of your personal information and obtain access to and a copy of your personal information.
- Rectification. You have the right to update, complete or correct inaccuracies in your personal information.
- Erasure. You have the right to have your personal information deleted.
- Portability. You have the right to obtain a machine-readable copy of your personal information or to have us transfer it to another controller of your choice.
- Restriction. You have the right to restrict the processing of your personal information, meaning that we will not further process your personal information except to store it.
- Withdrawal of Consent. You have the right to withdraw your consent to our processing of your personal information, without affecting the lawfulness of processing up until withdrawal.
- Objection. You have the right to object, on grounds relating to your particular situation, to the processing of your personal information.
- You also have the right to object to the processing of your personal information for direct marketing (including profiling) purposes.
Please note that some of these rights may be limited, such as where we have an overriding interest or legal obligation to continue to process the data. Please contact us by using the information set out above in Section 11. Contact Us to exercise your rights. You can also contact us by using the information set out above in Section 11. Contact Us if you have any inquiries or complaints regarding the processing of your personal information by Pictorus.
If you are not happy with how your rights are handled, you can submit a complaint with the relevant data protection authority of your habitual residence, your place of work, or the place of the alleged infringement/violation of your rights. This link will redirect you to the European Data Protection Board Website with an up-to-date list of all European Union Data Protection Authorities: https://edpb.europa.eu/about-edpb/board/members_en. The UK authority, the ICO, can be reached here: https://ico.org.uk/.
Retention. We will retain personal information for as long as necessary for the purposes described in this Policy, including for the purpose of satisfying any legal, regulatory, tax, accounting, or reporting requirements. We typically retain personal information for a period of time corresponding to a statute of limitation, and so that we can raise or defend a legal claim. We may also retain your personal information for a longer period in the event of a complaint or if we reasonably believe there is a prospect of litigation.
International Data Transfers. By using our Services, you understand that your personal information is transferred to countries outside of the EEA and UK, and notably to the United States, which are not deemed by the European or UK Commission to provide an adequate level of personal information protection. Where necessary, we have implemented measures to protect your personal information.